Spring全家桶(一)HelloWorld与入门基础
一、认识Spring
1.1 Spring简介
Spring是一个开源框架,为简化企业级应用而生,是一个IOC(DI)和AOP容器框架。
IOC和AOP不太好理解,这里有一篇文章值得参考 IOC和AOP的一些基本概念
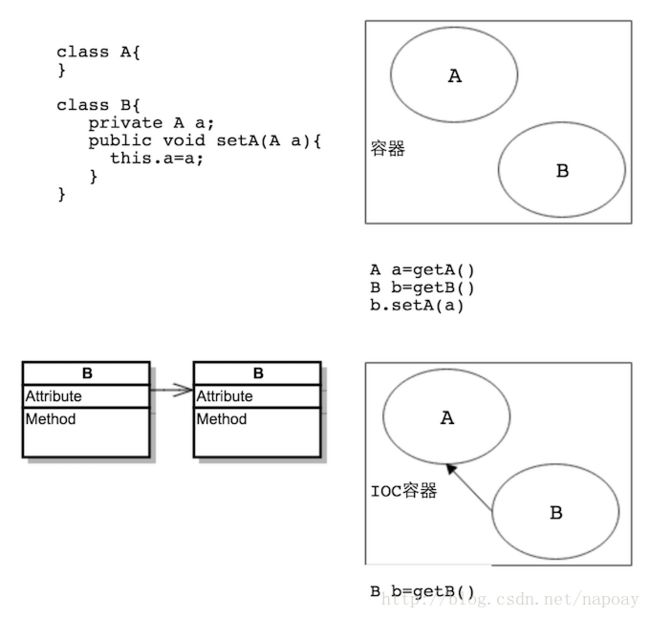
IOC(Inversion of Control):
反转资源获取的方向,传统的资源查找方式要求组件向容器发起请求查找资源,容器适时返回资源作为回应。应用IOC之后,容器主动地讲资源推送给它所管理的组件,组件要做的就是选择一种合适的方式接受资源,这种行为也被称为查找的被动形式。
DI(Dependency Injection):
IOC的另一种表述方式,即组件以一些预先定义好的方式(比如setter方法)接受来自容器的资源注入。相对于IOC而言,DI在表述上更直接。
1.2 Spring特点
- 轻量级:Spring是非入侵的,基于Spring开发的应用中的对象可以不依赖Spring的API
- 依赖注入
- 面向切面编程
- 容器:Spring是一个容器,它包含并且管理应用对象的生命周期
- 框架:Spring使用简单的组件配置组合成一个复杂的应用,在Spring中可以使用XML和Java注解组合这些对象
- 一站式:Spring是一个一站式的框架,在IOC和AOP的基础上可以整合企业应用的开源框架和第三方类库。使用Spring可以把Java EE中的知识点都包括起来,Spring等同于Java EE。
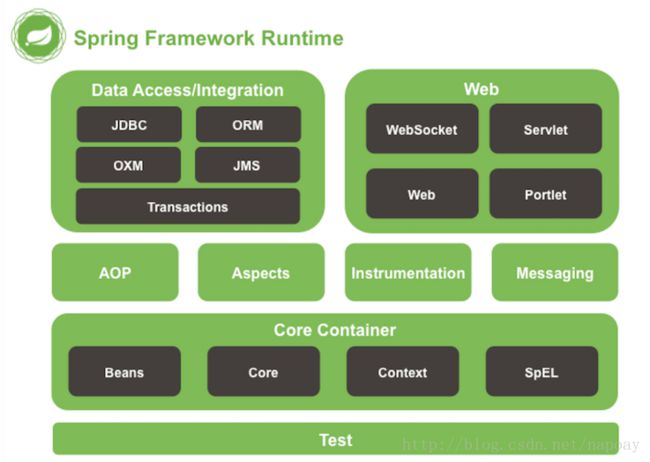
1.3 Spring模块
Spring框架包含了大约20个模块,如下图所示。这些模块再细分成Core Container, Data Access/Integration, Web, AOP (Aspect Oriented Programming), Instrumentation, Messaging, and Test。
二、Spring HelloWorld
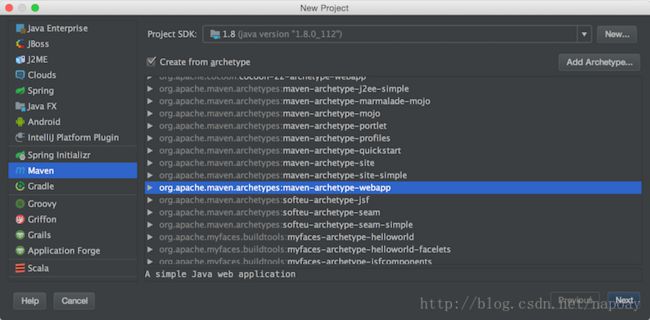
2.1 搭建开发环境
在IDEA中新建Maven工程,选择maven-archetype-webapp。
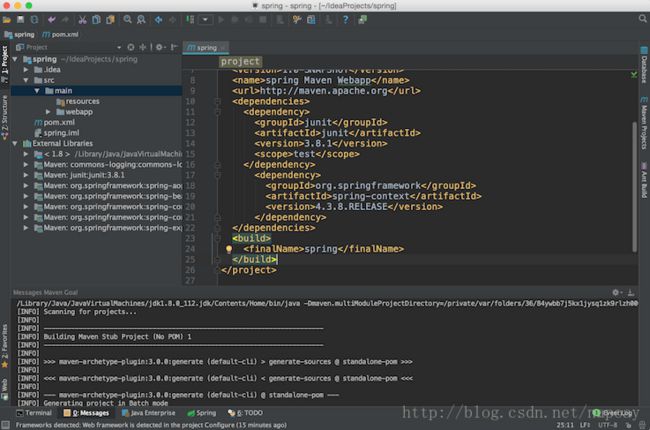
在pom.xml中添加spring的maven依赖:
 <dependency>
      <groupId>org.springframeworkgroupId>
      <artifactId>spring-contextartifactId>
      <version>4.3.8.RELEASEversion>
 dependency>
导包完成以后,在External Libraries目录下可以看到新导入的五个jar包:spring-aop、spring-beans、spring-contex、spring-core、spring-expression.
在src/main目录下新建Directory,设置资源文件夹。
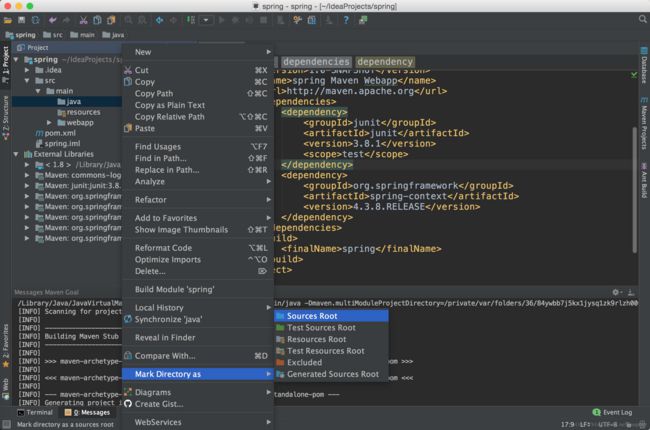
在java目录下新建一个包,再增加一个HelloWorld类。HelloWorld类中设置了一个私有域name,一个setName方法和一个sayHello方法。
package com.stuspring;

/** * Created by bee on 17/4/22. */
public class HelloWorld {
    private String name;

    public void setName(String name) {
        this.name = name;
    }

    public void sayHello(){
        System.out.println("Hello:"+name);
    }
}
在新增一个Main类做测试,创建一个HelloWorld对象,设置name,调用sayHello方法:
package com.stuspring;

/** * Created by bee on 17/4/22. */
public class Main {
    public static void main(String[] args) {
        HelloWorld hw1=new HelloWorld();
        hw1.setName("Doraemon");
        hw1.sayHello();
    }
}
运行结果:
Hello:Doraemon上面是传统的创建对象的方法,下面通过Spring来创建HelloWorld的对象。
2.2 使用Spring管理对象
首先创建Spring的配置文件,点击resources文件夹,右键->New->XML Configuration File->Spring Config,如下如所示。文件名为beans,

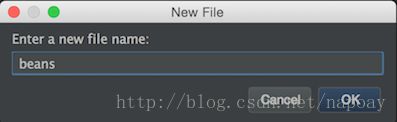
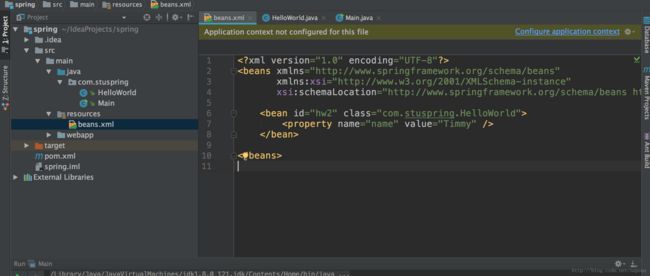
点击OK以后,会在resources目录下生成beans.xml。
在beans.xml定义一个新的HelloWorld对象,方式如下:
<beans xmlns="http://www.springframework.org/schema/beans" xmlns:xsi="http://www.w3.org/2001/XMLSchema-instance" xsi:schemaLocation="http://www.springframework.org/schema/beans http://www.springframework.org/schema/beans/spring-beans.xsd">

    <bean id="hw2" class="com.stuspring.HelloWorld">
        <property name="name" value="Timmy" />
    bean>

beans>
在Main类中获取id为hw2的HelloWorld对象:
package com.stuspring;

import org.springframework.context.ApplicationContext;
import org.springframework.context.support.ClassPathXmlApplicationContext;

/** * Created by bee on 17/4/22. */
public class Main {
    public static void main(String[] args) {

        //1.创建一个HelloWorld对象
        HelloWorld hw1=new HelloWorld();
        //2.对name属性赋值
        hw1.setName("Doraemon");
        //3.调用sayHello方法
        hw1.sayHello();


        //1.创建IOC容器对象
        ApplicationContext ctx=new ClassPathXmlApplicationContext("beans.xml");

        //2.从IOC容器中获取对象
        HelloWorld hw2= (HelloWorld) ctx.getBean("hw2");
        //3.调用sayHello方法
        hw2.sayHello();
    }
}
再次运行,打印结果:
Hello:Doraemon
Hello:Timmy
ClassPathXmlApplicationContext用于加载CLASSPATH下的配置文件,传入参数问文件名,这里就是加载resources目录下的beans.xml,通过ApplicationContext对象的getBean方法获取对象,传入参数为配置文件中bean的id。
在创建IOC容器对象的时候,所有Bean实例都已经初始化完成。可以通过一个简单的方法进行测试,在HelloWorld类的setName方法中打印一行提示信息,增加一个无参构造方法:
package com.stuspring;

/** * Created by bee on 17/4/22. */
public class HelloWorld {
    private String name;

    public void setName(String name) {
        System.out.println("setName:"+name);
        this.name = name;
    }

    public void sayHello(){
        System.out.println("Hello:"+name);
    }

    public HelloWorld(){
        System.out.println("HelloWorld的无参构造方法!");
    }
}
在Main类的Main函数中只创建一个ApplicationContext对象:
package com.stuspring;

import org.springframework.context.ApplicationContext;
import org.springframework.context.support.ClassPathXmlApplicationContext;

/** * Created by bee on 17/4/22. */
public class Main {
    public static void main(String[] args) {
        ApplicationContext ctx=new ClassPathXmlApplicationContext("beans.xml");
    }
}
运行,打印结果如下:
HelloWorld的无参构造方法!
setName:Timmy
三、Bean配置细节
Bean的配置形式:
- 基于XML文件的方式
- 基于注解的方式
Bean的配置方式:
- 通过全类名(反射)
- 通过工厂方法(静态工厂方法、实例工厂方法)
- FactoryBean
依赖注入的方式:
- 属性注入
- 构造器注入
Spring容器:
- BeanFactory:IOC容器的基本实现,是Spring框架的基础设施,面向Spring本身
- ApplicationContext:提供了更高级的特性,是BeanFactory的子接口,面向Spring框架的开发者,几乎所有的应用场合都直接使用ApplicationContext而非底层的BeanFactory。
3.1 构造器注入
新建一个Car类,四个属性、2个重载的构造方法、一个toString()方法。
package com.stuspring;

/** * Created by bee on 17/4/23. */
public class Car {

    private String brand;
    private String corp;
    private double price;
    private int maxSpeed;

    public Car(String brand, String corp, int maxSpeed) {
        this.brand = brand;
        this.corp = corp;
        this.maxSpeed = maxSpeed;
    }

    public Car(String brand, String corp, double price) {
        this.brand = brand;
        this.corp = corp;
        this.price = price;
    }

    @Override
    public String toString() {
        return "Car{" +
                "brand='" + brand + '\'' +
                ", corp='" + corp + '\'' +
                ", price=" + price +
                ", maxSpeed=" + maxSpeed +
                '}';
    }
}
配置bean:
    <bean id="car1" class="com.stuspring.Car">
        <constructor-arg name="brand" value="Ford" index="0"/>
        <constructor-arg name="corp" value="ShangHai" index="1"/>
        <constructor-arg name="price" value="100000" index="2" />
    bean>


    <bean id="car2" class="com.stuspring.Car">
        <constructor-arg name="brand" value="Audi"/>
        <constructor-arg name="corp" >
            <value>]]>value>
        constructor-arg>
        <constructor-arg name="maxSpeed" value="280"/>
    bean>

    <bean id="car3" class="com.stuspring.Car">
        <constructor-arg value="DaZhong"/>
        <constructor-arg value="ShangHai"/>
        <constructor-arg type="int">
            <value>300value>
        constructor-arg>
    bean>
3.2 Bean之间的引用
应用程序之间的Bean经常需要相互协作以完成应用程序的功能,要使Bean之间能相互访问,就必须在Bean配置文件中指定对Bean的引用。可以通过ref属性指定Bean的引用。
新建一个Person类,有姓名、年龄、拥有的汽车三个属性:
package com.stuspring;

/** * Created by bee on 17/4/24. */
public class Person {
    private String name;
    private int age;
    private Car car;
    //省略setter、getter和toString()方法

    public Person() {
    }

    public Person(String name, int age, Car car) {
        this.name = name;
        this.age = age;
        this.car = car;
    }
}
在beans.xml中创建Person对象:
    <bean id="person1" class="com.stuspring.Person">
        <property name="name" value="LiHua"/>
        <property name="age" value="28"/>
        <property name="car" ref="car1"/>
    bean>
    <bean id="person2" class="com.stuspring.Person">
        <property name="name" value="ZhaoHua"/>
        <property name="age" value="29"/>
        <property name="car">
            <ref bean="car2"/>
        property>
    bean>


    <bean id="person3" class="com.stuspring.Person">
        <property name="name" value="LiSi"/>
        <property name="age" value="31"/>
        <property name="car">
            <bean class="com.stuspring.Car">
                <constructor-arg name="brand" value="Ford"/>
                <constructor-arg name="corp" value="ShangHai"/>
                <constructor-arg name="price" value="20000"/>
            bean>
        property>
    bean>
    <bean id="person4" class="com.stuspring.Person">
        <constructor-arg name="name" value="Jerry"/>
        <constructor-arg name="age" value="25"/>
        <constructor-arg name="car" ref="car3"/>
    bean>


    <bean id="person5" class="com.stuspring.Person">
        <constructor-arg name="name" value="John"/>
        <constructor-arg name="age" value="31"/>
        <constructor-arg name="car"><null/>constructor-arg>
    bean>


    <bean id="person6" class="com.stuspring.Person">
        <constructor-arg name="name" value="Linda"/>
        <constructor-arg name="age" value="33"/>
        <constructor-arg name="car" ref="car1"/>
        <property name="car.maxSpeed" value="240"/>
    bean>
3.2 Bean的集合属性
集合属性赋值:在xml中可以通过内置的xml标签,例如、
3.2.1 Set属性赋值
一个Person有多个汽车,改进Person类:
package com.stuspring.collections;
import com.stuspring.Car;

import java.util.List;

/** * Created by bee on 17/4/24. */
public class Person {
    private String name;
    private int age;
    private List cars;

    public String getName() {
        return name;
    }

    public int getAge() {
        return age;
    }

    public List getCars() {
        return cars;
    }

    public void setName(String name) {
        this.name = name;
    }

    public void setAge(int age) {
        this.age = age;
    }

    public void setCars(List cars) {
        this.cars = cars;
    }

    public Person() {
    }

    public Person(String name, int age, List cars) {
        this.name = name;
        this.age = age;
        this.cars = cars;
    }

    @Override
    public String toString() {
        return "Person{" +
                "name='" + name + '\'' +
                ", age=" + age +
                ", cars=" + cars +
                '}';
    }


}
在beans.xml中创建bean:
    <bean id="person7" class="com.stuspring.collections.Person">
        <property name="name" value="Mike"/>
        <property name="age" value="29"/>
        <property name="cars">
            <list>
                <ref bean="car1"/>
                <ref bean="car2"/>
                <bean class="com.stuspring.Car">
                    <constructor-arg value="DaZhong"/>
                    <constructor-arg value="ShangHai"/>
                    <constructor-arg type="int">
                        <value>300value>
                    constructor-arg>
                bean>
            list>
        property>
    bean>
把集合独立出来,可以共享被多个bean引用(需要导入util命名空间):
    <util:list id="cars">
        <ref bean="car1"/>
        <ref bean="car2"/>
    util:list>

    <bean id="person9" class="com.stuspring.collections.Person">
        <property name="name" value="NewPerson"/>
        <property name="age" value="29"/>
        <property name="cars" ref="cars">property>
    bean>
3.2.2 Map属性赋值
package com.stuspring.collections;

import com.stuspring.Car;

import java.util.Map;

/** * Created by bee on 17/4/24. */
public class NewPerson {
    private String name;
    private int age;

    private Map cars;
    //省略setter、getter、无参构造方法、有参构造方法和toString方法

}
配置bean:
id="person8" class="com.stuspring.collections.NewPerson">
<property name="name" value="Tina"/>
<property name="age" value="26"/>
<property name="cars">
property>
3.2.3 Properties属性赋值
新建一个DataSource类模拟数据库连接:
package com.stuspring.collections;

import java.util.Properties;

/** * Created by bee on 17/4/24. */
public class DataSource {

    private Properties properties;

    public void setProperties(Properties properties) {
        this.properties = properties;
    }

    public Properties getProperties() {
        return properties;
    }

    @Override
    public String toString() {
        return "DataSource{" +
                "properties=" + properties +
                '}';
    }
}
在beans.xml中新建bean:
    <bean id="dataSource" class="com.stuspring.collections.DataSource">
        <property name="properties">
            <props>
                <prop key="user">rootprop>
                <prop key="password">123456prop>
                <prop key="jdbcUrl">jdbc:mysql:///testprop>
                <prop key="driverClass">com.mysql.jdbc.Driverprop>
            props>
        property>
    bean>
四、命名空间
Spring整合了各种工具,为了简化操作,spring提供了对各种工具的xml scheme 的配置方式。各种命名空间以及相应的定义文件地址:http://www.springframework.org/schema/
导入util和p命名空间,xsi:schemaLocation 指定了用于解析和校验xml的定义文件(xsd)的位置。
"http://www.springframework.org/schema/beans"
       xmlns:util="http://www.springframework.org/schema/util"
       xmlns:xsi="http://www.w3.org/2001/XMLSchema-instance"
       xmlns:p="http://www.springframework.org/schema/p"
       xsi:schemaLocation="http://www.springframework.org/schema/beans
        http://www.springframework.org/schema/beans/spring-beans.xsd
        http://www.springframework.org/schema/util
        http://www.springframework.org/schema/util/spring-util-4.3.xsd">