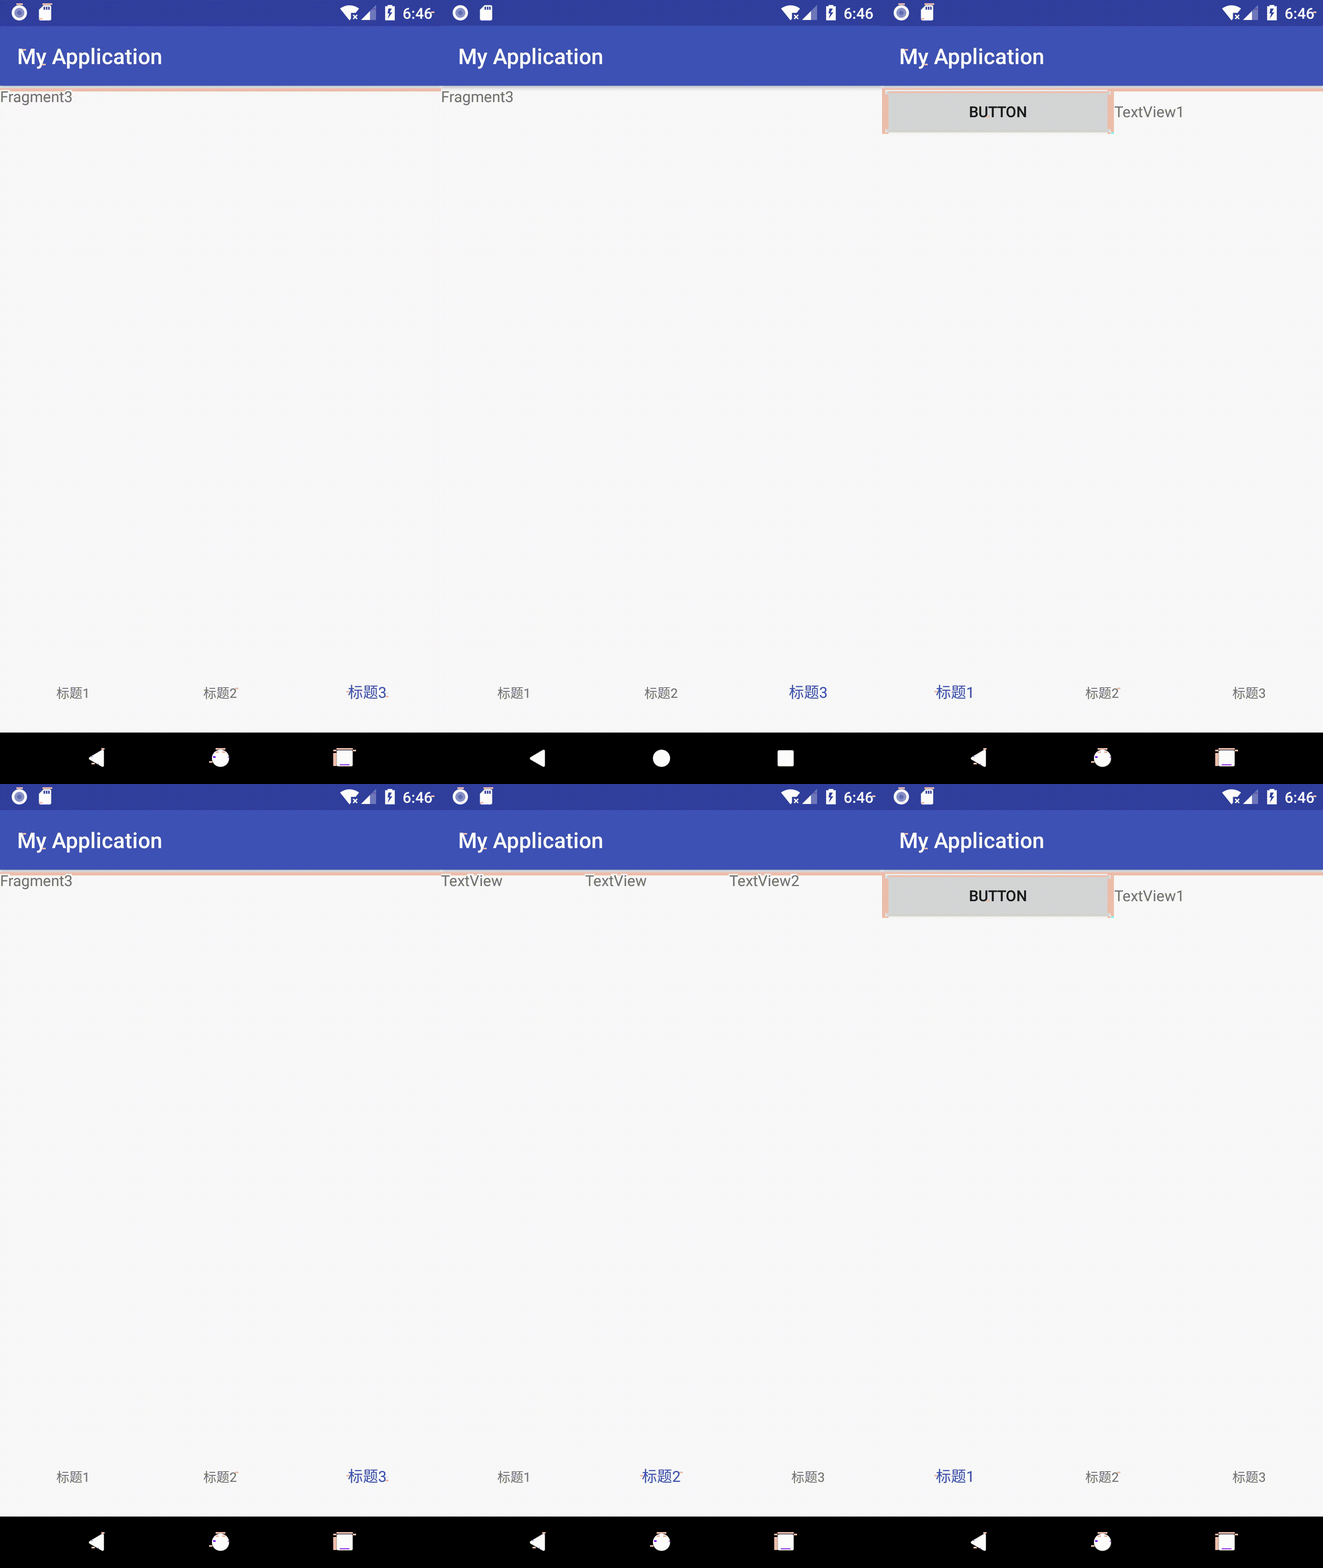
Android Studio 导航栏开发 BottomNavigationView+Fragment 简单实例 超详细
然后在看项目和代码:
一、
新建空白的项目:Empety Activity
二、
先添加依赖:在build.gradle 的dependencies里面添加
compile 'com.android.support:design:26.1.0'
三、
先看MainActivity布局文件:
这里的ButtomNavigationView 对应的就是我们的导航栏 上面的LinearLayout用来填充fragment实现切换页面。
ButtomNavigationView 里面的app:menu 对应的是导航栏里面的内容,所以还有新建一个menu的布局文件。
Menu布局文件:
先新建menu 文件夹 ( 如果有就不用) 新建 android resources directory 里面的resource type选择menu.
直接在项目上右键 new--adnroid resource file 然后里面的resource type 选择menu.
四、
接下来写准备切换的三个界面Fragment。
三个fragment就要对应3个布局文件,所以再新建3个布局文件 layout。
非常的简单 只放了一个button和一个textview,其余两个布局相似。
五、
然后再新建3个Fragment。
package com.example.it_cty.myapplication;

import android.content.Intent;
import android.os.Bundle;
import android.support.annotation.Nullable;
import android.support.v4.app.Fragment;
import android.view.LayoutInflater;
import android.view.View;
import android.view.ViewGroup;
import android.widget.Button;
import android.widget.TextView;
import android.widget.Toast;

/**
 * Created by IT-CTY on 2018/4/25.
 */

public class Fragment1 extends Fragment {
    private TextView textView;
    private Button button;
    @Nullable
    @Override
    public View onCreateView(LayoutInflater inflater, @Nullable ViewGroup container, @Nullable Bundle savedInstanceState) {
        View view=inflater.inflate(R.layout.fragment1,container,false);
        return view;
    }

    @Override
    public void onActivityCreated(@Nullable Bundle savedInstanceState) {
        super.onActivityCreated(savedInstanceState);
        textView=(TextView)getActivity().findViewById(R.id.textView1);
        button=(Button)getActivity().findViewById(R.id.button1);
        button.setOnClickListener(new View.OnClickListener() {
            @Override
            public void onClick(View view) {
                Toast.makeText(getActivity(),"Fragment1",Toast.LENGTH_SHORT).show();
            }
        });


    }
}
内容也是很简单 只实现了按钮点击显示一个内容,其他两个fragment 也是一样,fragment和布局文件要一一对应。
六、
接下来看最关键的 MainActivity
1、先看初始化函数
 private void initFragment()
    {

        fragment1 = new Fragment1();
        fragment2 = new Fragment2();
        fragment3 = new Fragment3();
        fragments = new Fragment[]{fragment1,fragment2,fragment3};
        lastfragment=0;
        getSupportFragmentManager().beginTransaction().replace(R.id.mainview,fragment1).show(fragment1).commit();
        bottomNavigationView=(BottomNavigationView)findViewById(R.id.bnv);

        bottomNavigationView.setOnNavigationItemSelectedListener(changeFragment);
    }
在看初始化函数里面bottomNaviationView 绑定的一个点击监听的函数changeFragment:
private BottomNavigationView.OnNavigationItemSelectedListener changeFragment= new BottomNavigationView.OnNavigationItemSelectedListener() {
        @Override
        public boolean onNavigationItemSelected(@NonNull MenuItem item) {

            switch (item.getItemId())
            {
                case R.id.id1:
                {
                    if(lastfragment!=0)
                    {
                        switchFragment(lastfragment,0);
                        lastfragment=0;

                    }

                    return true;
                }
                case R.id.id2:
                {
                    if(lastfragment!=1)
                    {
                        switchFragment(lastfragment,1);
                        lastfragment=1;

                    }

                    return true;
                }
                case R.id.id3:
                {
                    if(lastfragment!=2)
                    {
                        switchFragment(lastfragment,2);
                        lastfragment=2;

                    }

                    return true;
                }


            }


            return false;
        }
    };
最后再来看看switchFragment 函数
 private void switchFragment(int lastfragment,int index)
    {
        FragmentTransaction transaction =getSupportFragmentManager().beginTransaction();
        transaction.hide(fragments[lastfragment]);//隐藏上个Fragment
        if(fragments[index].isAdded()==false)
        {
            transaction.add(R.id.mainview,fragments[index]);


        }
        transaction.show(fragments[index]).commitAllowingStateLoss();


    }
隐藏上个fragment 显示选中的fragment。
最后贴个完整的MainActivity
package com.example.it_cty.myapplication;


import android.support.annotation.NonNull;
import android.support.design.widget.BottomNavigationView;
import android.support.v4.app.Fragment;
import android.support.v4.app.FragmentTransaction;
import android.support.v7.app.AppCompatActivity;
import android.os.Bundle;
import android.view.MenuItem;

public class MainActivity extends AppCompatActivity {
        private BottomNavigationView bottomNavigationView;
        private  Fragment1 fragment1;
        private Fragment2 fragment2;
        private Fragment3 fragment3;
        private Fragment[] fragments;
        private int lastfragment;//用于记录上个选择的Fragment
    @Override
    protected void onCreate(Bundle savedInstanceState) {
        super.onCreate(savedInstanceState);
        setContentView(R.layout.activity_main);
        initFragment();
    }
//初始化fragment和fragment数组
    private void initFragment()
    {

        fragment1 = new Fragment1();
        fragment2 = new Fragment2();
        fragment3 = new Fragment3();
        fragments = new Fragment[]{fragment1,fragment2,fragment3};
        lastfragment=0;
        getSupportFragmentManager().beginTransaction().replace(R.id.mainview,fragment1).show(fragment1).commit();
        bottomNavigationView=(BottomNavigationView)findViewById(R.id.bnv);

        bottomNavigationView.setOnNavigationItemSelectedListener(changeFragment);
    }
    //判断选择的菜单
    private BottomNavigationView.OnNavigationItemSelectedListener changeFragment= new BottomNavigationView.OnNavigationItemSelectedListener() {
        @Override
        public boolean onNavigationItemSelected(@NonNull MenuItem item) {

            switch (item.getItemId())
            {
                case R.id.id1:
                {
                    if(lastfragment!=0)
                    {
                        switchFragment(lastfragment,0);
                        lastfragment=0;

                    }

                    return true;
                }
                case R.id.id2:
                {
                    if(lastfragment!=1)
                    {
                        switchFragment(lastfragment,1);
                        lastfragment=1;

                    }

                    return true;
                }
                case R.id.id3:
                {
                    if(lastfragment!=2)
                    {
                        switchFragment(lastfragment,2);
                        lastfragment=2;

                    }

                    return true;
                }


            }


            return false;
        }
    };
//切换Fragment
    private void switchFragment(int lastfragment,int index)
    {
        FragmentTransaction transaction =getSupportFragmentManager().beginTransaction();
        transaction.hide(fragments[lastfragment]);//隐藏上个Fragment
        if(fragments[index].isAdded()==false)
        {
            transaction.add(R.id.mainview,fragments[index]);


        }
        transaction.show(fragments[index]).commitAllowingStateLoss();


    }
}
源码地址:点击打开链接

