Git与Github应用实践
用来记录我自己首次使用Git和Github的过程,以后长的代码就收集到我的github上了。
》》》》》2017.09.12 update
(实现部分提交:https://www.oschina.net/translate/partial-commits-with-git)
》》》》》end
一、首先是安装Git和申请Github账号
这里我用的是QQ邮箱来申请的Github账号,果然遇到了没有收到验证邮件的问题,这时候就需要去github的设置中查看email设置,点击重发邮件,然后我就收到验证邮件了。
Git的安装网上有很多教程,这里就不记录了(其实这里我也不知道在安装过程中我到底有没有为自己埋下坑,不过坑也是要自己踩了才能深刻)。
下面是使用Git创建新仓库,以下为我的代码:
$ pwd    //查看当前所在的路径
/            //在根目录
$ mkdir G:/Git_xcq    //创建新的文件夹
$ cd G:/Git_xcq       //切换到新创建的路径中
$ pwd                 //查看当前路径
/g/Git_xcq
$ git init            //初始化仓库
Initialized empty Git repository in G:/Git_xcq/.git/
$ git config --global user.name xuechengqi
$ git config --global user.email 10******@qq.com
到这里我想了一下,我是要将代码提交到github上的,所以应该要clone一个在线的仓库。
然后就应该先在github上创建一个项目:在github首页,点击页面右上角“New Repository”,输入相应的名字,描述等。当创建完之后,github会给以下提示:
...or create a new repository on the command line
echo "# test" >> README.md
git init
git add README.md
git commit -m "first commit"
git remote add origin https://github.com/Xuechengqi/test.git
git push -u origin master
git remote add origin https://github.com/Xuechengqi/test.git
git push -u origin masterYou can initialize this repository with code from a Subversion, Mercurial, or TFS project.
这些命令对应着相应的git命令,可以参考我的上一篇博文:《产品前端架构(版本管理)》
但是上面还有一行Quick setup。
后面有两个选择——HTTPS和SSH,在管理Git项目时,这两者的分析:
很多时候都是直接使用https url克隆到本地,当然也有些人使用SSH url克隆的。这两种方式的主要区别在于:使用https url克隆对初学者来说会比较方便,复制https url然后到Git Bash里面直接用clone命令克隆到本地就好了,但是每次fetch和push代码都需要输入账号和密码,这也是https方式的麻烦之处(所以这种方式成为我在非个人电脑上传代码的选择)。而使用SSH url克隆却需要在克隆之前先配置和添加好SSH key,因此,如果你想要使用SSH url克隆的话,你必须是这个项目的拥有者,否则你是无法添加SSH key的,另外SSH默认是每次fetch和push代码都不需要输入账号和密码,如果你想要每次都输入账号密码才能进行fetch和push也可以另外进行设置。
这里我分开记录:
2、分开记录使用https与使用ssh将Git和Github关联起来:
A、HTTPS:
$ git status    //查看当前仓库的状态
On branch master

Initial commit

nothing to commit (create/copy files and use "git add" to track)
然后我在“G:\Git_xcq”的目录下创建了一个hello.html文件,再次查看本地仓库状态:
$ git status
On branch master

Initial commit

Untracked files:
  (use "git add ..." to include in what will be committed)

        hello.html

nothing added to commit but untracked files present (use "git add" to track)
可以看出这个新增文件还不受Git管理,要使它被管理:
$ git add .     //将新增文件全部添加入本地的Git仓库中
warning: CRLF will be replaced by LF in hello.html.
The file will have its original line endings in your working directory.warning: CRLF will be replaced by LF in hello.html.$ rm -rf .git // 删除.git
$ git config --global core.autocrlf false //禁用自动转换
$ git init
$ git add .
$ git status
On branch master

Initial commit

Changes to be committed:
  (use "git rm --cached ..." to unstage)

        new file:   hello.html
$ git commit -m 'this is my first commit for test'
[master (root-commit) be6d099] this is my first commit for test
warning: CRLF will be replaced by LF in hello.html.             //出现了一样的问题,但是没有影响提交
The file will have its original line endings in your working directory.
 1 file changed, 10 insertions(+)
 create mode 100644 hello.html
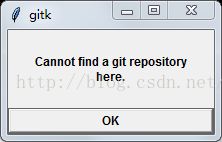
$ gitk //查看当前一个本地的提交记录
$ rm -rf .git //发现当前路径下的.git文件夹被删除
$ git config --global core.autocrlf false$ gitk$ git init
Initialized empty Git repository in G:/Git_xcq/.git/$ git status
On branch master
Initial commit
Untracked files:
(use "git add ..." to include in what will be committed)
hello.html
nothing added to commit but untracked files present (use "git add" to track)
$ git add . //未出现刚刚的警告了
$ git status
On branch master

Initial commit

Changes to be committed:
  (use "git rm --cached ..." to unstage)

        new file:   hello.html
$ git config --global user.name xuechengqi
$ git config --global user.email 10******@qq.com
$ git commit -m 'this is my second commit for test'
[master (root-commit) cd778c8] this is my second commit for test
1 file changed, 10 insertions(+)
create mode 100644 hello.html
$ gitk //再次查看提交记录,就只有second现在我们将仓库同步到Github中:
$ git remote add origin https://github.com/Xuechengqi/test.git
$ git remote -v
origin  https://github.com/Xuechengqi/test.git (fetch)
origin  https://github.com/Xuechengqi/test.git (push)
最后将本地仓库中的内容同步到远程服务器上:
$ git push origin master
//这里跳出了github登录输入框,需要登录成功之后才能出现以下信息
Counting objects: 3, done.
Delta compression using up to 4 threads.
Compressing objects: 100% (2/2), done.
Writing objects: 100% (3/3), 351 bytes | 0 bytes/s, done.
Total 3 (delta 0), reused 0 (delta 0)
To https://github.com/Xuechengqi/test.git
 * [new branch]      master -> master
$ git status
On branch master
Untracked files:
  (use "git add ..." to include in what will be committed)

        world.html

nothing added to commit but untracked files present (use "git add" to track)

$ git add .

$ git status
On branch master
Changes to be committed:
  (use "git reset HEAD ..." to unstage)

        new file:   world.html

$ git commit -m 'for my security'
[master 831ccf1] for my security
 1 file changed, 10 insertions(+)
 create mode 100644 world.html

$ git push origin master
//这里没有跳出登录框,直接就提交到了远程服务器,这里需要更新说明的是,这个情况是出现在公司的电脑上,我自己的笔电还是需要再次验证的
Counting objects: 3, done.
Delta compression using up to 4 threads.
Compressing objects: 100% (3/3), done.
Writing objects: 100% (3/3), 405 bytes | 0 bytes/s, done.
Total 3 (delta 0), reused 0 (delta 0)
To https://github.com/Xuechengqi/test.git
   cd778c8..831ccf1  master -> master

$ gitk

