THREE.JS中常用的4种光源
总序
如果没有光源,就不可能看到任何渲染结果。
- AmbientLight: 环境光,基础光源,它的颜色会被加载到整个场景和所有对象的当前颜色上。
- PointLight:点光源,朝着所有方向都发射光线
- SpotLight :聚光灯光源:类型台灯,天花板上的吊灯,手电筒等
- DirectionalLight:方向光,又称无限光,从这个发出的光源可以看做是平行光.
AmbientLight=>影响整个场景的光源
注意点:
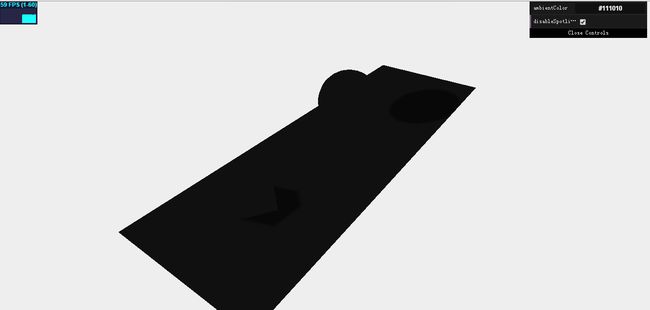
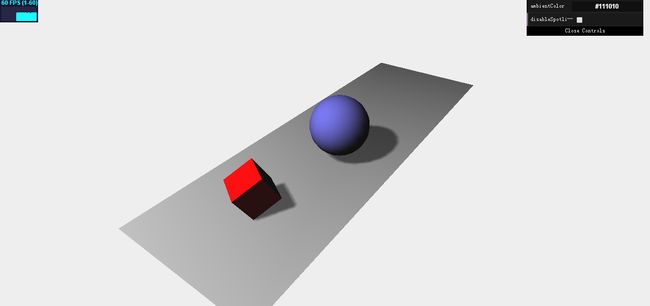
如果往其中添加SpotLight光源的如图2(因为使用了聚光灯光源才能照亮物体并产生了阴影)
属性
对于环境光的设置只需要设置颜色即可
结论======>环境光使用的主要目的是弱化阴影或添加一些颜色。
Code
....
....
        // 创建一个方块
        var cubeGeometry = new THREE.BoxGeometry(4, 4, 4);
        var cubeMaterial = new THREE.MeshLambertMaterial({color: 0xff0000});
        var cube = new THREE.Mesh(cubeGeometry, cubeMaterial);
....
....
         var ambiColor = "#0c0c0c";
            var ambientLight = new THREE.AmbientLight(ambiColor);//设置颜色
            scene.add(ambientLight);
通过更改环境光的颜色可以感受环境光颜色的变化对于在场景中的物体渲染结果的变化。
PointLight=>照射所有方向的光源
注意点
- 单点发光
- 不产生阴影
如何理解照射所有方向的光源
单点发光,就类似于丢在空中的照明弹,该点往四面八方各个方向发光,类似这样的光源就称之为PointLight
如何理解不产生阴影
知道了什么是PointLight,你就能理解为什么不产生阴影了,原因是这样的光源会朝着所有的方向发射光线,在这种情况下计算阴影对GPU来讲是一个非常沉重的负担,所以不能产生阴影,你愿意你的应用慢如蜗牛吗,当然有其他光源可以替代,就比如SpotLight
属性
- color:光源颜色
- intensity:强度,光照的强度,默认为1
- distance:距离, 光照照射得到的距离,决定光可以照射多远
- position:光源所在的位置
- visible:可见性,如果为true,光源就会打开
Code
        var pointColor = "#ccffcc";
        var pointLight = new THREE.PointLight(pointColor);
        pointLight.distance = 100;
        pointLight.intensity = 1;
        scene.add(pointLight);
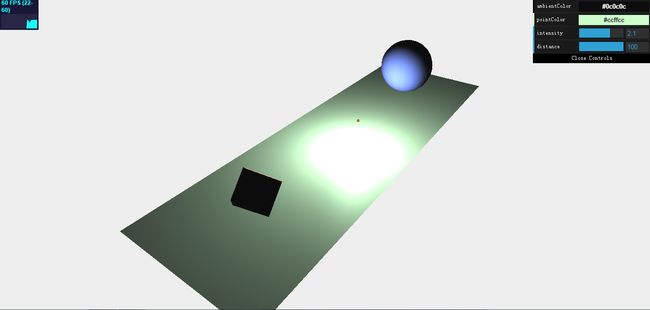
可以通过修改光源光照的强度来查看强度为渲染效果的影响
pointLight.intensity = 1时

pointLight.intensity = 2.1时
感受完美
SpotLight=>锥形效果的光源
注意点
制造产生阴影的几个步骤,让球体和方块将阴影投影到地上,哪些物体投射阴影,哪些物体接受阴影
- render.shadowMapEnabled=true;//告诉render我们需要阴影(允许阴影隐射)
- plane.receiveShadow=true;//地面接受阴影
- cude.castShadow=true;//cast投射,就是方块投射阴影
- spotLight.castShadow=true;不是所有的光源都可以投射阴影 ,这里使用聚点光源可以产生阴影
属性
- 点光源的属性在聚点光源上都存在
- castShadow:为true则该光源会产生阴影
- shadowCameraNear:投影近点,距离光源多近能产生阴影
- shadowCameraFar:投影远点,到哪一点为止不再产生阴影
- shadowCameraFov:投影视场,聚光的角度大小
- target:决定关注的方向。
- exponent:光照衰减指数,光照越远光强衰减越快。
- shadowBias:阴影偏移。
- onlyShadow:如果为true,表示只在场景中添加阴影,并不会添加光照。
- shadowCameraVisible=true;可以场景中看到光源在哪里,和如何产生阴影的。很好用的一个属性。
- shadowDarkness:阴影暗度,默认0.5 定义阴影有多黑
- shadowMapWidth:阴影映射宽度
- shadowMapHeight:阴影映射高度
//对于 shadowCameraNear,shadowCameraFar,和shadowCameraFov,可以参照透视相机的模型
//对于最后两个:决定有多少像素用来生成阴影,如果阴影的边缘参差不起或者不那么平滑,可以增加这个值,场景渲染之后不能更改。
Code
        var pointColor = "#ffffff";
        var spotLight = new THREE.SpotLight(pointColor);
        spotLight.position.set(-40, 60, -10);
        spotLight.castShadow = true;
        spotLight.shadowCameraNear = 2;
        spotLight.shadowCameraFar = 200;
        spotLight.shadowCameraFov = 30;
        spotLight.target = plane;//光照照向地面
        spotLight.distance = 0;
        spotLight.angle = 0.4;
        scene.add(spotLight);
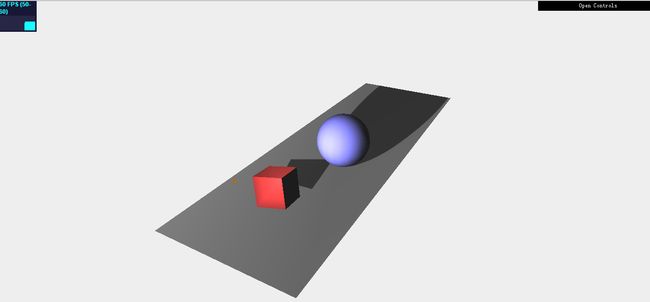
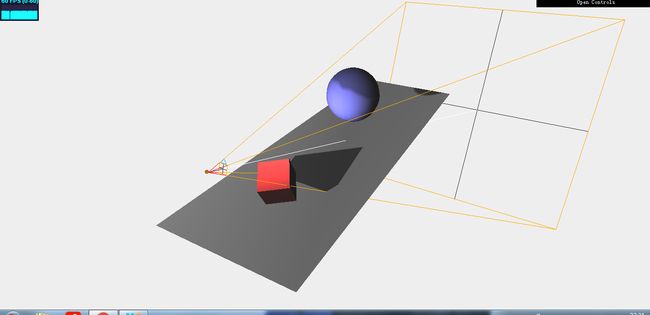
说到那个很好用的属性shadowCameraVisible=true,如果设置了那么效果将是这样的。能显示光源,光的角度大小,光源的distance等信息,这个对于调试设置等有很好的效果
也可以让光源的target只照射其中一个如方块
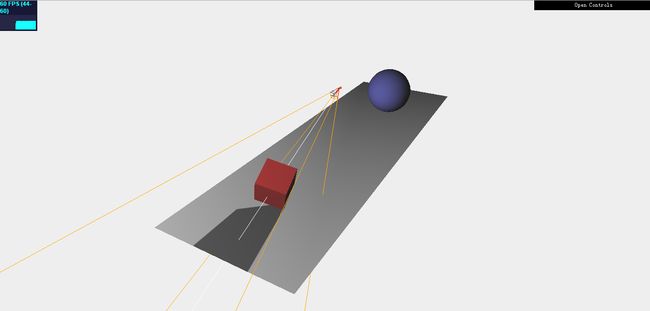
一个值得注意的是 有一个非常光亮的光束,离中心越远衰减地越快。可以使用小的exponent衰减值和小的angle值来创建同样的聚光效果。不过如果角度很小,可能会产生光线渲染失真。
另一个值得注意的是:如果看起来阴影有点模糊,可以增加shadowMapWidth和shadowMapHeight来配置。
DirectionalLight=>平行光,类型太阳光
距离很远的光,如太阳般,照射到地球上每一束光都是平行的。
注意点
- 平行光
- 所有对象接收的光强都是一样的
- 会产生阴影
- 与聚点光源的主要差别是:聚点光源光距离目标越远光越暗淡,而平行光光强都是一样的。
- 只用direction(方向),color(颜色),intensity(强度)来计算属性和阴影
-形成的不是光锥而是一个方块<==很重要
属性
- 聚点光源的主要属性都有(无设置光锥的属性)
- shadowCameraNear
- shadowCameraFar
- shadowCameraLeft
- shadowCameraRight
- shadowCameraTop
shadowCameraBottom
前后左右上下的位置,参考正投影相机
Code
        var pointColor = "#ff5808";
        var directionalLight = new THREE.DirectionalLight(pointColor);
        directionalLight.position.set(-40, 60, -10);
        directionalLight.castShadow = true;
        directionalLight.shadowCameraNear = 2;
        directionalLight.shadowCameraFar = 200;
        directionalLight.shadowCameraLeft = -50;
        directionalLight.shadowCameraRight = 50;
        directionalLight.shadowCameraTop = 50;
        directionalLight.shadowCameraBottom = -50;

        directionalLight.distance = 0;
        directionalLight.intensity = 0.5;
        directionalLight.shadowMapHeight = 1024;
        directionalLight.shadowMapWidth = 1024;


        scene.add(directionalLight);