SpringBoot整合Mybatis+jsp(完整版)
Spring Boot 概述
什么是 Spring Boot
- 它使用 “习惯优于配置” (项目中存在大量的配置,此外还内置一个习惯性的配置)的理念让你的项目快速运行起来。
- 它并不是什么新的框架,而是默认配置了很多框架的使用方式,就像 Maven 整合了所有的 jar 包一样,Spring Boot 整合了所有框架
使用 Spring Boot 有什么好处
回顾我们之前的 SSM 项目,搭建过程还是比较繁琐的,需要:
- 1)配置 web.xml,加载 spring 和 spring mvc
- 2)配置数据库连接、配置日志文件
- 3)配置家在配置文件的读取,开启注解
- 4)配置mapper文件
- .....
而使用 Spring Boot 来开发项目则只需要非常少的几个配置就可以搭建起来一个 Web 项目,并且利用 IDEA 可以自动生成生成。
- 划重点:简单、快速、方便地搭建项目;对主流开发框架的无配置集成;极大提高了开发、部署效率。
Spring Boot 快速搭建
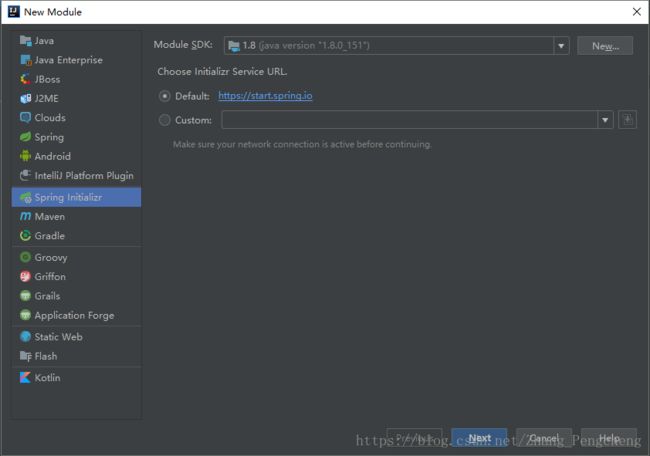
第一步:新建项目
选择 Spring Initializr ,然后选择默认的 url 点击【Next】
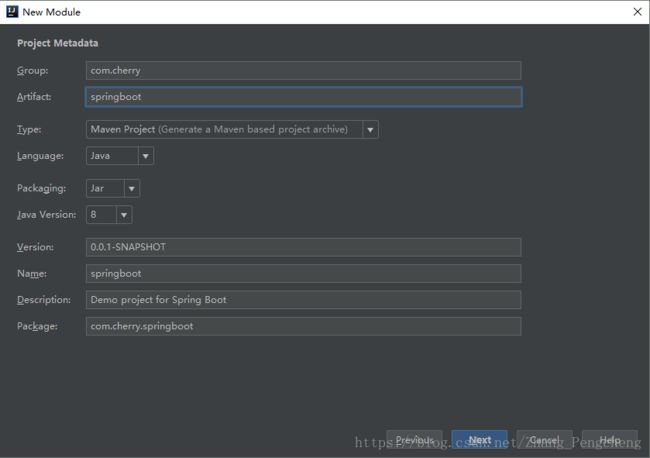
修改一下Group 和 Artifact 信息 点击【Next】
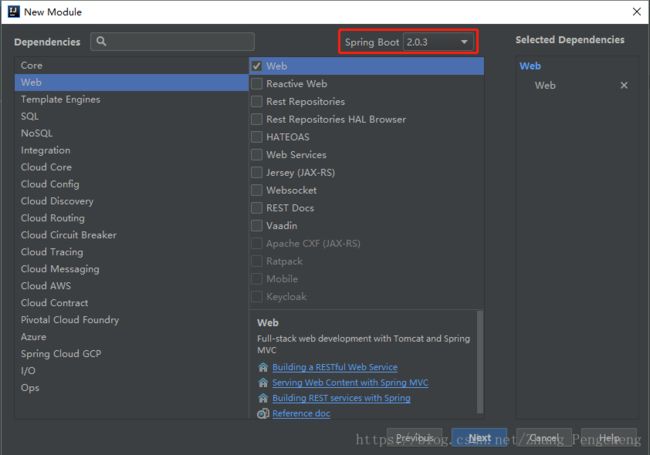
勾选上 Web 模板:
这个在你选择版本的时候是无关紧要的,只是为啦方便给你几个比较典型的版本。你先随便选一个版本,构建好工程以后,把pom.xml里面的springBoot版本改成你想要的就可以啦 。比如一开始你选的1.5.4版本:
    org.springframework.boot

    spring-boot-starter-parent

    1.5.4.RELEASE
把
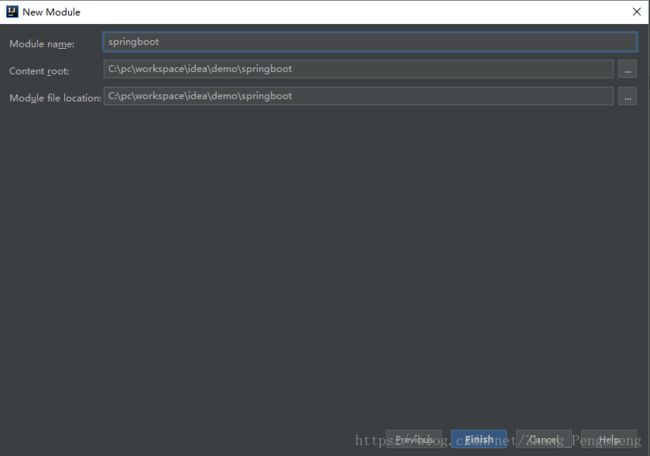
选择好项目的位置,点击【Finish】
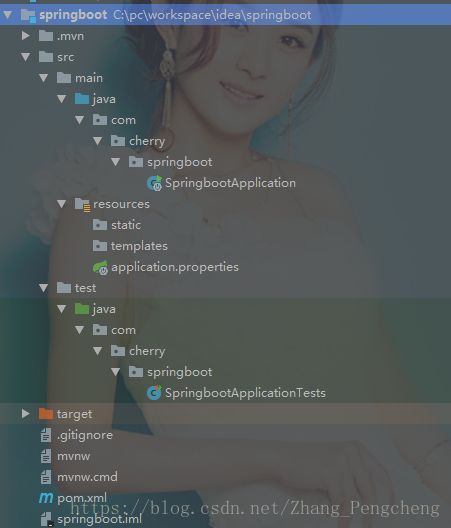
创建的时候时间较长,耐心等待就ok了,创建完成后,项目结构如下:
项目结构还是看上去挺清爽的,少了很多配置文件,我们来了解一下默认生成的有什么:
- SpringbootApplication: 一个带有 main() 方法的类,用于启动应用程序
- SpringbootApplicationTests:一个空的 Junit 测试了,它加载了一个使用 Spring Boot 字典配置功能的 Spring 应用程序上下文
- application.properties:一个空的 properties 文件,可以根据需要添加配置属性
- pom.xml: Maven 构建说明文件
第二步:HelloController
在【com.cherry.springboot】包下新建一个【HelloController】:
package com.cherry.springboot;

import org.springframework.web.bind.annotation.RequestMapping;
import org.springframework.web.bind.annotation.RestController;

/**
 * @author [email protected]
 * @create 2018/7/11 11:23
 * @desc 测试控制器
 */
@RestController
public class HelloController {
    @RequestMapping("/hello")
    public String hello() {
        return "Hello Spring Boot!";
    }
}- @RestController 注解: 该注解是 @Controller 和 @ResponseBody 注解的合体版
第三步:利用 IDEA 启动 Spring Boot
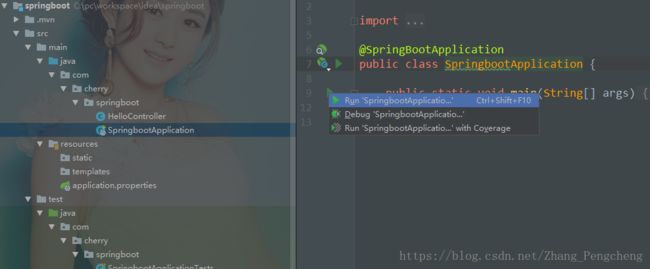
我们回到 SpringbootApplication 这个类中,然后运行:
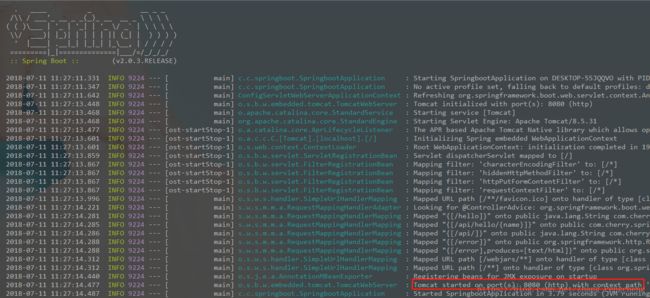
注意:我们之所以在上面的项目中没有手动的去配置 Tomcat 服务器,是因为 Spring Boot 内置了 Tomcat
可以看到我们的 Tomcat 运行在 8080 端口,我们来访问 “/hello” 地址试一下:
可以看到页面成功显示出我们返回的信息。
解析 Spring Boot 项目
解析 pom.xml 文件
我们可以看到一个比较陌生一些的标签
    org.springframework.boot
    spring-boot-starter-parent
    2.0.3.RELEASE
有了这个,当前的项目才是 Spring Boot 项目,spring-boot-starter-parent 是一个特殊的 starter ,它用来提供相关的 Maven 默认依赖,使用它之后,常用的包依赖就可以省去 version 标签。
关于具体 Spring Boot 提供了哪些 jar 包的依赖,我们可以查看本地 Maven 仓库下:\repository\org\springframework\boot\spring-boot-dependencies\2.0.1.RELEASE\spring-boot-dependencies-2.0.1.RELEASE.pom 文件来查看,挺长的...
应用入口类
Spring Boot 项目通常有一个名为 *Application 的入口类,入口类里有一个 main 方法, 这个 main 方法其实就是一个标准的 Javay 应用的入口方法。
@SpringBootApplication 是 Spring Boot 的核心注解,它是一个组合注解,该注解组合了:@Configuration、@EnableAutoConfiguration、@ComponentScan; 若不是用 @SpringBootApplication 注解也可以使用这三个注解代替。
- 其中,@EnableAutoConfiguration 让 Spring Boot 根据类路径中的 jar 包依赖为当前项目进行自动配置,例如,添加了 spring-boot-starter-web 依赖,会自动添加 Tomcat 和 Spring MVC 的依赖,那么 Spring Boot 会对 Tomcat 和 Spring MVC 进行自动配置。
- Spring Boot 还会自动扫描 @SpringBootApplication 所在类的同级包以及下级包里的 Bean ,所以入口类建议就配置在 grounpID + arctifactID 组合的包名下(这里为 cn.wmyskxz.springboot 包)
Spring Boot 的配置文件
Spring Boot 使用一个全局的配置文件 application.properties 或 application.yml,放置在【src/main/resources】目录或者类路径的 /config 下。
Spring Boot 不仅支持常规的 properties 配置文件,还支持 yaml 语言的配置文件。yaml 是以数据为中心的语言,在配置数据的时候具有面向对象的特征。
Spring Boot 的全局配置文件的作用是对一些默认配置的配置值进行修改。
- 简单实例一下
我们同样的将 Tomcat 默认端口设置为 8080 ,并将默认的访问路径从 “/” 修改为 “/hello” 时,使用 properties 文件和 yml 文件的区别如上图。
- 注意: yml 需要在 “:” 后加一个空格,幸好 IDEA 很好地支持了 yml 文件的格式有良好的代码提示;
- 我们可以自己配置多个属性
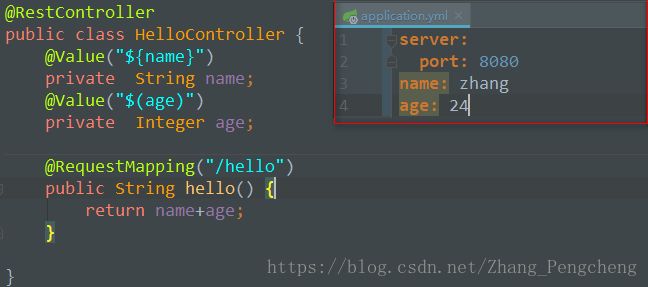
我们直接把 .properties 后缀的文件删掉,使用 .yml 文件来进行简单的配置,然后使用 @Value 来获取配置属性:
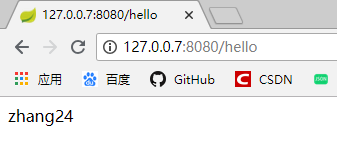
重启 Spring Boot ,查看结果
注意: 我们并没有在 yml 文件中注明属性的类型,而是在使用的时候定义的。
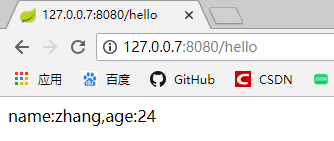
你也可以在配置文件中使用当前配置:
仍然可以得到正确的结果:
- 问题: 这样写配置文件繁琐而且可能会造成类的臃肿,因为有许许多多的 @Value 注解。
封装配置信息
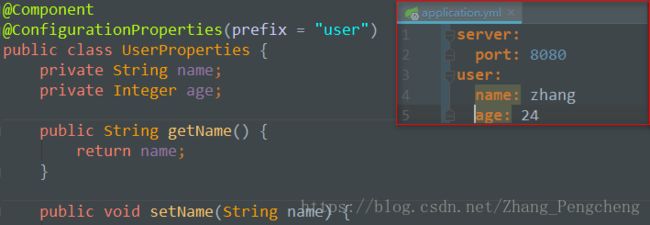
我们可以把配置信息封装成一个类,首先在我们的 name 和 age 前加一个 user前缀,然后新建一个 UserProperties 的类用来封装这些信息,并用上两个注解:
@Component:表明当前类是一个 Java Bean @ConfigurationProperties(prefix = "user"):表示获取前缀为 user 的配置信息
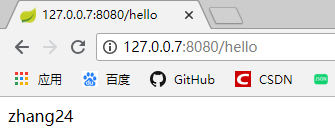
这样我们就可以在控制器中使用,重启得到正确信息:
注意一下这个prefix ,不能配成user ,会读取你电脑的配置信息,最后改成了users
Spring Boot 热部署
在目前的 Spring Boot 项目中,当发生了任何修改之后我们都需要重新启动才能够正确的得到效果,这样会略显麻烦,Spring Boot 提供了热部署的方式,当发现任何类发生了改变,就会通过 JVM 类加载的方式,加载最新的类到虚拟机中,这样就不需要重新启动也能看到修改后的效果了。
- 做法也很简单,修改 pom.xml 即可!
我们往 pom.xml 中添加一个依赖就可以了:
    org.springframework.boot
    spring-boot-devtools
    true
Spring Boot 使用
上面已经完成了 Spring Boot 项目的简单搭建,我们仅仅需要进行一些简单的设置,写一个 HelloController 就能够直接运行了,不要太简单...接下来我们再深入了解一下 Spring Boot 的使用。
Spring Boot 支持 JSP
Spring Boot 的默认视图支持是 Thymeleaf 模板引擎,但是这个我们不熟悉啊,我们还是想要使用 JSP 怎么办呢?
- 第一步:修改 pom.xml 增加对 JSP 文件的支持
    javax.servlet
    javax.servlet-api
    provided


    javax.servlet
    jstl


    org.apache.tomcat.embed
    tomcat-embed-jasper
    provided
- 第二步:配置试图重定向 JSP 文件的位置
修改 application.yml 文件,将我们的 JSP 文件重定向到 /WEB-INF/views/ 目录下:
- 第三步:修改 HelloController
修改 @RestController 注解为 @Controller ,然后将 hello 方法修改为:
- 第四步:新建 hello.jsp 文件
在【src/main】目录下依次创建 webapp、WEB-INF、views 目录,并创建一个 hello.jsp 文件:
- 第五步:刷新网页
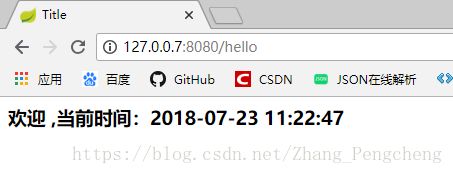
因为我们部署了热部署功能,所以只需要等待控制台重启信息完成之后再刷新网页就可以看到正确效果了
集成 MyBatis【无配置文件注解版】
- 第一步:修改 pom.xml 增加对 MySql和 MyBatis 的支持
    org.mybatis.spring.boot
    mybatis-spring-boot-starter
    1.1.1


    mysql
    mysql-connector-java
    5.1.21
- 第二步:配置application.yml 新增数据库链接参数
- 第三步:创建实体类和映射类
在【com.cherry.springboot】下新建一个【entity】包,然后在其下创建一个 Student 类:
package com.cherry.springboot.entity;
import lombok.Getter;
import lombok.Setter;
import lombok.ToString;
import java.io.Serializable;
/**
 * @author [email protected]
 * @create 2018/7/23 11:43
 * @desc
 */
@Getter
@Setter
@ToString
public class Student implements Serializable {
    private static final long serialVersionUID = 1671658130062704119L;
    private Integer id;
    private String  name;
    private String sex;
    private Double grade;
}
在【com.cherry.springboot】下新建一个【dao】包,然后在其下创建一个 IStudentDao :
package com.cherry.springboot.dao;
import com.cherry.springboot.entity.Student;
import org.apache.ibatis.annotations.Mapper;
import org.apache.ibatis.annotations.Select;
import java.util.List;
/**
 * @author [email protected]
 * @create 2018/7/23 11:47
 * @desc
 */
@Mapper
public interface IStudentDao {
    @Select("SELECT * FROM student_info")
    List selectAll();
}
- 第四步:编写 StudentController
在【com.cherry.springboot】下新建一个【controller】包,然后在其下创建一个 StudentController :
package com.cherry.springboot.controller;
import com.cherry.springboot.dao.IStudentDao;
import com.cherry.springboot.entity.Student;
import org.springframework.beans.factory.annotation.Autowired;
import org.springframework.stereotype.Controller;
import org.springframework.ui.Model;
import org.springframework.web.bind.annotation.RequestMapping;
import java.util.List;
/**
 * @author [email protected]
 * @create 2018/7/23 11:49
 * @desc
 */
@Controller
public class StudentController {
    @Autowired
    private IStudentDao iStudentDao;
    @RequestMapping("/student")
    public String listStudent(Model model) {
        List students = iStudentDao.selectAll();
        model.addAttribute("students", students);
        return "student";
    }
} - 第五步:编写 student.jsp
<%@ page language="java" contentType="text/html; charset=UTF-8"
         pageEncoding="UTF-8"%>
<%@ taglib uri="http://java.sun.com/jsp/jstl/core" prefix="c"%>


        id
        name
        sex
        grade


            ${s.id}
            ${s.name}
            ${s.sex}
            ${s.grade}
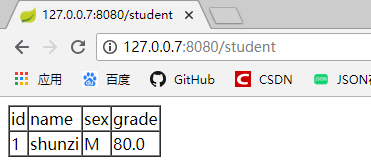
- 第六步:重启服务器运行
集成 MyBatis【配置文件注解版】
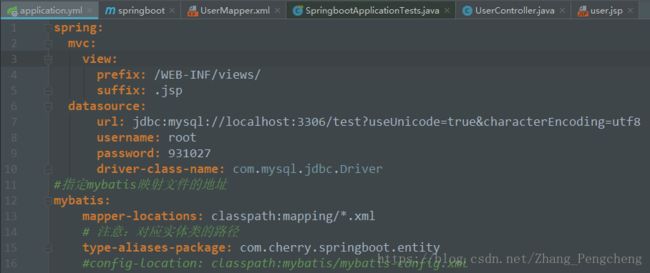
- 第一步:修改 application.yml 文件
- 第二步:编写 User实体
package com.cherry.springboot.entity;

import java.io.Serializable;
@Getter
@Setter
public class User implements Serializable {
    private Integer id;
    private String name;
    private String sex;
}- 第三步:编写 UserController
package com.cherry.springboot.controller;
import com.cherry.springboot.entity.User;
import com.cherry.springboot.service.IUserService;
import org.springframework.beans.factory.annotation.Autowired;
import org.springframework.stereotype.Controller;
import org.springframework.ui.Model;
import org.springframework.web.bind.annotation.RequestMapping;
/**
 * @author [email protected]
 * @create 2018/7/23 17:14
 * @desc
 */
@Controller
public class UserController {
    @Autowired
    private IUserService userService;
    @RequestMapping("/selectByPrimaryKey")
    public String selectUserById(Model model) {
        User user = userService.selectByPrimaryKey(1);
        model.addAttribute("user", user);
        return "user";
    }
}- 第四步:编写 IUserService
package com.cherry.springboot.service;
import com.cherry.springboot.entity.User;
/**
 * @author [email protected]
 * @create 2018/7/23 15:47
 * @desc
 */
public interface IUserService {
    User selectByPrimaryKey(Integer id);
}
- 第五步:编写 UserServiceImpl
package com.cherry.springboot.service.impl;
import com.cherry.springboot.dao.IUserDao;
import com.cherry.springboot.entity.User;
import com.cherry.springboot.service.IUserService;
import org.springframework.beans.factory.annotation.Autowired;
import org.springframework.stereotype.Service;
/**
 * @author [email protected]
 * @create 2018/7/23 15:49
 * @desc
 */
@Service
public class UserServiceIpml implements IUserService {
    @Autowired
    private IUserDao userDao;
    @Override
    public User selectByPrimaryKey(Integer id) {
        return userDao.selectByPrimaryKey(id);
    }
}
- 第六步:编写 IUserDao
package com.cherry.springboot.dao;
import com.cherry.springboot.entity.User;
import org.apache.ibatis.annotations.Mapper;
@Mapper
public interface IUserDao {
    int deleteByPrimaryKey(Integer id);
    int insert(User record);
    int insertSelective(User record);
    User selectByPrimaryKey(Integer id);
    int updateByPrimaryKeySelective(User record);
    int updateByPrimaryKey(User record);
}- 第七步:编写 UserMapper.xml
-
注意:这个文件的路径要和application.yml文件中的mapper-locations:路径对应
id, name, sex
delete from user_info
where id = #{id,jdbcType=INTEGER}
insert into user_info (id, name, sex
)
values (#{id,jdbcType=INTEGER}, #{name,jdbcType=VARCHAR}, #{sex,jdbcType=VARCHAR}
)
insert into user_info
id,
name,
sex,
#{id,jdbcType=INTEGER},
#{name,jdbcType=VARCHAR},
#{sex,jdbcType=VARCHAR},
update user_info
name = #{name,jdbcType=VARCHAR},
sex = #{sex,jdbcType=VARCHAR},
where id = #{id,jdbcType=INTEGER}
update user_info
set name = #{name,jdbcType=VARCHAR},
sex = #{sex,jdbcType=VARCHAR}
where id = #{id,jdbcType=INTEGER}
- 第八步:编写 user.jsp
<%@ page language="java" contentType="text/html; charset=UTF-8"
         pageEncoding="UTF-8"%>

<%@ taglib uri="http://java.sun.com/jsp/jstl/core" prefix="c"%>


        id
        name
        sex


        ${user.id}
        ${user.name}
        ${user.sex}
- 第九步:测试数据库连接
package com.cherry.springboot;
import com.cherry.springboot.entity.User;
import com.cherry.springboot.service.IUserService;
import org.junit.Test;
import org.junit.runner.RunWith;
import org.springframework.beans.factory.annotation.Autowired;
import org.springframework.boot.test.context.SpringBootTest;
import org.springframework.test.context.junit4.SpringRunner;
@RunWith(SpringRunner.class)
@SpringBootTest
public class SpringbootApplicationTests {
    @Autowired
    private IUserService userService;
    @Test
    public void contextLoads() {
        User user = userService.selectByPrimaryKey(1);
        System.out.println(user);
    }
}
- 第十步:重启服务器运行
整合 MyBatis【配置文件注解版】中的实体类以及mapper文件都是通过mybatis-generator 代码自动生成工具生成的,具体的使用方法我会在下一篇文章中写出来,以便提高大家日后的开发效率。
以上就是springboot项目的创建和对jsp和mybaits的整个,这是一个比较完整的文档,希望对大家有所帮助。
