Seata阿里分布式事务中间件(二):SpringBoot+SpringCloud+Mybatis整合Seata
下载最新版Seata Sever(window10)
官方下载地址:https://github.com/seata/seata/releases
- 下载完成后解压到本地磁盘,解压完成后有三个文件夹,bin目录下是服务启动的bat文件,conf目录下是相关配置文件,lib目录下是相关jar包
- 进入conf,根据自身需求可以修改file.conf以及registry.conf的内容(不建议修改,默认设置就好,因为相关配置在项目中可以修改)
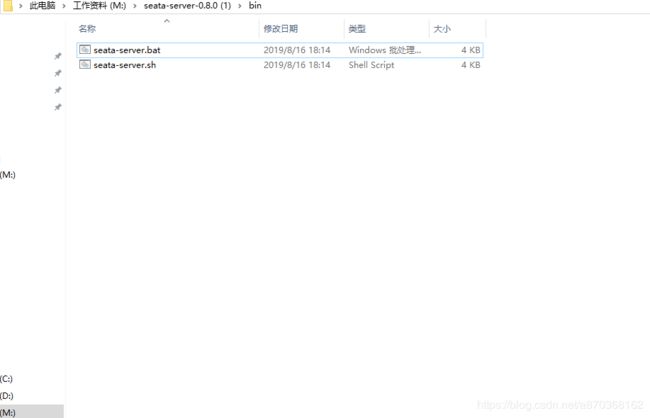
- 进入bin目录,双击seata-server.bat即可运行

创建UNDO_LOG表
-注意此处0.3.0+增加唯一索引ux_undo_log
CREATE TABLE undo_log(
ID BIGINT( 20) NOT NULL AUTO_INCREMENT,
branch_id BIGINT( 20) NOT NULL,
XID VARCHAR( 100) NOT NULL,
上下文 VARCHAR( 128) NOT NULL,
rollback_info LONGBLOB NOT NULL,
log_status INT(11)NOT NULL,
log_created日期时间NOT NULL,
log_modified日期时间NOT NULL,
分机 VARCHAR(100)DEFAULT NULL,
PRIMARY KEY(ID),
UNIQUE KEY ux_undo_log(XID,branch_id)
)ENGINE = InnoDB AUTO_INCREMENT = 1 DEFAULT CHARSET = utf8;
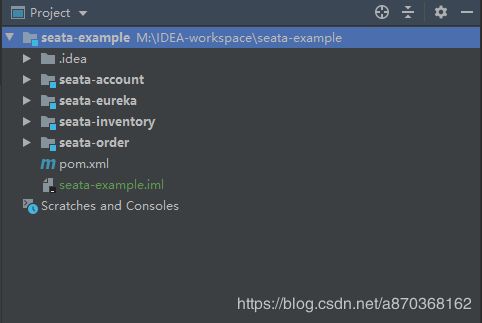
创建项目
- 添加依赖
   <properties>
       <seata.version>0.8.0</seata.version>
   </properties>

   <dependency>
      <groupId>io.seata</groupId>
      <artifactId>seata-all</artifactId>
      <version>${seata.version}</version>
   </dependency>

   <dependency>
      <groupId>com.alibaba.cloud</groupId>
      <artifactId>spring-cloud-alibaba-seata</artifactId>
      <version>2.1.0.RELEASE</version>
   </dependency>
2.添加Seata的配置文件file.conf,注意service中服务的地址需要跟你下载的服务地址一致,默认为127.0.0.1:8091,不需要修改
file.conf 的 service.vgroup_mapping 配置必须和spring.application.name一致
在 org.springframework.cloud:spring-cloud-starter-alibaba-seata的org.springframework.cloud.alibaba.seata.GlobalTransactionAutoConfiguration类中,默认会使用 ${spring.application.name}-fescar-service-group作为服务名注册到 Seata Server上,如果和file.conf中的配置不一致,会提示 no available server to connect错误
也可以通过配置 spring.cloud.alibaba.seata.tx-service-group修改后缀,但是必须和file.conf中的配置保持一致
transport {
  # tcp udt unix-domain-socket
  type = "TCP"
  #NIO NATIVE
  server = "NIO"
  #enable heartbeat
  heartbeat = true
  #thread factory for netty
  thread-factory {
    boss-thread-prefix = "NettyBoss"
    worker-thread-prefix = "NettyServerNIOWorker"
    server-executor-thread-prefix = "NettyServerBizHandler"
    share-boss-worker = false
    client-selector-thread-prefix = "NettyClientSelector"
    client-selector-thread-size = 1
    client-worker-thread-prefix = "NettyClientWorkerThread"
    # netty boss thread size,will not be used for UDT
    boss-thread-size = 1
    #auto default pin or 8
    worker-thread-size = 8
  }
}
service {
  #vgroup->rgroup
  vgroup_mapping.这里需要写你spring.application.name的名字-fescar-service-group = "这里要写你seata服务的名字,比如我的是seata-service"
  #only support single node
  default.grouplist = "127.0.0.1:8091"
  #degrade current not support
  enableDegrade = false
  #disable
  disable = false
  disableGlobalTransaction = false
}

client {
  async.commit.buffer.limit = 10000
  lock {
    retry.internal = 10
    retry.times = 30
  }
}
registry.conf 此处的注册中心可以根据自身需求配置,type=“eureka”,表示我的注册中心为eureka
registry {
  # file 、nacos 、eureka、redis、zk
  type = "eureka"

  nacos {
    serverAddr = "localhost"
    namespace = "public"
    cluster = "default"
  }
  eureka {
    serviceUrl = "http://localhost:8761/eureka"
    application = "seata-service"
    weight = "1"
  }
  redis {
    serverAddr = "localhost:6381"
    db = "0"
  }
  zk {
    cluster = "default"
    serverAddr = "127.0.0.1:2181"
    session.timeout = 6000
    connect.timeout = 2000
  }
  file {
    name = "file.conf"
  }
}

config {
  # file、nacos 、apollo、zk
  type = "file"

  nacos {
    serverAddr = "localhost"
    namespace = "public"
    cluster = "default"
  }
  apollo {
    app.id = "fescar-server"
    apollo.meta = "http://192.168.1.204:8801"
  }
  zk {
    serverAddr = "127.0.0.1:2181"
    session.timeout = 6000
    connect.timeout = 2000
  }
  file {
    name = "file.conf"
  }
}
注入 DataSourceProxy
Seata是通过代理数据源实现分布式事务,所以需要配置io.seata.rm.datasource.DataSourceProxy的Bean,且是@Primary默认的数据源,否则事务不会回滚,无法实现分布式事务
@Configuration
public class DataSourceConfig {

    @Bean
    @ConfigurationProperties(prefix = "spring.datasource")
    public DruidDataSource druidDataSource() {
        return new DruidDataSource();
    }

    /**
     * 需要将 DataSourceProxy 设置为主数据源,否则事务无法回滚
     *
     * @param druidDataSource The DruidDataSource
     * @return The default datasource
     */
    @Primary
    @Bean("dataSource")
    public DataSource dataSource(DruidDataSource druidDataSource) {
        return new DataSourceProxy(druidDataSource);
    }
}
因为使用了mybatis的starter所以需要排除DataSourceAutoConfiguration,不然会产生循环依赖
@SpringBootApplication(exclude = {DataSourceAutoConfiguration.class})
在需要进行分布式事务的方法上添加@GlobalTransactional注解即可(这里需要注意一点,单点故障的问题,由于协调者的重要性,一旦协调者发生故障。参与者会一直阻塞下去。尤其在第二阶段,协调者发生故障,那么所有的参与者还都处于锁定事务资源的状态中,而无法继续完成事务操作。(如果是协调者挂掉,可以重新选举一个协调者,但是无法解决因为协调者宕机导致的参与者处于阻塞状态的问题)
