Spring Cloud Alibaba实战(一) - Nacos动态配置
目录
(一)Nacos动态配置
(二)Nacos注册中心
(三)Sentinel之限流
(四)Sentinel之熔断
(五)Gateway之路由、限流
(六)Gateway之鉴权、日志
(七)Gateway搭配Nacos实现动态路由
(八)Dubbo + Nacos
正文
前两年的Spring微服务世界,Netflix OSS一枝独秀,阿里巴巴仅有的Dubbo偶尔登场,通常也是被拿来衬托Netflix的优秀。但是美好的时光总是短暂的,很快Eureka2宣布闭源,Hyxtrix不再更新,Netflix就此抛弃了Spring及拥趸。
这时,阿里巴巴站出来说,不用怕,还有我们的Spring Cloud Alibaba全家桶,等你吃过后,就会回来和我一起唱这首"Only you"。
真的吗?不妨探索一番再做决定。
首先规划一个项目,功能需求如下图:
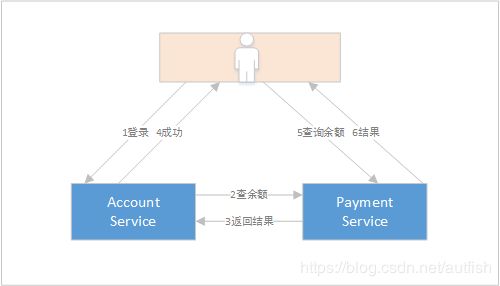
服务端分为账号和支付两个服务,客户端需要调用账号服务的登录接口和支付服务的查询余额接口,同时为了简化客户端处理,登录成功后账号服务会调用查询余额接口一同返回余额信息。
在技术选型上,尽可能使用Alibaba的组件,主要选择如下:
- 使用Nacos作为配置中心(相当于Spring Cloud Config + Bus)
- 使用Nacos作为注册中心,实现服务注册和发现
- 使用Feign作为服务调用组件
- 使用Ribbon实现服务调用的负载均衡
- 使用Sentinel实现限流和熔断, 并结合Nacos实现动态配置
- 使用Spring Cloud Gateway作为API网关
架构设计如下图:

下面进入开发环节,本节首先探索Nacos的动态配置功能。
1 配置JAVA_HOME
2 下载Nacos
https://github.com/alibaba/nacos/releases
3 运行
Windows环境:
解压后进入nacos/bin目录,执行startup.cmd
Linux环境:
tar -xzf nacos-server-1.0.0.tar.gz
cd nacos/bin
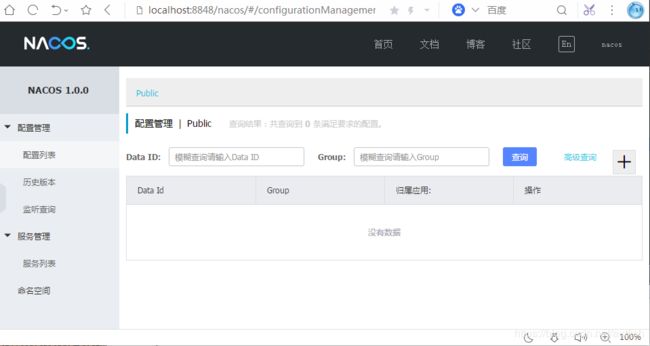
sh startup.sh &4 进入管理后台
如果启动成功,Nacos在8848端口绑定管理端Web应用程序,例如在本机运行则入口是http://localhost:8848/nacos/,默认用户名和密码都是nacos。
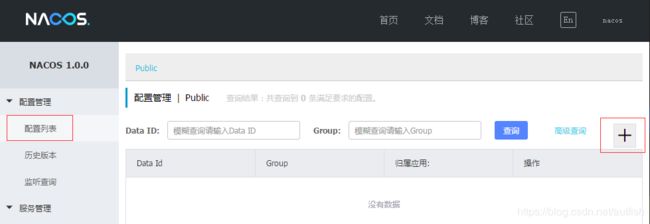
5 创建应用
创建一个SpringBoot应用,Artiface=payment-service
依赖:
            org.springframework.boot
            spring-boot-starter-web


            org.springframework.boot
            spring-boot-starter-test
            test
application.yml
spring:
   profiles:
     active: dev
server:
  port: 8082
sleep: 0
创建一个pojo类:Balance.java
public class Balance {

    private int id;
    private int diamond;
    private int ticket;
    private String message;

    public Balance() {
    }

    public Balance(int id, int diamond, int ticket) {
        this(id, diamond, ticket, "OK");
    }

    public Balance(int id, int diamond, int ticket, String message) {
        this.id = id;
        this.diamond = diamond;
        this.ticket = ticket;
        this.message = message;
    }
    //Setter/Getter略
}
创建Controller
@RestController
public class PaymentController {

    @Value("${sleep:0}")
    private int sleep;

    final static Map balanceMap = new HashMap() {{
            put(1, new Balance(1, 10, 1000));
            put(2, new Balance(2, 0, 10000));
            put(3, new Balance(3, 100, 0));
        }
    };

    @RequestMapping("/pay/balance")
    public Balance getBalance(Integer id) {
        System.out.println("request: /pay/balance?id=" + id + ", sleep: " + sleep);
        if(sleep > 0) {
            try {
                Thread.sleep(sleep);
            } catch (InterruptedException e) {
                e.printStackTrace();
            }
        }
        if(id != null && balanceMap.containsKey(id)) {
            return balanceMap.get(id);
        }
        return new Balance(0, 0, 0);
    }
}
启动应用并测试

6 引入Nacos实现sleep参数动态配置
修改 pom.xml 添加相关依赖
        1.8
        Greenwich.SR1
        0.9.0.RELEASE


            org.springframework.boot
            spring-boot-starter-web


            org.springframework.cloud
            spring-cloud-starter-alibaba-nacos-config
            ${alibaba.version}


            org.springframework.boot
            spring-boot-starter-test
            test


                org.springframework.cloud
                spring-cloud-dependencies
                ${spring-cloud.version}
                pom
                import
添加bootstrap.yml,其中 server-addr即Nacos监听IP和端口
spring:
  application:
    name: payment-service
  cloud:
    nacos:
      config:
        server-addr: 127.0.0.1:8848
在Controller 上添加 @RefreshScope注解
@RestController
@RefreshScope
public class PaymentController {
打开Nacos管理后台创建配置
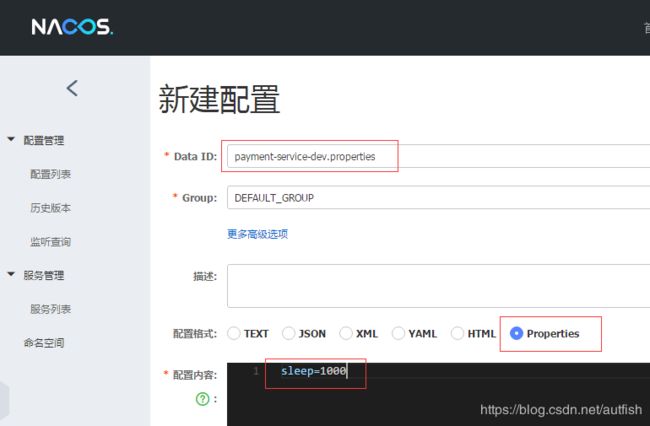
点击发布
重启payment-service,可以看到启动窗口中显示
b.c.PropertySourceBootstrapConfiguration : Located property source: CompositePropertySource {name='NACOS', propertySources=[NacosPropertySource {name='payment-service-dev.properties'}, NacosPropertySource {name='payment-service.properties'}]}刷新http://localhost:8082/pay/balance?id=1可以看到响应延迟1秒,同时控制台显示
request: /pay/balance?id=1, sleep: 1000证明Nacos上的配置已经生效并覆盖了本地配置。接下来修改Nacos中的sleep值为2000,点击发布后立刻在payment-service控制台中显示
o.s.c.e.event.RefreshEventListener : Refresh keys changed: [sleep]从开发过程可以看出,相比原来的Spring Cloud Config + Bus总线 + MQ + Github的配置方式,使用Nacos可以大幅简化配置和开发工作,后续结合Sentinel更能展现动态设置限流等强大功能。
本文源码下载地址
https://download.csdn.net/download/autfish/11176177
下一节将使用Feign和Robbin实现远程调用及负载均衡。
扫扫更健康
