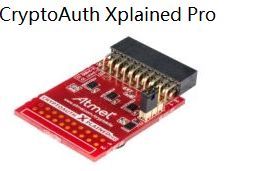
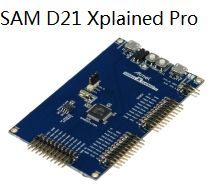
ATECC508A加密芯片
ATECC508A加密芯片使用
开一个帖子交流下ATECC508A,也包括同类型芯片ATSHA208A
- demo使用
- 串口调试
- ConfigZone配置
- DataZone配置
- 加密读写
- 挑战(challenge)应答及校验
- Openssl相关
- 证书相关
demo使用
目前官网上能下载到的demo有cryptoauth-node-auth-basic和cryptoauth-d21-host
接下来的问题围绕着demo中代码展开讨论
串口调试
ConfigZone配置
重点说一下ReadKey和WriteKey,恰恰是这两个简单的说明,让人不清楚这两个参数如何使用。
在bit6和bit7配置为1的时候,本slot需要加密读或者写,所以需要秘钥,这个秘钥是需要存储在parent slot中的,这个parent slot的ID就是这两个Key。所以加密读写slot的时候,需要首先在parent key的slot中写入秘钥,然后再修改需要加密读写的slot。
DataZone配置
待补充
Demo数据分析
Demo中提供了一套配置参数,解析如下
tatic const uint8_t g_ecc_configdata[128] = {
0x01, 0x23, 0x00, 0x00, 0x00, 0x00, 0x50, 0x00, 0x04, 0x05, 0x06, 0x07, 0xEE, 0x00, 0x01, 0x00,
0xC0, 0x00, 0x55, 0x00, 0x8F, 0x20, 0xC4, 0x44, 0x87, 0x20, 0xC4, 0x44, 0x8F, 0x0F, 0x8F, 0x8F,
0x9F, 0x8F, 0x83, 0x64, 0xC4, 0x44, 0xC4, 0x44, 0x0F, 0x0F, 0x0F, 0x0F, 0x0F, 0x0F, 0x0F, 0x0F,
0x0F, 0x0F, 0x0F, 0x0F, 0xFF, 0xFF, 0xFF, 0xFF, 0x00, 0x00, 0x00, 0x00, 0xFF, 0xFF, 0xFF, 0xFF,
0x00, 0x00, 0x00, 0x00, 0xFF, 0xFF, 0xFF, 0xFF, 0xFF, 0xFF, 0xFF, 0xFF, 0xFF, 0xFF, 0xFF, 0xFF,
0xFF, 0xFF, 0xFF, 0xFF, 0x00, 0x00, 0x00, 0x00, 0xFF, 0xFF, 0x00, 0x00, 0x00, 0x00, 0x00, 0x00,
0x33, 0x00, 0x1C, 0x00, 0x13, 0x00, 0x1C, 0x00, 0x3C, 0x00, 0x1C, 0x00, 0x1C, 0x00, 0x33, 0x00,
0x1C, 0x00, 0x1C, 0x00, 0x3C, 0x00, 0x3C, 0x00, 0x3C, 0x00, 0x3C, 0x00, 0x3C, 0x00, 0x3C, 0x00 };
利用程序分析如下:
serial NUM: 0x01 0x23 0x00 0x00 0x04 0x05 0x06 0x07 0xee
I2C enable: 0x01
I2C address: 0xc0
check mac: 0x00
OPT mode: 0x55
chip mode: 0x00
slot00 config: 0x8f 0x20 ; ReadKey:0B1111; NoMac:0; LimitUse:0; EncryptRead:0; IsSecret:1; WriteKey:0B0000; WriteConfig:0B0010;
slot01 config: 0xc4 0x44 ; ReadKey:0B0100; NoMac:0; LimitUse:0; EncryptRead:1; IsSecret:1; WriteKey:0B0100; WriteConfig:0B0100;
slot02 config: 0x87 0x20 ; ReadKey:0B0111; NoMac:0; LimitUse:0; EncryptRead:0; IsSecret:1; WriteKey:0B0000; WriteConfig:0B0010;
slot03 config: 0xc4 0x44 ; ReadKey:0B0100; NoMac:0; LimitUse:0; EncryptRead:1; IsSecret:1; WriteKey:0B0100; WriteConfig:0B0100;
slot04 config: 0x8f 0x0f ; ReadKey:0B1111; NoMac:0; LimitUse:0; EncryptRead:0; IsSecret:1; WriteKey:0B1111; WriteConfig:0B0000;
slot05 config: 0x8f 0x8f ; ReadKey:0B1111; NoMac:0; LimitUse:0; EncryptRead:0; IsSecret:1; WriteKey:0B1111; WriteConfig:0B1000;
slot06 config: 0x9f 0x8f ; ReadKey:0B1111; NoMac:1; LimitUse:0; EncryptRead:0; IsSecret:1; WriteKey:0B1111; WriteConfig:0B1000;
slot07 config: 0x83 0x64 ; ReadKey:0B0011; NoMac:0; LimitUse:0; EncryptRead:0; IsSecret:1; WriteKey:0B0100; WriteConfig:0B0110;
slot08 config: 0xc4 0x44 ; ReadKey:0B0100; NoMac:0; LimitUse:0; EncryptRead:1; IsSecret:1; WriteKey:0B0100; WriteConfig:0B0100;
slot09 config: 0xc4 0x44 ; ReadKey:0B0100; NoMac:0; LimitUse:0; EncryptRead:1; IsSecret:1; WriteKey:0B0100; WriteConfig:0B0100;
slot10 config: 0x0f 0x0f ; ReadKey:0B1111; NoMac:0; LimitUse:0; EncryptRead:0; IsSecret:0; WriteKey:0B1111; WriteConfig:0B0000;
slot11 config: 0x0f 0x0f ; ReadKey:0B1111; NoMac:0; LimitUse:0; EncryptRead:0; IsSecret:0; WriteKey:0B1111; WriteConfig:0B0000;
slot12 config: 0x0f 0x0f ; ReadKey:0B1111; NoMac:0; LimitUse:0; EncryptRead:0; IsSecret:0; WriteKey:0B1111; WriteConfig:0B0000;
slot13 config: 0x0f 0x0f ; ReadKey:0B1111; NoMac:0; LimitUse:0; EncryptRead:0; IsSecret:0; WriteKey:0B1111; WriteConfig:0B0000;
slot14 config: 0x0f 0x0f ; ReadKey:0B1111; NoMac:0; LimitUse:0; EncryptRead:0; IsSecret:0; WriteKey:0B1111; WriteConfig:0B0000;
slot15 config: 0x0f 0x0f ; ReadKey:0B1111; NoMac:0; LimitUse:0; EncryptRead:0; IsSecret:0; WriteKey:0B1111; WriteConfig:0B0000;
counter 0: 0xff 0xff 0xff 0xff 0x00 0x00 0x00 0x00
counter 1: 0xff 0xff 0xff 0xff 0x00 0x00 0x00 0x00
LastKeyUse:0xff 0xff 0xff 0xff 0xff 0xff 0xff 0xff 0xff 0xff 0xff 0xff 0xff 0xff 0xff 0xff
UserEctrax: 0x00
SelectorX: 0x00
LockValue: 0x00
LockConfig: 0x00
SlotLockedX: 0xff 0xff
Rfu90: 0x00 0x00
X509Format : 0x00 0x00 0x00 0x00
KeyConfig00 config: 0x33 0x00 ; Private:1; Pubinfo:1; KeyType:0B100;
KeyConfig01 config: 0x1c 0x00 ; Private:0; Pubinfo:0; KeyType:0B111;
KeyConfig02 config: 0x13 0x00 ; Private:1; Pubinfo:1; KeyType:0B100;
KeyConfig03 config: 0x1c 0x00 ; Private:0; Pubinfo:0; KeyType:0B111;
KeyConfig04 config: 0x3c 0x00 ; Private:0; Pubinfo:0; KeyType:0B111;
KeyConfig05 config: 0x1c 0x00 ; Private:0; Pubinfo:0; KeyType:0B111;
KeyConfig06 config: 0x1c 0x00 ; Private:0; Pubinfo:0; KeyType:0B111;
KeyConfig07 config: 0x33 0x00 ; Private:1; Pubinfo:1; KeyType:0B100;
KeyConfig08 config: 0x1c 0x00 ; Private:0; Pubinfo:0; KeyType:0B111;
KeyConfig09 config: 0x1c 0x00 ; Private:0; Pubinfo:0; KeyType:0B111;
KeyConfig10 config: 0x3c 0x00 ; Private:0; Pubinfo:0; KeyType:0B111;
KeyConfig11 config: 0x3c 0x00 ; Private:0; Pubinfo:0; KeyType:0B111;
KeyConfig12 config: 0x3c 0x00 ; Private:0; Pubinfo:0; KeyType:0B111;
KeyConfig13 config: 0x3c 0x00 ; Private:0; Pubinfo:0; KeyType:0B111;
KeyConfig14 config: 0x3c 0x00 ; Private:0; Pubinfo:0; KeyType:0B111;
KeyConfig15 config: 0x3c 0x00 ; Private:0; Pubinfo:0; KeyType:0B111;
加密读写
Datasheet上表示了加密读写的两种用法,但是描述不清楚,或者因为个人理解有限吧。
参照**cryptoauth-node-auth-basic**demo中的函数说明,测试了加密读写接口,文件为atca_basic.c文件中的两个函数
加密写接口如下
/** \brief Write 32 bytes of data into given slot.
 *      The function takes clear text bytes, but encrypts them for writing over the wire
 *      Data zone must be locked and the slot configuration must be set to encrypted write for the block to be successfully written
 *  \param[in] slotid
 *  \param[in] block
 *  \param[in] data      The 32 bytes of clear text data to be written to the slot
 *  \param[in] enckey    The key to encrypt with for writing
 *  \param[in] enckeyid  The keyid of the parent encryption key
 *  returns ATCA_STATUS
 */
ATCA_STATUS atcab_write_enc(uint8_t slotid, uint8_t block, const uint8_t *data, const uint8_t* enckey, const uint16_t enckeyid)
加密读接口如下
/** \brief Read 32 bytes of data from the given slot.
 *      The function returns clear text bytes. Encrypted bytes are read over the wire, then subsequently decrypted
 *      Data zone must be locked and the slot configuration must be set to encrypted read for the block to be successfully read
 *  \param[in]  slotid    The slot id for the encrypted read
 *  \param[in]  block     The block id in the specified slot
 *  \param[out] data      The 32 bytes of clear text data that was read encrypted from the slot, then decrypted
 *  \param[in]  enckey    The key to encrypt with for writing
 *  \param[in]  enckeyid  The keyid of the parent encryption key
 *  returns ATCA_STATUS
 */
ATCA_STATUS atcab_read_enc(uint8_t slotid, uint8_t block, uint8_t *data, const uint8_t* enckey, const uint16_t enckeyid)
目前疑惑的地方就是这个enckey参数,究竟是从哪里来的,我随意写出来的enckey参数,加密写入没问题,但是读取的时候,就会返回出来错误的数据,与写入的不一致,希望能有人一起讨论一下
2017-10-11 15:51(修改)
问题已经解决,这个enckey是需要首先写入芯片,作为存储秘钥的slot的parent slot,并且这个enckye在随后向slot写入和读取秘钥的时候,都是作为必备参数的。
挑战(challenge)应答及校验
芯片本身的挑战响应与校验方式很简单,参照文件node_auth.c中的两个函数,改写测试函数如下
slot0提供公钥,host得到公钥保存起来。
static int get_pub_key(void)
{
    int ret = 0;
    int i = 0;


    //slot0上生成key
    ret = atcab_genkey(0, device_public_key);
    if (ret != ATCA_SUCCESS) return ret;

    printf("\r\n device_public_key:");
    for(i=0;i<64;i++)
    {
        printf("0x%02x,",device_public_key[i]);
    }
    printf("\r\n");

    char displaystr[256];
    int displaylen = sizeof(displaystr);

    atcab_bin2hex(device_public_key, 64, displaystr, &displaylen );
    printf("\r\n device_public_key:\r\n%s\r\n", displaystr);

    return 0;

}
host随机一个挑战,发送给芯片,芯片用slot0做出应答,
挑战应答函数如下
static int get_response(void)
{
    int ret = 0;
    int i = 0;

    //设备使用slot0响应challenge,得到response
    ret = atcacert_get_response(0, s_challenge, s_response);
    if (ret != ATCACERT_E_SUCCESS) return ret;

    printf("\r\n s_response:");
    for(i=0;i<64;i++)
    {
        printf("0x%02x,",s_response[i]);
    }
    printf("\r\n");

    char displaystr[256];
    int displaylen = sizeof(displaystr);

    atcab_bin2hex(s_response, 64, displaystr, &displaylen );
    printf("\r\n s_response:\r\n%s\r\n", displaystr);
    return 0;
}
这样host拥有了公钥,挑战,和挑战应答,就可以验证芯片是否合法有效了
芯片本身也可以检查其他人发送过来的,公钥,挑战和应答是否合法有效
应答检查函数如下
static int check_response(void)
{
    int ret = 0;
    int i = 0;
    char displaystr[256];
    int displaylen = sizeof(displaystr);
    char displaystr2[256];
    int displaylen2 = sizeof(displaystr);
    char displaystr3[256];
    int displaylen3 = sizeof(displaystr);


    //检验设备应答
    ret = atcacert_verify_response_hw(device_public_key, s_challenge, s_response);


    printf("\r\n device_public_key:");
    for(i=0;i<64;i++)
    {
        printf("0x%02x,",device_public_key[i]);
    }
    printf("\r\n");

    atcab_bin2hex(device_public_key, 64, displaystr, &displaylen );
    printf("\r\n device_public_key:\r\n%s\r\n", displaystr);

    printf("\r\n s_challenge:");
    for(i=0;i<32;i++)
    {
        printf("0x%02x,",s_challenge[i]);
    }
    printf("\r\n");

    memset(displaystr,0x0,256);
    atcab_bin2hex(s_challenge, 32, displaystr2, &displaylen2 );
    printf("\r\n s_challenge:\r\n%s\r\n", displaystr2);


    printf("\r\n s_response:");
    for(i=0;i<64;i++)
    {
        printf("0x%02x,",s_response[i]);
    }
    printf("\r\n");

    memset(displaystr,0x0,256);
    atcab_bin2hex(s_response, 64, displaystr3, &displaylen3 );
    printf("\r\n s_response:\r\n%s\r\n", displaystr3);


    if (ret != ATCACERT_E_SUCCESS)
    {
            printf("HOST: Device response to challenge fail!\r\n");
    }
    else
    {
            printf("HOST: Device response to challenge verified!\r\n");

    }

    return ret;
}
Openssl相关
之所以提到Openssl,例如在检查挑战应答是否合法的时候,是在host里面,如果host里面没有ATECC508芯片的话,那就需要软件实现ECDSA算法来校验应答是否正确
网上查看了相关同学的博客,也没有找到合适的C语言代码
结合openssl的头文件,找到了一个相关函数
说明如下
/** Verifies that the given signature is valid ECDSA signature
 *  of the supplied hash value using the specified public key.
 *  \param  type     this parameter is ignored
 *  \param  dgst     pointer to the hash value
 *  \param  dgstlen  length of the hash value
 *  \param  sig      pointer to the DER encoded signature
 *  \param  siglen   length of the DER encoded signature
 *  \param  eckey    EC_KEY object containing a public EC key
 *  \return 1 if the signature is valid, 0 if the signature is invalid
 *          and -1 on error
 */
int ECDSA_verify(int type, const unsigned char *dgst, int dgstlen,
                 const unsigned char *sig, int siglen, EC_KEY *eckey);
2017-10-12 补充
编写了一段代码模拟主机验证挑战、应答和公钥的正确性
#include printf("0x%02x ",digest[i]);
}
printf("\r\n");
/* 获取实现的椭圆曲线个数 */
crv_len = EC_get_builtin_curves(NULL, 0);
curves = (EC_builtin_curve *)malloc(sizeof(EC_builtin_curve) * crv_len);
/* 获取椭圆曲线列表 */
EC_get_builtin_curves(curves, crv_len);
for(i=0;i//printf("curves[%d]:[%d]%s \r\n",i,curves[i].nid,curves[i].comment);
int ret = verify(curves[i].nid,(const unsigned char *)&response,sizeof(response),(const unsigned char *)&digest,dgst_len);
if(ret==1)
{
printf("|keytype:[%d]:[%s] Verify:OK\n",curves[i].nid,curves[i].comment);
}
else
{
printf("|keytype:[%d]:[%s] Verify:Error\n",curves[i].nid,curves[i].comment);
}
}
return 0;
}
目前还是存在问题,o2i_ECPublicKey将秘钥从buffer导出成EC_KEY格式的时候一直有问题,目前尚不清楚原因为何


