Spring Security 实战 - 表单认证
在上一节中,我们初步引入了Spring Security,并使用了其默认生效的HTTP Basic认证形式保护url资源,本节我们将尝试使用表单认证来达到同样的目的。
说明
本章节摘自《Spring Security 实战》第二章 - 表单认证,更多内容请购书学习。
目前已经上线京东,首批仅需6.8折,猛搓购买:京东 -《Spring Security 实战》

默认表单认证
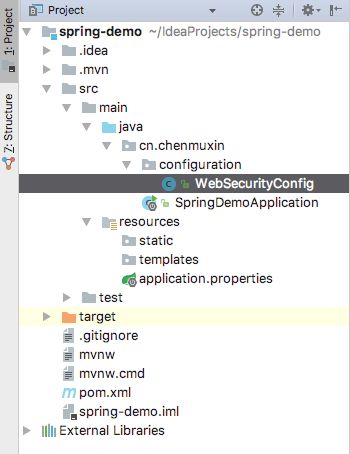
首先新建一个configuration包用于存放通用配置,接着新建一个WebSecurityConfig类,并使其继承WebSecurityConfigurerAdapter:
对WebSecutiryConfig加上@EnableWebSecurity注解便会自动被Spring发现并注册(翻看@EnableWebSecurity我们可以看到它已经存在@Configuration注解,所以此处并不需要额外添加):
@EnableWebSecurity
public class WebSecurityConfig extends WebSecurityConfigurerAdapter {

}
接着查看WebSecurityConfigurerAdapter类对于configure(HttpSecurity http)的定义:
protected void configure(HttpSecurity http) throws Exception {
    this.logger.debug("Using default configure(HttpSecurity). If subclassed this will potentially override subclass configure(HttpSecurity).");
    ((HttpSecurity)((HttpSecurity)((AuthorizedUrl)http.authorizeRequests().anyRequest()).authenticated().and()).formLogin().and()).httpBasic();
}
也即在我们没有做其他更多编码时,继承WebSecurityConfigurerAdapter就已经默认帮我们声明了一些安全特性:
- 验证所有请求。
- 允许用户使用基于表单的登录进行身份验证(Spring Security为我们提供了一个简陋的表单登录页面)。
- 允许用户使用基于HTTP Basic进行认证。
现在我们重启服务,以应用新的安全配置。可以预见,下次访问localhost:8080时,系统会要求我们进行表单验证。
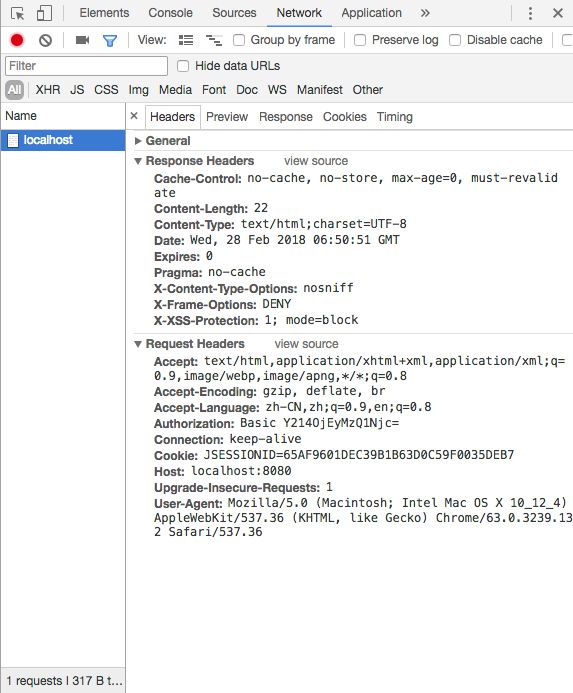
结果很意外,无论怎么刷新,似乎都无法看到登录页面,这是怎么回事?我们可以从浏览器的开发者工具中找到蛛丝马迹(chrome可以使用快捷键F12调出,其它浏览器就不赘述了):
可以清楚地看到,浏览器发出的请求头中自动携带着Authorization属性,由于Spring Security的配置刚好也同时支持HTTP Basic认证,所以并不需要重新在表单中登录即可访问系统资源。这实际上属于浏览器的默认行为,只要在HTTP Basic中成功认证过,便会自动记住一段时间,不需要再次登录。那么我们怎么避免这种情况呢?IE浏览器可以通过在控制台执行下面的语句来达到清除HTTP Basic认证缓存的目的:
document.execCommand("ClearAuthenticationCache")
但这在chrome下并不适用,虽然也有其它办法可以做到,但这里建议调试时直接使用浏览器的无痕模式即可,简单方便,也能避免很多缓存问题。(windows版本chrome浏览器用ctrl+shift+n打开,mac版本用command+shift+n打开)。
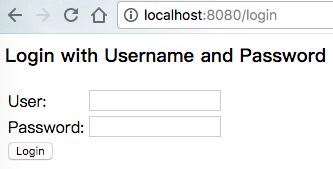
经过一些小插曲,我们终于成功访问到了表单登录页:
在地址栏可以发现,我们访问的地址自动跳转到了localhost:8080/login下,这正是Spring Security默认的登录页,只要输入正确的用户名和密码便会跳转回原访问地址。
自定义表单登录
1. 初步配置自定义登录页面
虽然自动生成的登录页可以很方便、快速地启动运行,但大多数应用程序更希望提供自己的登录页面,此时我们就需要覆写configure方法了:
@EnableWebSecurity
public class WebSecurityConfig extends WebSecurityConfigurerAdapter {

    @Override
    protected void configure(HttpSecurity http) throws Exception {
        http.authorizeRequests()
                .anyRequest().authenticated()
                .and()
            .formLogin()
                .loginPage("/myLogin.html")
                // 使登录页面不设限访问
                .permitAll()
                .and()
            .csrf().disable();
    }

}
2. 认识HttpSecurity
在此我们有必要了解一下这些HttpSecurity是什么,HttpSecurity事实上对应了Spring Securtiy命名空间配置方式中,XML文件内的标签,允许我们为特定的http请求配置安全策略。
在XML文件中声明大量配置早已司空见惯,但在Java配置中,按照传统的方式,我们需要这么来调用:
@EnableWebSecurity
public class WebSecurityConfig extends WebSecurityConfigurerAdapter {

    @Override
    protected void configure(HttpSecurity http) throws Exception {
        ExpressionUrlAuthorizationConfigurer.ExpressionInterceptUrlRegistry urlRegistry
        = http.authorizeRequests();
        ExpressionUrlAuthorizationConfigurer.AuthorizedUrl authorizedUrl
        =  (ExpressionUrlAuthorizationConfigurer.AuthorizedUrl)urlRegistry.anyRequest();
        authorizedUrl.authenticated();
        // more...

        FormLoginConfigurer formLoginConfigurer = http.formLogin();
        formLoginConfigurer.loginPage("/myLogin.html");
        formLoginConfigurer.permitAll();

        // more...
    }

}
可以想象得到这是多么繁琐且令人痛苦的一件事。从这方面考虑,HttpSecurity首先被设计为链式调用,在每个方法执行后,都会返回一个预期的上下文,便于连续调用,而不需要关心每个方法究竟返回了什么,怎么继续下一个配置等细节。
HttpSecurity提供了很多有用的配置相关的方法,对应了命名空间配置中的子标签,例如,authorizeRequests()、formLogin()、httpBasic()和csrf()分别对应了、、和标签。调用这些方法之后,链式调用的上下文将自动进入相对应标签域,除非使用and()方法表明结束当前标签,上下文才会继续回到HttpSecurity。
authorizeRequests()实际上返回了一个表达式url拦截注册器,我们可以调用其提供的anyanyRequest()、antMatchers()、regexMatchers()等方法来匹配系统的url,并为其指定安全策略。
formLogin()跟httpBasic()都声明了需要Spring Security提供的认证方式,分别返回对应的配置器,其中,formLogin().loginPage("/myLogin.html")指定了自定义的登录页面/myLogin.html,同时,Spring Security也会用/myLogin.html注册一个POST路由,用于接受登录请求。
csrf()是Spring Security为我们提供的跨站请求伪造防护能力,当我们继承WebSecurityConfigurerAdapter时就已经默认开启,关于csrf的问题,后续的章节会专门探讨,暂时将其关闭,以使测试进程更加顺利。
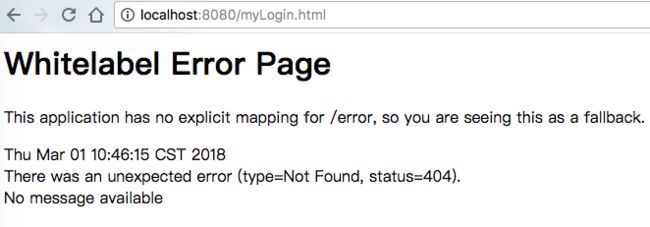
正如所见,重新启动服务之后再次访问localhost:8080,页面便自动跳转到了localhost:8080/myLogin.html,只是由于/myLogin.html无法定位到页面资源,会显示一个404页面:
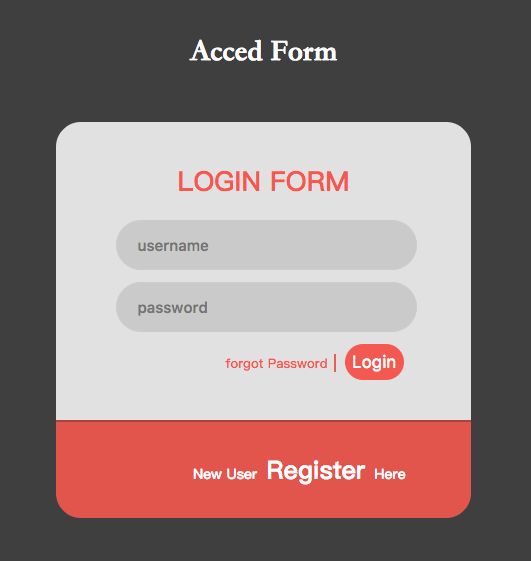
3. 编写登录页面
既然配置了使用自定义登录页,那它就必不可少:
<html>
    <head>
        <title>登录title>
        <meta http-equiv="Content-Type" content="text/html; charset=utf-8" />
        <style>

        style>
    head>
    <body>
        <div class="login">
            <h2>Acced Formh2>
            <div class="login-top">
                <h1>LOGIN FORMh1>
                <form action="myLogin.html" method="post">
                    <input type="text" name="username" placeholder="username" />
                    <input type="password" name="password" placeholder="password" />
                    <div class="forgot">
                        <a href="#">forgot Passworda>
                        <input type="submit" value="Login" >
                    div>
                form>
            div>
            <div class="login-bottom">
                <h3>New User  <a href="#">Registera>  Hereh3>
            div>
        div>
    body>
html>
myLogin.html来自网络上的开源模板,经过一些简单的修改。篇幅原因,css样式部分已被截取。
登录页面很简单,仅仅编写了一个表单,用户名、密码分别起名为username和password,并以POST方式提交到/myLogin.html。
我们将其命名为myLogin.html并放置到resources/static/下,重启服务,再次访问localhost:8080即可看到此自定义的登录页面:
输入正确的用户名和密码,点击Login,页面成功跳转,与预期相符。
4. 其它表单配置项
自定义了登录页面之后,处理登录请求的url也会相对应改变,如果我们需要自定义该url呢?也很简单,Spring Security在表单定制里也提供了相应的支持:
@EnableWebSecurity
public class WebSecurityConfig extends WebSecurityConfigurerAdapter {

    @Override
    protected void configure(HttpSecurity http) throws Exception {
        http.authorizeRequests()
                .anyRequest().authenticated()
                .and()
            .formLogin()
                .loginPage("/myLogin.html")
                // 指定处理登录请求的路径,POST请求
                .loginProcessingUrl("/login")
                .permitAll()
                .and()
            .csrf().disable();
    }

}
有些读者到此可能会有更深一层的想法,因为按照我们目前为止的惯例,都是在发送登录请求并认证成功之后,页面便跳转回原访问页,这在某些系统中是契合的,但并非所有。例如部分前后端完全分离,仅靠JSON完成所有交互的系统,会更倾向于登录时返回一段JSON数据,告知前端成功与否,并由前端决定如何处理后续逻辑,而非服务端主动执行页面跳转。这在Spring Security中同样有实现的可能:
@EnableWebSecurity
public class WebSecurityConfig extends WebSecurityConfigurerAdapter {

    @Override
    protected void configure(HttpSecurity http) throws Exception {
        http.authorizeRequests()
                .anyRequest().authenticated()
                .and()
            .formLogin()
                .loginPage("/myLogin.html")
                // 指定处理登录请求的路径,POST请求
                .loginProcessingUrl("/login")
                // 指定登录成功时的处理逻辑
                .successHandler(new AuthenticationSuccessHandler() {
                    @Override
                    public void onAuthenticationSuccess(
                        HttpServletRequest httpServletRequest,
                        HttpServletResponse httpServletResponse,
                        Authentication authentication
                    ) throws IOException, ServletException {
                        httpServletResponse.setContentType("application/json;charset=UTF-8");
                        PrintWriter out = httpServletResponse.getWriter();
                        out.write("{\"error_code\":\"0\", \"message\":\"欢迎登录系统\"}");
                    }
                })
                // 指定登录失败时的处理逻辑
                .failureHandler(new AuthenticationFailureHandler() {
                    @Override
                    public void onAuthenticationFailure(
                        HttpServletRequest httpServletRequest,
                        HttpServletResponse httpServletResponse,
                        AuthenticationException e
                    ) throws IOException, ServletException {
                        httpServletResponse.setContentType("application/json;charset=UTF-8");
                        httpServletResponse.setStatus(401);
                        PrintWriter out = httpServletResponse.getWriter();
                        // 输出认证失败原因
                        out.write("{\"error_code\":\"401\", \"name\":\""
                        + e.getClass() + "\", \"message\":\"" + e.getMessage() + "\"}");
                    }
                })
                .and()
            .csrf().disable();
    }

}
表单登录配置模块提供了successHandler和failureHandler两个方法分别用于处理登录成功和登录失败的逻辑,其中,successHandler带有一个Authentication参数,携带了当前登录用户名及其角色等信息,failureHandler则携带一个AuthenticationException异常参数。至于怎么来具体处理,完全可以按照系统的情况自定义。
在形式上,本节我们确实使用了Spring Security的表单验证功能,并自定义了登录页。但实际上,这还远远不够,例如,我们通常登录所使用的用户名和密码是来自数据库的,这里却写在配置上。更进一步,我们可能对每个登录用户都有详尽的权限设定,并非通用一个角色。这些都将在后续章节继续深入。
