目标检测Detectron安装教程及解决方案
本博客介绍了如何安装Detectron,其依赖项(包括Caffe2)和COCO数据集。
安装前所需知道的知识:
a、Detectron运营商目前没有CPU实施; 需要GPU系统。
b、caffe2 已经集成到pytorch1.0中,所以框架我们直接安装pytorch即可。
c、Detectron已经过CUDA 8.0和cuDNN 6.0.21的广泛测试,不过cuda其他版本也是可以的,比如cuda9.
d、首先先保证已经安装了cuda与cudnn,若是没安装,先安装这些。
e、官方教程链接:https://github.com/facebookresearch/Detectron/blob/master/INSTALL.md
1、创建独立conda虚拟环境变量
conda create -n detectron (detectron为虚拟环境的名字,名字随便取)2、激活环境变量
source activate detectron3、安装caffe2
首先安装相关的依赖项目:
sudo apt-get update
sudo apt-get install -y --no-install-recommends \
build-essential \
git \
libgoogle-glog-dev \
libgtest-dev \
libiomp-dev \
libleveldb-dev \
liblmdb-dev \
libopencv-dev \
libopenmpi-dev \
libsnappy-dev \
libprotobuf-dev \
openmpi-bin \
openmpi-doc \
protobuf-compiler \
python-dev \
python-pip
pip install --user \
future \
numpy \
protobuf \
typing \
hypothesis然后继续:
# for Ubuntu 14.04
sudo apt-get install -y --no-install-recommends \
      libgflags2 \
      cmake3
# for Ubuntu 16.04
sudo apt-get install -y --no-install-recommends \
      libgflags-dev \
      cmake
因为caffe2已经集成到pytorch1.0中,所以直接安装pytorch:
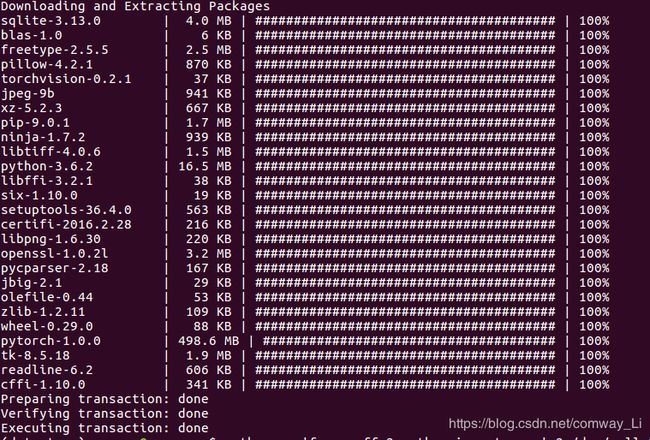
conda install pytorch torchvision -c pytorch漫长等待,安装。
注:若此处安装的时候出现solving enviroment failure,可以试试添加一些镜像源到anaconda里面去,
添加清华镜像源命令:
conda config --add channels https://mirrors.tuna.tsinghua.edu.cn/anaconda/pkgs/free/
conda config --set show_channel_urls yes
conda info
4、测试是否安装成功
# To check if Caffe2 build was successful
python -c 'from caffe2.python import core' 2>/dev/null && echo "Success" || echo "Failure"

# To check if Caffe2 GPU build was successful
# This must print a number > 0 in order to use Detectron
python -c 'from caffe2.python import workspace; print(workspace.NumCudaDevices())'
显示出结果为:Succes则成功,否则失败。
若为Failure,则:激活环境后,进入python编辑,输入:
from caffe2.python import core看会出现什么问题。我出现了几个问题,解决如下,若出现其他问题,就需要想办法解决了。
a、ModuleNotFoundError: No module named 'google',如 下图所示:
解决办法:
pip3 install google

conda install protobuf
b、 ModuleNotFoundError: No module named 'past',
解决办法:
conda install future
博主试了pip3 install future 可是还是报错,直至用conda安装才不会报错,conda安装的future是0.16.0版本。pip3安装的是0.07.1版本,不知为何?我猜应该是要特定的版本吧。
5、安装其他依赖项
安装coco api
# COCOAPI=/path/to/clone/cocoapi
git clone https://github.com/cocodataset/cocoapi.git $COCOAPI
cd $COCOAPI/PythonAPI
# Install into global site-packages
make install
# Alternatively, if you do not have permissions or prefer
# not to install the COCO API into global site-packages
python setup.py install --user
注:#号为注释,不用管。其中进行 git clone https://github.com/cocodataset/cocoapi.git $COCOAPI操作时,$COCOAPI是代指路径,注释中$COCOAPI路径我们可以随便改,你要把coco api安装到那个路径。这个路径随便用个路径就行。后面的$COCOAPI也是代指你要安装的路径。make all 命令的时候,会要下载一些东西,估计要等一会,不要着急,等待完成就好了。
出现问题:
a、在执行make install 时,出现gcc: error: pycocotools/_mask.c: 没有那个文件或目录
gcc: fatal error: no input files
compilation terminated.
error: command 'gcc' failed with exit status 1
Makefile:7: recipe for target 'install' failed
解决办法:
pip install cythonb、在执行pip install cython时,会出现 InvalidSchema: Missing dependencies for SOCKS support.
解决办法:其实所有用pip安装库的时候,出现这个问题,都可以用下面方法解决。
依次输入下面命令:
# Unset socks proxy
unset all_proxy
unset ALL_PROXY

# Install missing dependencies:
pip install pysocks

# Reset proxy
source ~/.bashrc
6、安装detectron
注:下面$DETECTRON是你要吧detectron安装到哪里的路径,可以随便制定,自己记住在哪就行。
a、克隆Detectron存储库:
# DETECTRON=/path/to/clone/detectron
git clone https://github.com/facebookresearch/detectron $DETECTRON
b、安装Python依赖项:
pip install -r $DETECTRON/requirements.txt
c、设置Python模块:
cd $DETECTRON && make
d、检查Detectron测试是否通过:
python $DETECTRON/detectron/tests/test_spatial_narrow_as_op.py若是没出错,就会出现运行时间秒数。
至此,安装成功。


