1,以太坊私有节点搭建
1,安装Geth:
从此处下载: http://ethfans.org/wikis/Ethereum-Geth-Mirror,本文使用版本:1.8.3
2,安装Mist:
https://github.com/ethereum/mist/releases/tag/v0.10.0 ,版本:0.10.0
2,编写genesis.json 合约文件,放到Geth安装目录下。(kvgenesis.json)
内容如下:
{
	"config": {
        "chainId": 10,
        "homesteadBlock": 0,
        "eip155Block": 0,
        "eip158Block": 0
    },
	"nonce": "0x0000000000000042",
	"mixhash": "0x0000000000000000000000000000000000000000000000000000000000000000",
	"difficulty": "0x4000",
	"alloc": {},
	"coinbase": "0x0000000000000000000000000000000000000000",
	"timestamp": "0x00",
	"parentHash": "0x0000000000000000000000000000000000000000000000000000000000000000",
	"extraData": "0x4b6576696e2047656e65736973426c6f636b",
	"gasLimit": "0xffffffff"
}
Parameters:
config.chainId // 区块链的ID,在 geth 命令中的 --networkid 参数需要与 chainId 的值一致
config.homesteadBlock // Homestead 硬分叉区块高度,不需要关注
config.eip155Block // EIP 155 硬分叉高度,不需要关注
config.eip158Block // EIP 158 硬分叉高度,不需要关注
nonce:64位随机数,用于挖矿,当与mixHash组合时,证明此区块已经执行了足够的计算,
mixHash:一个Hash值,当与nonce组合时,证明此区块已经执行了足够的计算以太坊挖矿算法:
difficulty:设置区块的难度。
alloc:用来预置账号以及账号的以太币数量,因为私有链挖矿比较容易,所以我们不需要预置有币的账号,需要的时候自己创建即可以。
alloccoinbase:矿工的账号,随便填
timestamp:设置创世块的时间戳
parentHash:上一个区块的hash值,因为是创世块,所以这个值是0
extraData:附加信息,随便填,可以填你的个性信息
gasLimit:该值设置对GAS的消耗总量限制,用来限制区块能包含的交易信息总和,因为我们是私有链,所以填最大。
3, Geth 创建节点:
开始--》运行--》cmd,
进入Geth安装目录,输入:
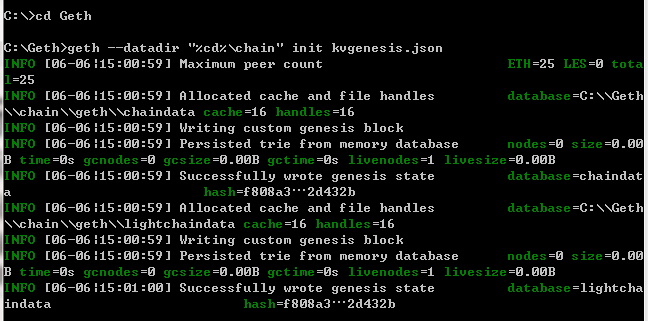
geth --datadir "%cd%\chain" init kvgenesis.json--datadir: 为文件产生的目录。
得到如下结果:创世区块创建成功:
查看Geth目录,发现生成chain文件夹及其相关目录文件。
4,启动Console:
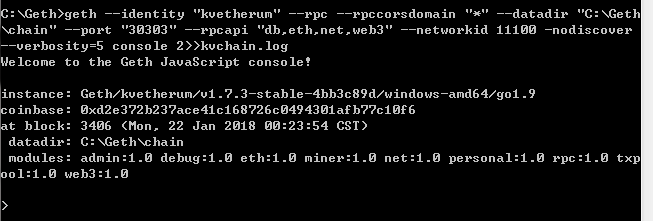
geth -datadir "%cd%\chain" consolegeth --identity "kvetherum" --rpc --rpccorsdomain "*" --datadir "C:\Geth\chain" --port "30303" --rpcapi "db,eth,net,web3,personal" --networkid 11100 -nodiscover --verbosity=5 console 2>>kvchain.log参数详解:
identity:区块链的标示,随便填写,用于标示目前网络的名字
init:指定创世块文件的位置,并创建初始块
datadir:设置当前区块链网络数据存放的位置
port:网络监听端口
rpc:启动rpc通信,可以进行智能合约的部署和调试
rpcapi:设置允许连接的rpc的客户端,一般为db,eth,net,web3
networkid:设置当前区块链的网络ID,用于区分不同的网络,是一个数字
console:启动命令行模式,可以在Geth中执行命令
nodiscover:禁止被网络中其它节点发现,需要手动添加该节点到网络
verbosity:打印详细的日志信息
- eth:包含一些跟操作区块链相关的方法
- net:包含以下查看p2p网络状态的方法
- admin:包含一些与管理节点相关的方法
- miner:包含启动&停止挖矿的一些方法
- personal:主要包含一些管理账户的方法
- txpool:包含一些查看交易内存池的方法
- web3:包含了以上对象,还包含一些单位换算的方法
4,新建以太坊主账户:
personal.newAccount('password1')personal.newAccount('123456')如下,账号:
personal.newAccount('123456')账户会保存在:Geth/keystore文件夹中
可以在此处创建多个账户
5,开始/结束挖矿
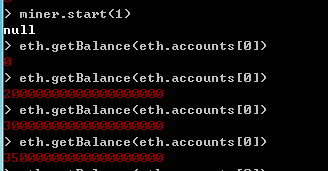
Miner.start(1);  //表示启动一个线程挖矿
Miner.stop()
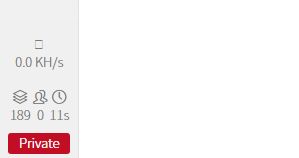
6, 打开Mist,显示private-net,表示链接私有节点成功。
7,添加新节点形成私有网络
- 在另外一台电脑或者虚拟机重复以上步骤(1-4);
- 运行命令:admin.nodeInfo.enode 获取到新节点的enode信息。
- 在第一个节点上运行:admin.addPeer(enode URL) ,注意在第二部中获得的enode信息中心包含[::], 此处置换为节点2的IP地址;
- 运行admin.peers命令可查看对等节点信息。
