深度学习(三)theano入门学习
theano入门学习
原文地址:http://blog.csdn.net/hjimce/article/details/46806923
作者:hjimce
本篇博文主要是在我刚入门学theano的一个学习历程的回顾,记录了自己深度学习学习征程的第一站。
一、初识theano
1、theano.tensor常用数据类型
学习theano,首先要学的就是theano.tensor使用,其是基础数据结构,功能类似于python.numpy,教程网站为:http://deeplearning.net/software/theano/library/tensor/basic.html
在theano.tensor数据类型中,有double、int、uchar、float等各种类型,不过我们最常用到的是int和float类型,float是因为GPU一般是float32类型,所以在编写程序的时候,我们很少用到double,常用的数据类型如下:
数值:iscalar(int类型的变量)、fscalar(float类型的变量)
一维向量:ivector(int 类型的向量)、fvector(float类型的向量)、
二维矩阵:fmatrix(float类型矩阵)、imatrix(int类型的矩阵)
三维float类型矩阵:ftensor3
四维float类型矩阵:ftensor4
其它类型只要把首字母变一下就可以了,更多类型请参考:http://deeplearning.net/software/theano/library/tensor/basic.html#theano.tensor.TensorVariable 中的数据类型表格
2、theano编程风格
例1:记得刚接触theano的时候,觉得它的编程风格很神奇,与我们之前所接触到的编程方式大不相同。在c++或者java等语言中,比如我们要计算“2的3次方”的时候,我们一般是:
int x=2;
int y=power(x,3);import theano
x=theano.tensor.iscalar('x')#声明一个int类型的变量x
y=theano.tensor.pow(x,3)#定义y=x^3
f=theano.function([x],y)#定义函数的自变量为x(输入),因变量为y(输出)
print f(2)#计算当x=2的时候,函数f(x)的值
print f(4)#计算当x=4时,函数f(x)=x^3的值一旦我们定义了f(x)=x^3,这个时候,我们就可以输入我们想要的x值,然后计算出x的三次方了。因此个人感觉theano的编程方式,跟我们数学思路一样,数学上一般是给定一个自变量x,定义一个函数(因变量),然后根据我们实际的x值,对因变量进行赋值。在深度学习中,每个样本就是一个x的不同赋值。
例2:S函数示例。再看一个例子,S函数的实现:
import theano
x =theano.tensor.fscalar('x')#定义一个float类型的变量x
y= 1 / (1 + theano.tensor.exp(-x))#定义变量y
f= theano.function([x],y)#定义函数f,输入为x,输出为y
print f(3)#计算当x=3的时候,y的值
上面的例子中,我们学到了一个非常重要的函数:theano.function,这个函数用于定义一个函数的自变量、因变量。
function网站为:http://deeplearning.net/software/theano/library/compile/function.html。函数的参数:function(inputs, outputs, mode=None, updates=None, givens=None, no_default_updates=False, accept_inplace=False, name=None,rebuild_strict=True, allow_input_downcast=None, profile=None, on_unused_input='raise'),参数看起来一大堆,不过我们一般只用到三个,inputs表示自变量、outputs表示函数的因变量(也就是函数的返回值),还有另外一个比较常用的是updates这个参数,这个一般用于神经网络共享变量参数更新,这个参数后面讲解。
例3:function使用示例
我们再看一个多个自变量、同时又有多个因变量的函数定义例子:
#coding=utf-8
import theano
x, y =theano.tensor.fscalars('x', 'y')
z1= x + y
z2=x*y
f =theano.function([x,y],[z1,z2])#定义x、y为自变量,z1、z2为函数返回值(因变量)
print f(2,3)#返回当x=2,y=3的时候,函数f的因变量z1,z2的值
二、必学函数
例1、求偏导数
theano有个很好用的函数,就是求函数的偏导数theano.grad(),比如上面的S函数,我们要求当x=3的时候,s函数的导数,代码如下:
#coding=utf-8
import theano
x =theano.tensor.fscalar('x')#定义一个float类型的变量x
y= 1 / (1 + theano.tensor.exp(-x))#定义变量y
dx=theano.grad(y,x)#偏导数函数
f= theano.function([x],dx)#定义函数f,输入为x,输出为s函数的偏导数
print f(3)#计算当x=3的时候,函数y的偏导数
例2、共享变量
共享变量是多线程编程中的一个名词,故名思议就是各线程,公共拥有的变量,这个是为了多线程高效计算、访问而使用的变量。因为深度学习中,我们整个计算过程基本上是多线程计算的,于是就需要用到共享变量。在程序中,我们一般把神经网络的参数W、b等定义为共享变量,因为网络的参数,基本上是每个线程都需要访问的。
#coding=utf-8
import theano
import numpy
A=numpy.random.randn(3,4);#随机生成一个矩阵
x = theano.shared(A)#从A,创建共享变量x
print x.get_value()例3、共享变量参数更新
前面我们提到theano.function函数,有个非常重要的参数updates,updates是一个包含两个元素的列表或tuple,updates=[old_w,new_w],当函数被调用的时候,这个会用new_w替换old_w,具体看一下下面例子:
#coding=utf-8
import theano
w= theano.shared(1)#定义一个共享变量w,其初始值为1
x=theano.tensor.iscalar('x')
f=theano.function([x], w, updates=[[w, w+x]])#定义函数自变量为x,因变量为w,当函数执行完毕后,更新参数w=w+x
print f(3)#函数输出为w
print w.get_value()#这个时候可以看到w=w+x为4这个主要用于梯度下降的时候,要用到。比如updates=[w,w-α*(dT/dw)],其中dT/dw就是我们梯度下降的时候,损失函数对参数w的偏导数,α是学习率。
OK,下面开始进入实战阶段,实战阶段的源码主要参考自网站:http://deeplearning.net/tutorial/
三、实战阶段1—逻辑回归实现
打好了基础的扎马步阶段,接着我们就要开始进入学习实战招式了,先学一招最简答的招式,逻辑回归的实现:
#coding=utf-8
import numpy
import theano
import theano.tensor as T
rng = numpy.random

N = 10     # 我们为了测试,自己生成10个样本,每个样本是3维的向量,然后用于训练
feats = 3
D = (rng.randn(N, feats).astype(numpy.float32), rng.randint(size=N, low=0, high=2).astype(numpy.float32))


# 声明自变量x、以及每个样本对应的标签y(训练标签)
x = T.matrix("x")
y = T.vector("y")

#随机初始化参数w、b=0,为共享变量
w = theano.shared(rng.randn(feats), name="w")
b = theano.shared(0., name="b")

#构造损失函数
p_1 = 1 / (1 + T.exp(-T.dot(x, w) - b))   # s激活函数
xent = -y * T.log(p_1) - (1-y) * T.log(1-p_1) # 交叉商损失函数
cost = xent.mean() + 0.01 * (w ** 2).sum()# 损失函数的平均值+L2正则项,其中权重衰减系数为0.01
gw, gb = T.grad(cost, [w, b])             #对总损失函数求参数的偏导数

prediction = p_1 > 0.5                    # 预测

train = theano.function(inputs=[x,y],outputs=[prediction, xent],updates=((w, w - 0.1 * gw), (b, b - 0.1 * gb)))#训练所需函数
predict = theano.function(inputs=[x], outputs=prediction)#测试阶段函数

#训练
training_steps = 1000
for i in range(training_steps):
    pred, err = train(D[0], D[1])
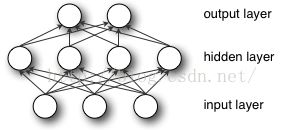
print err.mean()#查看损失函数下降变化过程接着学一个稍微牛逼一点,也就三层神经网络模型的实现,然后用于“手写字体识别”训练:
网络输出层的计算公式就是:
![]()
具体源码如下:
#encoding:utf-8
import os
import sys
import timeit
import numpy
import theano
import theano.tensor as T
from logistic_sgd import LogisticRegression, load_data


class HiddenLayer(object):
    def __init__(self, rng, input, n_in, n_out, W=None, b=None,
                 activation=T.tanh):
        """
        2、rng: numpy.random.RandomState是随机数生成器用于初始化W
        3、input: 类型为theano.tensor.dmatrix,是一个二维的矩阵(n_examples, n_in)
        第一维表示训练样本的个数,第二维表示特征维数,比如:input(i,j)表示第i个样本的第j个特征值
        4、n_in: 输入特征数,也就是输入神经元的个数
        5、n_out: 输出神经元的个数
        6、W如果有输入,那么为(n_in,n_out)大小的矩阵
        7、b如果有输入,那么为(n_out,)的向量
        8、activation活激活函数选项

        """
        self.input = input


        '''W的初始化选择[-a,a]进行均匀分布采样,其中如果激活函数选择tanh,则a=sqrt(6./(本层输入神经元数+本层输出神经元数))
        如果激活函数是选择sigmoid,那么a=4*sqrt(6./(本层输入神经元数+本层输出神经元数))
        dtype类型需要设置成theano.config.floatX,这样GPU才能调用'''
        if W is None:#如果外部没有输入W,那么创建W
            W_values = numpy.asarray(
                rng.uniform(
                    low=-numpy.sqrt(6. / (n_in + n_out)),
                    high=numpy.sqrt(6. / (n_in + n_out)),
                    size=(n_in, n_out)
                ),
                dtype=theano.config.floatX
            )
            if activation == theano.tensor.nnet.sigmoid:
                W_values *= 4

            W = theano.shared(value=W_values, name='W', borrow=True)

        if b is None:#如果外部没有输入b,那么创建b
            b_values = numpy.zeros((n_out,), dtype=theano.config.floatX)
            b = theano.shared(value=b_values, name='b', borrow=True)

        self.W = W
        self.b = b
        #激活函数映射
        lin_output = T.dot(input, self.W) + self.b
        self.output = (
            lin_output if activation is None
            else activation(lin_output)
        )
        # 模型参数
        self.params = [self.W, self.b]


# MLP类是三层神经网络:输入,隐层,输出,第一层为简单的人工神经网络,第二层为逻辑回归层
class MLP(object):

    def __init__(self, rng, input, n_in, n_hidden, n_out):
        """
        n_in: 输入层神经元个数

        n_hidden: 隐层神经元个数

        n_out:输出层神经元个数

        """

        # 创建隐藏层
        self.hiddenLayer = HiddenLayer(
            rng=rng,
            input=input,
            n_in=n_in,
            n_out=n_hidden,
            activation=T.tanh
        )

        # 创建逻辑回归层
        self.logRegressionLayer = LogisticRegression(
            input=self.hiddenLayer.output,
            n_in=n_hidden,
            n_out=n_out
        )

        # 整个网络的L1正则项,也就是使得所有的链接权值W的绝对值总和最小化
        self.L1 = (
            abs(self.hiddenLayer.W).sum()
            + abs(self.logRegressionLayer.W).sum()
        )

        # 整个网络的L2正则项,也就是使得所有的链接权值的平方和最小化
        self.L2_sqr = (
            (self.hiddenLayer.W ** 2).sum()
            + (self.logRegressionLayer.W ** 2).sum()
        )

        #
        self.negative_log_likelihood = (
            self.logRegressionLayer.negative_log_likelihood
        )
        # same holds for the function computing the number of errors
        self.errors = self.logRegressionLayer.errors

        # 把所有的参数保存到同一个列表中,这样后面可以直接求导
        self.params = self.hiddenLayer.params + self.logRegressionLayer.params

        self.input = input

#手写数字识别测试,BP算法
def test_mlp(learning_rate=0.01, L1_reg=0.00, L2_reg=0.0001, n_epochs=1000,
             dataset='mnist.pkl.gz', batch_size=20, n_hidden=500):
    """
    learning_rate: 梯度下降法的学习率

    L1_reg: L1正则项的权值

    L2_reg:L2正则项的权值

    n_epochs:最大迭代次数

    dataset:里面的数据是28*28的手写图片数据

   """
    datasets = load_data(dataset)

    train_set_x, train_set_y = datasets[0]
    valid_set_x, valid_set_y = datasets[1]
    test_set_x, test_set_y = datasets[2]

    # 批量训练,计算总共有多少批
    n_train_batches = train_set_x.get_value(borrow=True).shape[0] / batch_size
    n_valid_batches = valid_set_x.get_value(borrow=True).shape[0] / batch_size
    n_test_batches = test_set_x.get_value(borrow=True).shape[0] / batch_size


    # 分配符号变量
    index = T.lscalar()  # index to a [mini]batch
    x = T.matrix('x')  # 训练数据
    y = T.ivector('y')  # 训练数据的标签

    rng = numpy.random.RandomState(1234)

    # 构建三层神经网络
    classifier = MLP(
        rng=rng,
        input=x,
        n_in=28 * 28,
        n_hidden=n_hidden,
        n_out=10
    )

    # 计算损失函数
    cost = (
        classifier.negative_log_likelihood(y)
        + L1_reg * classifier.L1
        + L2_reg * classifier.L2_sqr
    )
    #损失函数求解偏导数
    gparams = [T.grad(cost, param) for param in classifier.params]
    # 梯度下降法参数更新
    updates = [
        (param, param - learning_rate * gparam)
        for param, gparam in zip(classifier.params, gparams)
    ]


    #定义训练函数
    train_model = theano.function(
        inputs=[index],
        outputs=cost,
        updates=updates,
        givens={
            x: train_set_x[index * batch_size: (index + 1) * batch_size],
            y: train_set_y[index * batch_size: (index + 1) * batch_size]
        }
    )

    #跑起来,训练起来,搞起
    epoch=0
    while (epoch <10):
        cost=0
        for minibatch_index in xrange(n_train_batches):
            cost+= train_model(minibatch_index)
        print 'epoch:',epoch,'    error:',cost/n_train_batches
        epoch = epoch + 1


#跑起来,网络train起来
test_mlp()
五、实战阶段3—最简单的卷积神经网络实现
最后再学一招最牛逼的,也就是卷积神经网络的实现,下面是一个手写字体lenet5的实现:
#-*-coding:utf-8-*-
import theano
import numpy as np
import matplotlib.pyplot as plt
from loaddata import loadmnist
import theano.tensor as T


#softmax函数
class softmax:
    #outdata为我们标注的输出,hiddata网络输出层的输入,nin,nout为输入、输出神经元个数
    def __init__(self,hiddata,outdata,nin,nout):

        self.w=theano.shared(value=np.zeros((nin,nout),dtype=theano.config.floatX),name='w');
        self.b=theano.shared(value=np.zeros((nout,),dtype=theano.config.floatX),name='b')

        prey=T.nnet.softmax(T.dot(hiddata,self.w)+self.b)#通过softmax函数,得到输出层每个神经元数值(概率)
        self.loss=-T.mean(T.log(prey)[T.arange(outdata.shape[0]),outdata])#损失函数
        self.para=[self.w,self.b]
        self.predict=T.argmax(prey,axis=1)
        self.error=T.mean(T.neq(T.argmax(prey,axis=1),outdata))


#输入层到隐藏层
class HiddenLayer:
    def __init__(self,inputx,nin,nout):
         a=np.sqrt(6./(nin+nout))
         ranmatrix=np.random.uniform(-a,a,(nin,nout));
         self.w=theano.shared(value=np.asarray(ranmatrix,dtype=theano.config.floatX),name='w')
         self.b=theano.shared(value=np.zeros((nout,),dtype=theano.config.floatX),name='b')
         self.out=T.tanh(T.dot(inputx,self.w)+self.b)
         self.para=[self.w,self.b]
#传统三层感知器
class mlp:
    def __init__(self,nin,nhid,nout):
        x=T.fmatrix('x')
        y=T.ivector('y')
        #åå
        hlayer=HiddenLayer(x,nin,nhid)
        olayer=softmax(hlayer.out,y,nhid,nout)
        #åå
        paras=hlayer.para+olayer.para
        dparas=T.grad(olayer.loss,paras)
        updates=[(para,para-0.1*dpara) for para,dpara in zip(paras,dparas)]
        self.trainfunction=theano.function(inputs=[x,y],outputs=olayer.loss,updates=updates)


    def train(self,trainx,trainy):
        return self.trainfunction(trainx,trainy)
#卷积神经网络的每一层,包括卷积、池化、激活映射操作
#img_shape为输入特征图,img_shape=(batch_size,特征图个数,图片宽、高)
#filter_shape为卷积操作相关参数,filter_shape=(输入特征图个数、输出特征图个数、卷积核的宽、卷积核的高)
#,这样总共filter的个数为:输入特征图个数*输出特征图个数*卷积核的宽*卷积核的高
class LeNetConvPoolLayer:
    def __init__(self,inputx,img_shape,filter_shape,poolsize=(2,2)):
        #参数初始化
        assert img_shape[1]==filter_shape[1]
        a=np.sqrt(6./(filter_shape[0]+filter_shape[1]))

        v=np.random.uniform(low=-a,high=a,size=filter_shape)

        wvalue=np.asarray(v,dtype=theano.config.floatX)
        self.w=theano.shared(value=wvalue,name='w')
        bvalue=np.zeros((filter_shape[0],),dtype=theano.config.floatX)
        self.b=theano.shared(value=bvalue,name='b')

        covout=T.nnet.conv2d(inputx,self.w)#卷积操作

        covpool=T.signal.downsample.max_pool_2d(covout,poolsize)#池化操作

        self.out=T.tanh(covpool+self.b.dimshuffle('x', 0, 'x', 'x'))

        self.para=[self.w,self.b]


#读取手写字体数据
trainx,trainy=loadmnist()
trainx=trainx.reshape(-1,1,28,28)
batch_size=30
m=trainx.shape[0]
ne=m/batch_size


batchx=T.tensor4(name='batchx',dtype=theano.config.floatX)#定义网络的输入x
batchy=T.ivector('batchy')#定义输出y

#第一层卷积层
cov1_layer=LeNetConvPoolLayer(inputx=batchx,img_shape=(batch_size,1,28,28),filter_shape=(20,1,5,5))
cov2_layer=LeNetConvPoolLayer(inputx=cov1_layer.out,img_shape=(batch_size,20,12,12),filter_shape=(50,20,5,5))#第二层卷积层
cov2out=cov2_layer.out.flatten(2)#从卷积层到全连接层,把二维拉成一维向量
hlayer=HiddenLayer(cov2out,4*4*50,500)#隐藏层
olayer=softmax(hlayer.out,batchy,500,10)#

paras=cov1_layer.para+cov2_layer.para+hlayer.para+olayer.para#网络的所有参数,把它们写在同一个列表里
dparas=T.grad(olayer.loss,paras)#损失函数,梯度求导
updates=[(para,para-0.1*dpara) for para,dpara in zip(paras,dparas)]#梯度下降更新公式

train_function=theano.function(inputs=[batchx,batchy],outputs=olayer.loss,updates=updates)#定义输出变量、输出变量
test_function=theano.function(inputs=[batchx,batchy],outputs=[olayer.error,olayer.predict])

testx,testy=loadmnist(True)
testx=testx.reshape(-1,1,28,28)

train_history=[]
test_history=[]

for it in range(20):
    sum=0
    for i in range(ne):
        a=trainx[i*batch_size:(i+1)*batch_size]
        loss_train=train_function(trainx[i*batch_size:(i+1)*batch_size],trainy[i*batch_size:(i+1)*batch_size])
        sum=sum+loss_train
    sum=sum/ne
    print 'train_loss:',sum
    test_error,predict=test_function(testx,testy)
    print 'test_error:',test_error

    train_history=train_history+[sum]
    test_history=test_history+[test_error]
n=len(train_history)
fig1=plt.subplot(111)
fig1.set_ylim(0.001,0.2)
fig1.plot(np.arange(n),train_history,'-')
参考文献:
1、http://deeplearning.net/software/theano/tutorial/index.html#tutorial
*************作者:hjimce 联系qq:1393852684 更多资源请关注我的博客:http://blog.csdn.net/hjimce 原创文章,转载请保留本行信息*********************
