Elasticsearch学习记录
Elastic Stack介绍
https://blog.csdn.net/xb_workspace/article/details/85165070
什么是Elasticsearch
分布式高性能高可用可伸缩的的搜索和分析系统
1.什么是搜索
垂直搜索(站内搜索)
互联网的搜索:电商网站,招聘网站新闻网站各种APP
IT系统的搜索:OA软件,办公自动化软件,会议管理,日程管理,项目管理,员工管理
2.如果用数据库做搜索会怎么样
(1)每条记录的指定字段的文本,可能会很长,比如"商品描述"字段的长度,这时如果每次都要对每条记录的所有文本进行扫描,比较耗时.
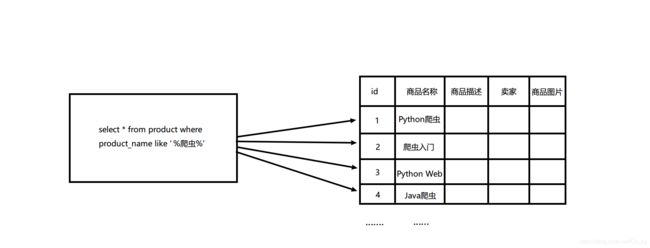
(2)还不能将搜索词拆分开来,比如输入"海市楼",就搜索不出海市蜃楼,用数据库来实现搜索,性能较差.
什么是全文搜索和Lucene
(1)全文搜索,倒排索引
(2)Lucene就是一个jar包,里面包含了封装好的各种建立倒排索引,以及进行搜索的代码,包括各种算法.我们用Java开发的时候,引入Lucene jar,然后基于Lucene开发就可以了.用Lucene可以将已有的数据建立索引,Lucene会在本地磁盘给我们组织索引的数据结构
安装Elasticsearch
github搜索elasticsearch-rtf,这是elasticsearch中文发行版,针对中文集成了相关插件,方便新手学习测试.
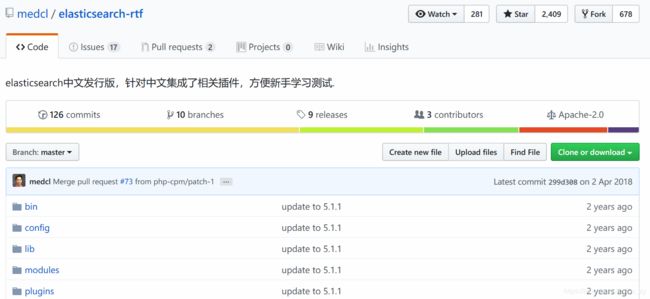
下载完成后,打开压缩文件,在cmd中运行bin/elasticsearch.bat
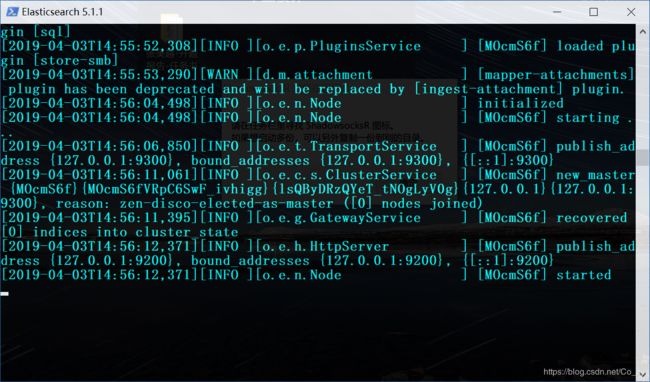
然后在浏览器打开http://127.0.0.1:9200/
安装head和kibana
github搜索elasticsearch-head
head插件类似于管理数据库的Navicat,基于浏览器(一个前端管理界面)

下载完成后解压,按照如下步骤进行(npm可用cnpm代替)
git clone git://github.com/mobz/elasticsearch-head.git
cd elasticsearch-head
npm install
启动
npm run start
安装完成并启动后,我们在浏览器打开 http://127.0.0.1:9100/ ,但此时会发现显示未连接,这是由于ES默认安全策略,不允许安装其他第三方插件,我们需要配置elasticsearch与head互通.
![]()
在/config/elasticsearch.yml文件末尾添加一下内容
http.cors.enabled: true
http.cors.allow-origin: "*"
重启es和head,可以看到此时已经正常

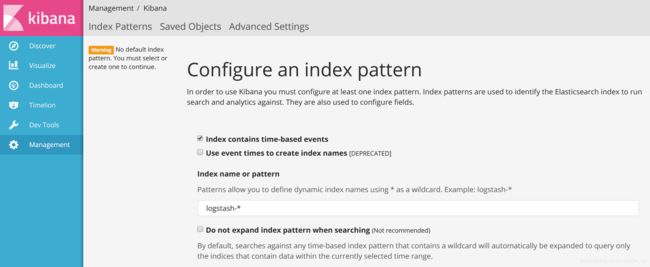
kibana版本要和elasticsearch-rtf版本一致,所以我们直接百度搜索kibana5.1.1下载
下载完成后解压,然后cmd中执行/bin/下的kibana.bat,然后在浏览器中打开
http://127.0.0.1:5601/
快速启动Elasticsearch
Windows下建立如下bat文件
start D:\Python\Elasticsearch\elasticsearch-5.1.1\bin\elasticsearch.bat
start D:\Python\Elasticsearch\kibana-5.1.1-windows-x86\bin\kibana.bat

@echo off
:: nodejs安装目录下的nodevars.bat
set nodevars = "C:\Program Files\nodejs\nodevars.bat"
:: 移动到需要启动的目录
cd d:/Python/Elasticsearch/elasticsearch-head-master
:: 启动项目
cmd /c %nodevars%&&npm run start

@echo off
python D:\Python\ESsearch\manage.py runserver
cmd /k
Elasticsearch概念
集群:一个或多个节点组织在一起
节点:一个集群中的一台服务器
分片:索引划分为多份的能力,允许水平分割,扩展容量,多个分片响应请求
副本:分片的一份或多分,一个节点失败,其他节点顶上
| Elasticsearch | MySQL |
|---|---|
| index(索引) | 数据库 |
| type(类型) | 表 |
| documents(文档) | 行 |
| field(字段) | 列 |
创建索引
方法一:浏览器kibana界面中dev tools中输入以下语句,(可以类比SQL语句)
PUT lagou
{
  "settings": {
    "index":{
      "number_of_shards":5,
      "number_of_replicas":1
    }
  }
}

之后我们可以在es界面看到已创建好的索引

方法二:也可以在es界面,手动点击创建索引
获取索引
获取lagou索引的settings
GET lagou/_settings
获取所有索引的settings,下面两条语句作用相同
GET _all/_settings
GET _settings
GET .kibana,lagou/_settings
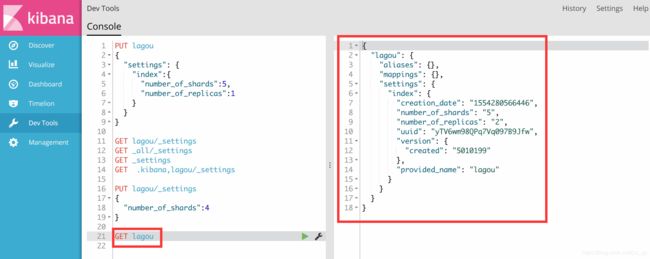
获取索引的信息,上面只是获取了settings
GET lagou
修改settings
我们可以修改number_of_replicas,即副本的数量,但是number_of_shards不能修改
PUT lagou/_settings
{
  "number_of_replicas":2
}
增加信息
- job是type,我们需要定义
- id也可以不定义,系统会自动添加
PUT lagou/job/1
{
  "title":"Python Cookbook",
  "salary_min":15000,
  "city":"北京",
  "company":{
    "name":"baidu",
    "company_addr":"beijing"
  },
  "publish_data":"2019-01-01",
  "comments":15
}

我们可以在http://127.0.0.1:9100/中查看我们增加的数据
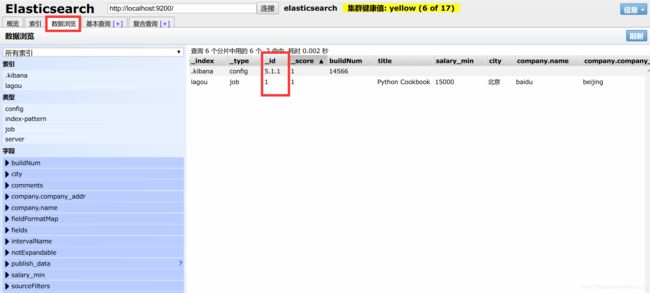
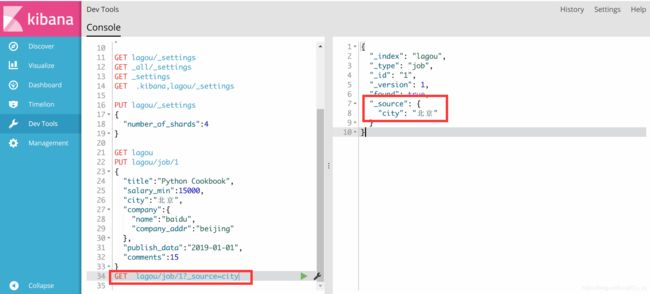
如果我们只想查看source中部分内容,可以用下面的查询方式
修改数据
两种方式
- PUT覆盖修改
- POST增量修改
第一种方式
PUT lagou/job/1
{
  "title":"Python Cookbook",
  "salary_min":15000,
  "city":"北京",
  "company":{
    "name":"baidu",
    "company_addr":"beijing"
  },
  "publish_data":"2019-01-01",
  "comments":10
}
GET lagou/job/1
POST lagou/job/1/_update
{
  "doc":{
    "comments":20
  }
}
GET lagou/job/1
删除
1.删除文档
DELETE lagou/job/1
2.不能删除type
DELETE lagou/job
3.删除索引
DELETE lagou
批量操作
为什么需要批量操作,因为之前的方式每次都建立HTTP请求,三次握手,比较耗时.
现在我们创建了如下图的索引以及类型

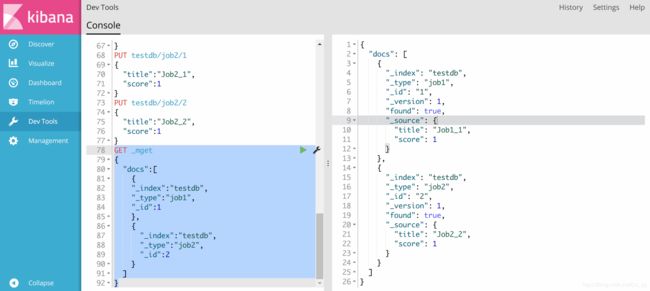
如果要同时查询两个type(表)中的内容
GET _mget
{
  "docs":[
    {
    "_index":"testdb",
    "_type":"job1",
    "_id":1
    },
    {
      "_index":"testdb",
      "_type":"job2",
      "_id":2
    }
  ]
}
GET testdb/_mget
{
  "docs":[
    {
    "_type":"job1",
    "_id":1
    },
    {
      "_type":"job2",
      "_id":2
    }
  ]
}
查询job1下的两个文档(两行)
GET testdb/job1/_mget
{
  "docs":[
    {
    "_id":1
    },
    {
      "_id":2
    }
  ]
}
或者简写成
GET testdb/job1/_mget
{
  "ids":[1,2]
}
elasticsearch的bulk批量操作
可以合并多个操作,比如index,delete,update,create等等,包括从一个索引到另一个索引:
action_and_meta_data\n
option_source\n
action_and_meta_data\n
option_source\n
….
注意,每两行是一条数据(index,update,create)(delete除外)

看下面的例子,利用bulk同时增加两条数据
POST _bulk
{"index":{"_index":"lagou","_type":"job1","_id":"1"}}
{"title":"python分布式爬虫开发","salary_min":15000,"city":"北京","company":{"name":"百度","company_addr":"北京市软件园"},"public_date":"2019-4-16","comments":15}
{"index":{"_index":"lagou","_type":"job2","_id":"2"}}
{"title":"python django","salary_min":15000,"city":"成都","company":{"name":"百度","company_addr":"成都市软件园"},"public_date":"2019-4-1","comments":50}
映射
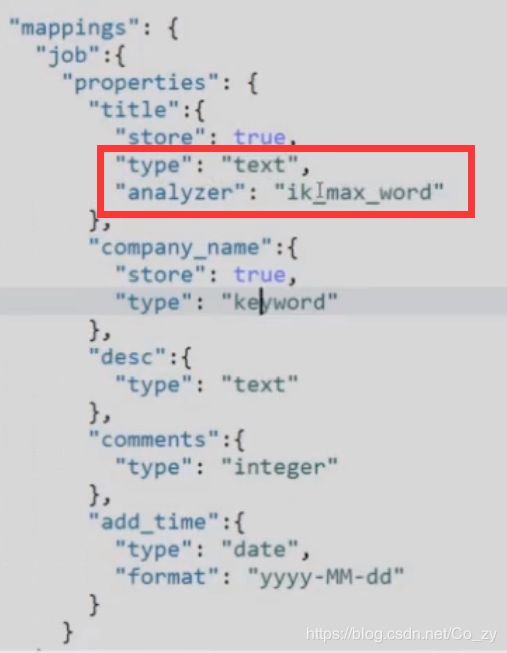
创建索引的时候,可以预先定义字段的类型以及相关属性
- 类比数据库中,我们定义一个表,然后要给每一列定义数据类型(整型,字符型),对于ES来说也是一样,放数据时,对每一个字段指定一种类型.
- 列类型一旦通过映射创建就不可修改(和关系数据库的不同)
相关属性的配置
类型
| 类型 | 解释 |
|---|---|
| String类型 | 分为两种text、keyword, text会对内部的内容进行分析,索引,进行倒排索引等 keyword则会当成字符串,不会被分析,只能完全匹配才能找到String(在es5已经被废弃了) |
| 日期类型 | date 以及datetime等 |
| 数字类型 | integer long double等等 |
| bool类型 | boolean |
| binary类型 | binary |
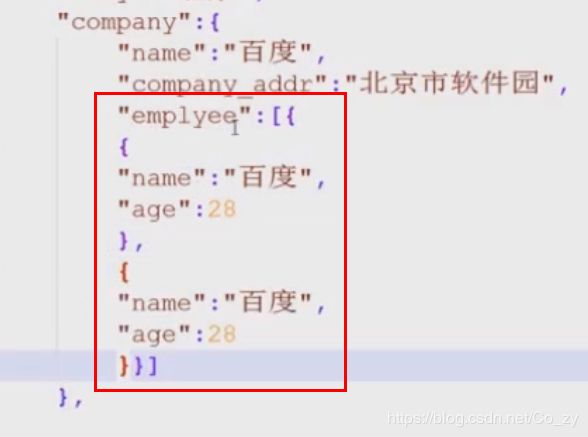
| 复杂类型 | object、nested(数组形式) |
| geo类型 | geo-point地理位置 |
| 专业类型 | ip competition |
| object | json里面内置的还有下层{}的对象 |
属性
Elasticsearch查询
elasticserach查询大概分为三类:
基本查询:
组合查询:
过滤:查询同时,通过filter条件在不影响打分的情况下筛选数据
match查询(使用较多)
后面为关键词,关于python的都会提取出来,match查询会对内容进行分词,并且会自动对传入的关键词进行大小写转换,内置ik分词器会进行切分,如python网站,只要搜到存在的任何一部分,都会返回
GET lagou/job/_search
{
    "query":{
        "match":{
            "title":"python"
        }
    }
}
term查询
区别,对传入的值不会做任何处理,就像keyword(见上面的映射.类型),只能查包含整个传入的内容的,一部分也不行,只能完全匹配(例如下面python爬虫,只能找到完全一样的关键词)
GET lagou/job/_search
{
    "query":{
        "term":{
            "title":"python爬虫"
        }
    }
}
terms查询
title里传入多个值,只要有一个匹配,就会返回结果
GET lagou/job/_search
{
    "query":{
        "term":{
            "title":["工程师","Django"]
        }
    }
}
控制查询的返回数量
通过这里就可以完成分页处理洛,从第一条开始查询两条,from从0开始
GET lagou/_serach
{
    "query":{
        "match":{
            "title":"python"
        }
    },
    "from":1,
    "size":2
}
match_all 返回所有
GET lagou/_search
{
“query”:{
“match_all”:{}
}
}
match_phrase查询:短语查询
python系统,将其分词,分为词条,满足词条里面的所有词才会返回结果,slop参数说明两个词条之间的最小距离,比如python和系统之间的距离
GET lagou/_search
{
    "query":{
        "match_phrase":{
            "title":{
                "query":"python系统",
                "slop":6
            }
        }
    }
}
通过sort把结果排序
先查询全部,然后对评论数按照降序排序
GET lagou/_search
{
    "query";{
        "match_all":{}
    },
    "sort":[{
        "comments":{
            "order":"desc"
        }
    }]
}
查询范围 range查询
range是在query里面的,boost是权重,gte lte是大于等于,小于等于的意思,(带e是等于)
对时间的范围查询,则是以字符串的形式传入
GET lagou / _search {“
	query”; {“
		range”: {“
			comments”: {“
				gte”: 10,
				“lte”: 20,
				“boost”: 2.0
			}
		}
	}
}
用的最多的是match,range
组合查询:bool查询
bool查询包括了must、should、must_not filter来完成
格式如下:
bool:{
    "filter":[],
    "must":[],
    "should":[],
    "must_not":[],
}
| 关键字 | 作用 |
|---|---|
| filter | 用于过滤字段,不参与打分 |
| must | 数组里的所有查询必须全部满足 |
| should | 与must相反,满足一个或多个都可以 |
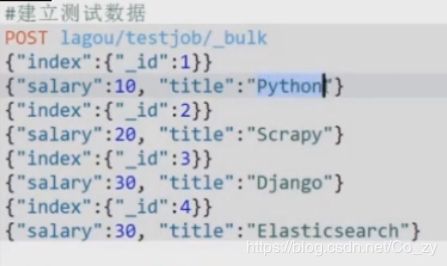
简单的filter查询
select * from testjob where salary=20
select * from testjob where title="Python"
查询时用小写python
查看分析器解析的结果


select * from testjob where (salary=20 OR title=“python”) AND (salary!=30)
select * from testjob where title=“python” or (title=“django” AND salary=30)
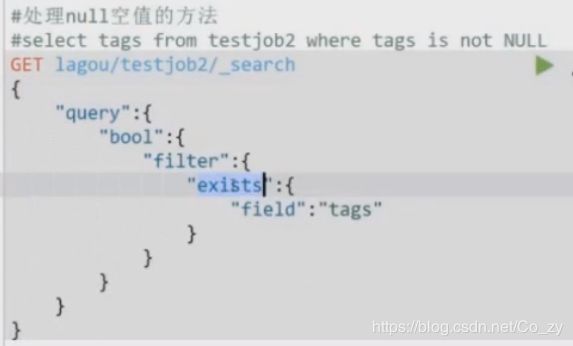
过滤空、非空
将scrapy爬到的item保存到es
新建一个models文件夹,新建es-jobbole.py文件,内容如下
这个文件作用是创建了索引,类似于我们新建了一个数据库,但是还没有往里面放值.
# _*_ coding: utf-8 _*_

from datetime import datetime
from elasticsearch_dsl import DocType, Date, Nested, Boolean, \
    analyzer, Completion, Keyword, Text, Integer

from elasticsearch_dsl.analysis import CustomAnalyzer as _CustomAnalyzer

from elasticsearch_dsl.connections import connections

# 与服务器进行连接,hosts允许多个,但我们现在连接本地
connections.create_connection(hosts=["localhost"])

# class CustomAnalyzer(_CustomAnalyzer):
#     def get_analysis_definition(self):
#         return {}
# ik_analyzer = CustomAnalyzer("ik_max_word", filter=["lowercase"])

class ArticleType(DocType):
    # 伯乐在线文章类型
    # suggest = Completion(analyzer=ik_analyzer)
    title = Text(analyzer="ik_max_word") #需要对title进行分词
    create_date = Date()
    url = Keyword()
    url_object_id = Keyword()
    front_image_url = Keyword()
    front_image_path = Keyword()
    praise_nums = Integer()
    comment_nums = Integer()
    fav_nums = Integer()
    tags = Text(analyzer="ik_max_word")
    content = Text(analyzer="ik_max_word")

    class Meta:
        index = "jobbole"  #相当于数据库名
        doc_type = "article"  #表名


if __name__ == "__main__":
    ArticleType.init() #根据我们定义的类,直接生成mapping
    #这样执行之后,那么是定义的哪一个index,哪个type之下呢,所以我们需要Meta
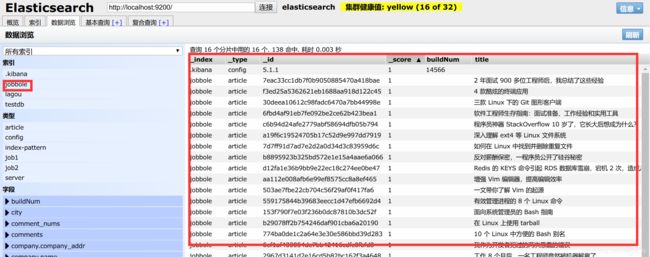
单独执行这个文件后,我们可以在es界面看到创建的jobbole索引

现在我们写pipelines.py使爬到的数据真正保存到es
class ElasticsearchPipeline(object):
    #将数据写入es

    def process_item(self,item,spider):
        #将item转换为es的数据,需要elastcsearch-dsl(python接口包)
        article = ArticleType()
        article.title = item['title']
        article.create_date = item['create_date']
        article.content = remove_tags(item['content'])
        article.front_image_url = item['front_image_url']
        if "front_image_path" in item:
            article.front_image_path = item['front_image_path']
        article.praise_nums = item["praise_nums"]
        article.fav_nums = item['fav_nums']
        article.comment_nums = item['comment_nums']
        article.url = item['url']
        article.tags = item['tags']
        article.meta.id = item['url_object_id']
        # article.suggest = [{"input":[],"weight":2}]

        #10,7代表的是权重
        article.suggest = gen_suggest(ArticleType._doc_type.index,((article.title,10),(article.tags,7)))

        article.save()


        return item
然后在settings.py中更改pipeline的执行顺序
ITEM_PIPELINES = {
    # 'ArticleSpider.pipelines.JsonWithEncodingPipeline': 2,
    # 'scrapy.pipelines.images.ImagesPipeline':1,
    #  'ArticleSpider.pipelines.ArticleImagePipeline':1
     #'ArticleSpider.pipelines.MysqlPipeline':1
    #  'ArticleSpider.pipelines.MysqlTwistedPipeline':1
     'ArticleSpider.pipelines.ElasticsearchPipeline':1
}
执行main.py文件后,去 http://127.0.0.1:9100/ 查看
实现搜索建议
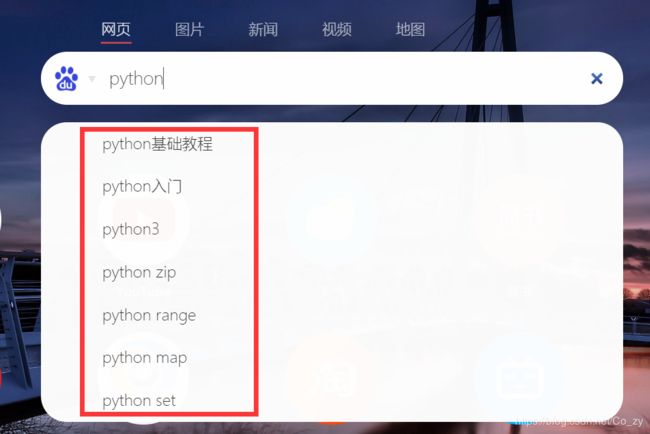
什么是搜索建议,就是如下图所示那样,当 我们在搜索框内输入某个关键词时,会自动给出联想提示
首先在es_jobbole.py中重写suggest,完成后代码如下:
# _*_ coding: utf-8 _*_

from datetime import datetime
from elasticsearch_dsl import DocType, Date, Nested, Boolean, \
    analyzer, Completion, Keyword, Text, Integer

from elasticsearch_dsl.analysis import CustomAnalyzer as _CustomAnalyzer

from elasticsearch_dsl.connections import connections
# 与服务器进行连接,hosts允许多个,但我们现在连接本地
connections.create_connection(hosts=["localhost"])

#搜索建议,需要从elasticsearch_dsl.analysis导入CustomAnalyzer
class CustomAnalyzer(_CustomAnalyzer):
    def get_analysis_definition(self):
        return {}
ik_analyzer = CustomAnalyzer("ik_max_word", filter=["lowercase"])

class ArticleType(DocType):
    # 伯乐在线文章类型
    suggest = Completion(analyzer=ik_analyzer) #这个会有问题,所以我们自己重写
    title = Text(analyzer="ik_max_word") #需要对title进行分词
    create_date = Date()
    url = Keyword()
    url_object_id = Keyword()
    front_image_url = Keyword()
    front_image_path = Keyword()
    praise_nums = Integer()
    comment_nums = Integer()
    fav_nums = Integer()
    tags = Text(analyzer="ik_max_word")
    content = Text(analyzer="ik_max_word")

    class Meta:
        index = "jobbole"  #相当于数据库名
        doc_type = "article"  #表名


if __name__ == "__main__":
    ArticleType.init() #根据我们定义的类,直接生成mapping
    #这样执行之后,那么是定义的哪一个index,哪个type之下呢,所以我们需要Meta
添加的代码如下
from elasticsearch_dsl.analysis import CustomAnalyzer as _CustomAnalyzer

#搜索建议,需要从elasticsearch_dsl.analysis导入CustomAnalyzer
class CustomAnalyzer(_CustomAnalyzer):
    def get_analysis_definition(self):
        return {}
ik_analyzer = CustomAnalyzer("ik_max_word", filter=["lowercase"])
......
......
......
suggest = Completion(analyzer=ik_analyzer)
报错1
TypeError: analyze() got an unexpected keyword argument 'analyzer'
解决1
参考: https://blog.csdn.net/javakklam/article/details/80114837
words = es.indices.analyze(index=index,body={'text':text,'analyzer':"ik_max_word"},params={'filter':["lowercase"]})
报错2
analyzed_words = set([r['token'] for r in words if len(r['token'])>1])
TypeError: string indices must be integers
解决2
analyzed_words = set([r["token"] for r in words["tokens"] if len(r["token"]) > 1])
生成搜索建议词
这部分我们在pipelines.py写
def gen_suggest(index,info_tuple):
    used_words = set()
    suggests = []
    for text,weight in info_tuple:
        if text:
            words = es.indices.analyze(index=index,body={'text':text,'analyzer':"ik_max_word"},params={'filter':["lowercase"]})
            #analyzed_words = set([r['token'] for r in words if len(r['token'])>1])
            analyzed_words = set([r["token"] for r in words["tokens"] if len(r["token"]) > 1])
            new_words = analyzed_words - used_words #集合相减,把已经存在的词过滤掉
        else:
            new_words = set()
    if new_words:
        suggests.append({"input":list(new_words),"weight":weight})
    return suggests


class ElasticsearchPipeline(object):
    #将数据写入es

    def process_item(self,item,spider):
        #将item转换为es的数据,需要elastcsearch-dsl(python接口包)
        article = ArticleType()
        article.title = item['title']
        article.create_date = item['create_date']
        article.content = remove_tags(item['content'])
        article.front_image_url = item['front_image_url']
        if "front_image_path" in item:
            article.front_image_path = item['front_image_path']
        article.praise_nums = item["praise_nums"]
        article.fav_nums = item['fav_nums']
        article.comment_nums = item['comment_nums']
        article.url = item['url']
        article.tags = item['tags']
        article.meta.id = item['url_object_id']
        # article.suggest = [{"input":[],"weight":2}]

        #10,7代表的是权重
        article.suggest = gen_suggest(ArticleType._doc_type.index,((article.title,10),(article.tags,7)))

        article.save()
        return item
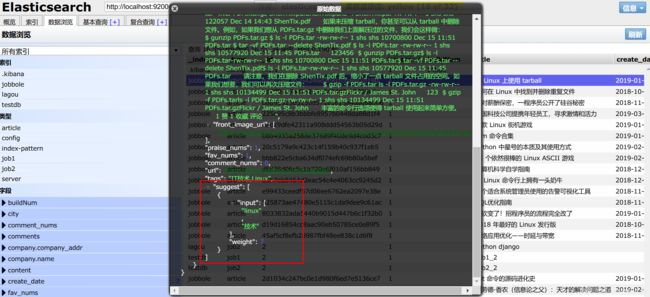
处理上面的错误后,我们运行main.py,爬到一些数据后停止运行,去es界面查看生成的suggest
Django搭建搜索界面

文件目录如下
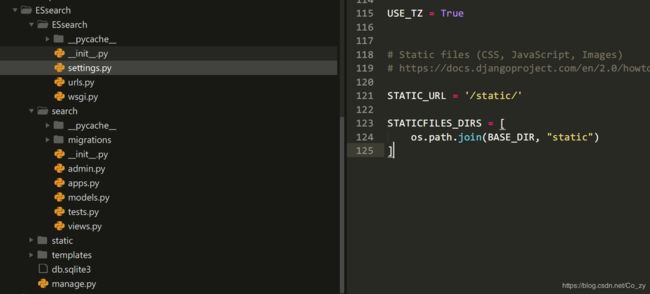
前端界面文件放在/templates文件夹 , css、js文件放在/static文件夹,为了使前端界面能够找到css和js , 我们在settings.py中添加
STATIC_URL = '/static/'

STATICFILES_DIRS = [
    os.path.join(BASE_DIR, "static")
]
然后在urls.py中添加
from django.conf.urls import url
from django.contrib import admin
from django.views.generic import TemplateView


urlpatterns = [
    url(r'^admin/', admin.site.urls),
    #url(r'^index', index,name = 'index'),
    url(r'^$',TemplateView.as_view(template_name="index.html"),name="index")

]
进入项目所在目录,找到manage.py目录打开cmd,输入下面命令启动Django
python manage.py runserver
浏览器打开 http://127.0.0.1:8000/ ,可以看到如下界面

为了实现搜索建议功能,首先来看一下编辑距离
编辑距离是一种字符之间相似程度的计算方法:linux、linx,即两个字符串之间的编辑距离等于使一个字符串变成另外一个字符串而进行的(1)插入、(2)删除、(3)替换或(4)相邻字符交换位置而进行操作的最少次数.
比如: ed("recognize","recoginze") == 1, 需要交换两个相邻i和n .
官方API
https://www.elastic.co/guide/en/elasticsearch/reference/current/search-suggesters-completion.html
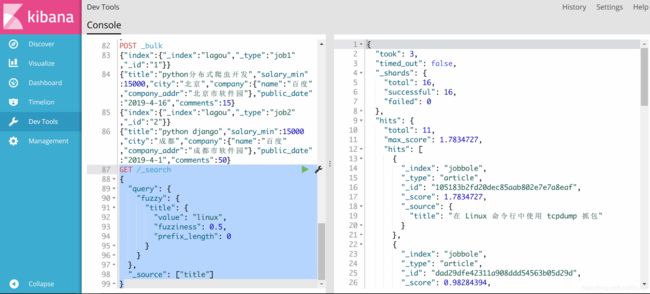
编辑距离会在fuzzy搜索 中使用到,下面是一个简单的fuzzy搜索案例:
fuzziness就是编辑距离
prefix_length是前缀长度
GET /_search
{
  "query": {
    "fuzzy": {
      "title": {
        "value": "linux",
        "fuzziness": 0.5,
        "prefix_length": 0
      }
    }
  },
  "_source": ["title"]
}
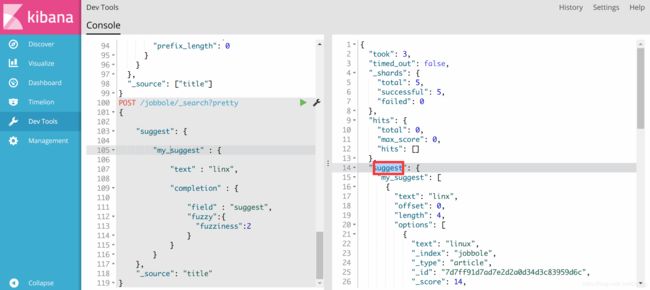
ES的suggest
POST /jobbole/_search?pretty
{

    "suggest": {

        "my_suggest" : {

            "text" : "linux",

            "completion" : {

                "field" : "suggest",
                "fuzzy":{
                  "fuzziness":2
                }
            }
        }
    },
    "_source": "title"
}
报错1
对于Es搜索自动提示功能debug出现Search object has no attribute execute_suggest.的解决方法
这一问题的出现主要是elasticsearch-dsl的改版,导致以前的方法被新版的方法替代或者不再使用。
旧版本代码:
class SearchSuggest(View):
        def get(self, request):
            key_words = request.GET.get('s', '')
            re_datas = []
            if key_words:
                s = ArticleType.search()
                s = s.suggest('my_suggest', key_words, completion={
                    "field": "suggest", "fuzzy": {
                        "fuzziness": 2
                    },
                    "size": 10
                }
                suggestions = s.execute_suggest()
                for match in suggestions.my_suggest[0].options:
                    source = match._source
                    re_datas.append(source["title"])
            return HttpResponse(json.dumps(re_datas), content_type="application/json")
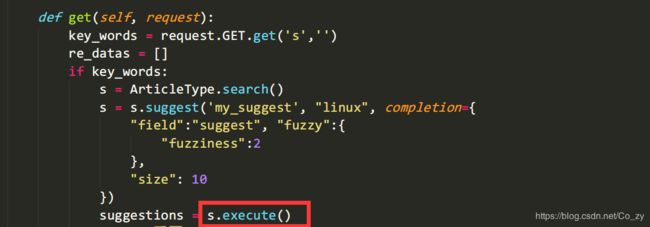
新版本代码:
新版本之后execute_suggest()方法就不再使用,取而代之的是execute()方法
 class SearchSuggest(View):
        def get(self, request):
            key_words = request.GET.get('s', '')
            re_datas = []
            if key_words:
                s = ArticleType.search()
                s = s.suggest('my_suggest', key_words, completion={
                    "field": "suggest", "fuzzy": {
                        "fuzziness": 2
                    },
                    "size": 10
                })
                suggestions = s.execute()
                suggestion = suggestions.suggest
                for match in suggestion.my_suggest[0].options:
                    source = match._source
                    re_datas.append(source["title"])
            return HttpResponse(json.dumps(re_datas), content_type="application/json")
AttributeError: 'Response' object has no attribute 'index'
原因是解析json返回的数据时出错,应改为
for match in suggestions.suggest.my_suggest[0].options[:10]:
搜索展示界面
报错
HTTPConnectionPool(host='localhost', port=9200): Read timed out. (read timeout=10))
原因是elasticsearch挂了,重启一下就好了
2019-5-15 后续常用功能
在原有基础上增加字段(mapping映射)
PUT jingdong/comment/_mapping
{
	"properties": {
		"wordcloud_negative": {
			"type": "string"
		},
		"proportion_positive": {
			"type": "double"
		},
		"proportion_negative": {
			"type": "double"
		}
	}
}
更新某个字段内容或者用GET全部更新
POST jingdong/comment/2/_update
{
  "doc":{
    "comments":20
  }
}

