Spring学习-12:Spring的Bean的装配:注解的方式
接下来,我们来学习使用注解的方式来实现属性的注入,常见的框架如Struts2、Hibernate等都支持注解的开发。虽然完全使用注解在开发中并不是特别多,但是在框架整合的时候往往会用到注解的方式。
IOC装配Bean(使用注解的方式):
Spring2.5中引入了使用注解去定义Bean:@Component描述Spring框架中的Bean。
首先,编写一个bean:
package com.js.demo1;

import org.springframework.stereotype.Component;
/**
 * 注解的方式装配bean
 * @author js
 *
 */
@Component("userService")
public class UserService {
	public void sayHello(){
		System.out.println("Hello Spring annotation...");
	}
}
然后,修改applicationContext.xml(为什么还需要配置文件呢?是为了告诉Spring应该去哪些包下扫描使用注解配置的bean),配上xmlns:context:
编写测试类:
package com.js.demo1;

import org.junit.Test;
import org.springframework.context.ApplicationContext;
import org.springframework.context.support.ClassPathXmlApplicationContext;

public class Test1 {
	@Test
	public void demo1(){
		ApplicationContext applicationContext = new ClassPathXmlApplicationContext("applicationContext.xml");
		UserService userService = (UserService)applicationContext.getBean("userService");
		userService.sayHello();
	}
}

除了@Component之外,Spring还提供了与之等效的三个注解(为了以后分层开发):
@Repository:用于对DAO实现类进行标注
@Service:用于对Service实现类进行标注
@Controller:用于对Controller实现类进行标注
这三个注解是为了让标注类本身的用途清晰,Spring在后续版本可能会对其增强。
如,修改之前的@Component为@Service:
package com.js.demo1;

import org.junit.Test;
import org.springframework.context.ApplicationContext;
import org.springframework.context.support.ClassPathXmlApplicationContext;

public class Test1 {
	@Test
	public void demo1(){
		ApplicationContext applicationContext = new ClassPathXmlApplicationContext("applicationContext.xml");
		UserService userService = (UserService)applicationContext.getBean("userService");
		userService.sayHello();
	}
}在此情况下,对于bean的属性的注入:
普通属性(使用@Value注解):
修改UserService(有了注解之后,可以不用setter方法):
package com.js.demo1;

import org.junit.Test;
import org.springframework.context.ApplicationContext;
import org.springframework.context.support.ClassPathXmlApplicationContext;

public class Test1 {
	@Test
	public void demo1(){
		ApplicationContext applicationContext = new ClassPathXmlApplicationContext("applicationContext.xml");
		UserService userService = (UserService)applicationContext.getBean("userService");
		userService.sayHello();
	}
}
运行测试类,看到注入成功:

对象属性(使用@Autowired注解,默认使用类型注入):
新建类UserDao:
package com.js.demo1;

import org.springframework.stereotype.Repository;

@Repository
public class UserDao {

}
修改UserService:
package com.js.demo1;
import org.springframework.beans.factory.annotation.Autowired;
import org.springframework.beans.factory.annotation.Value;
import org.springframework.stereotype.Service;
/**
 * 注解的方式装配bean
 * @author js
 *
 */
@Service("userService")
public class UserService {
	@Value(value="小蒋")
	private String info;

	@Autowired
	private UserDao userDao;

	@Override
	public String toString() {
		return "UserService [info=" + info + ", userDao=" + userDao + "]";
	}

	public void sayHello(){
		System.out.println("Hello Spring annotation..."+info);
	}
}
一般情况下我们使用名称注入,也就是需要给UserDao的@Repository注解加上名称,例如:@Repository("userDao"),然后在 @Autowired注解下再加一个@Qualifier("userDao")去装配,注意名称要一致,否则注入失败。Spring默认使用类型注入,也就是此处的UserDao类型会默认匹配UserDao这个bean。
简言之,按名称注入:命名+@Autowired+@Qualifier(命名),按类型注入:@Autowired
修改测试类,打印userService,并运行测试:
package com.js.demo1;
import org.junit.Test;
import org.springframework.context.ApplicationContext;
import org.springframework.context.support.ClassPathXmlApplicationContext;
public class Test1 {
@Test
public void demo1(){
ApplicationContext applicationContext = new ClassPathXmlApplicationContext("applicationContext.xml");
UserService userService = (UserService)applicationContext.getBean("userService");
System.out.println(userService);
}
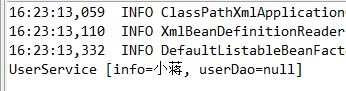
}运行结果:

@Autowired可以带参数,required,默认为true,表示不忽略异常。
@Autowired(required=false)表示忽略异常。
举个例子:
修改UserDao:
package com.js.demo1;

import org.springframework.stereotype.Repository;

@Repository("userDao")
public class UserDao {

}
修改UserService:
package com.js.demo1;
import org.springframework.beans.factory.annotation.Autowired;
import org.springframework.beans.factory.annotation.Qualifier;
import org.springframework.beans.factory.annotation.Value;
import org.springframework.stereotype.Service;
/**
 * 注解的方式装配bean
 * @author js
 *
 */
@Service("userService")
public class UserService {
	@Value(value="小蒋")
	private String info;

	@Autowired
	@Qualifier("userDao1111")
	private UserDao userDao;

	@Override
	public String toString() {
		return "UserService [info=" + info + ", userDao=" + userDao + "]";
	}

	public void sayHello(){
		System.out.println("Hello Spring annotation..."+info);
	}
}
下,注入会失败,并且程序停止运行。修改@Autowired为:@Autowired(required=false),重新运行测试类:
结果:
发现虽然没有注入成功,但是并不报错,而且程序继续执行。当然,一般情况下我们不建议这样使用。
另外,Spring提供对JSR-250中定义@Resource标准注解的支持,@Resource注解和@Autowired+@Qualifier(命名)功能有点类似:
例如上述例子中UserService中的注解:
@Autowired(required=false)
@Qualifier("userDao")
private UserDao userDao;
可以改写为:
@Resource(name="userDao")
private UserDao userDao;
运行同样成功。
What's more:
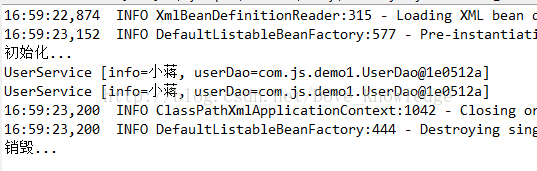
Spring初始化或销毁bean时,有时需要做一些处理工作,因此Spring可以在创建和卸载bean的时候调用bean的两个生命周期方法:
package com.js.demo1;
import javax.annotation.PostConstruct;
import javax.annotation.PreDestroy;
import javax.annotation.Resource;
import javax.annotation.Resources;

import org.springframework.beans.factory.annotation.Autowired;
import org.springframework.beans.factory.annotation.Qualifier;
import org.springframework.beans.factory.annotation.Value;
import org.springframework.stereotype.Service;
/**
 * 注解的方式装配bean
 * @author js
 *
 */
@Service("userService")
public class UserService {
	@Value(value="小蒋")
	private String info;

	@Resource(name="userDao")
	private UserDao userDao;

	@Override
	public String toString() {
		return "UserService [info=" + info + ", userDao=" + userDao + "]";
	}

	public void sayHello(){
		System.out.println("Hello Spring annotation..."+info);
	}
	@PostConstruct
	public void setup(){
		System.out.println("初始化...");
	}
	@PreDestroy
	public void teardown(){
		System.out.println("销毁...");
	}
}package com.js.demo1;
import org.junit.Test;
import org.springframework.context.ApplicationContext;
import org.springframework.context.support.ClassPathXmlApplicationContext;
public class Test1 {
@Test
public void demo1(){
ClassPathXmlApplicationContext applicationContext = new ClassPathXmlApplicationContext("applicationContext.xml");
UserService userService = (UserService)applicationContext.getBean("userService");
System.out.println(userService);
applicationContext.close();
}
}

@Service("userService")
@Scope
public class UserService {
//		省略代码
}package com.js.demo1;
import org.junit.Test;
import org.springframework.context.ApplicationContext;
import org.springframework.context.support.ClassPathXmlApplicationContext;
public class Test1 {
@Test
public void demo1(){
ClassPathXmlApplicationContext applicationContext = new ClassPathXmlApplicationContext("applicationContext.xml");
UserService userService = (UserService)applicationContext.getBean("userService");
UserService userService2 = (UserService)applicationContext.getBean("userService");
System.out.println(userService);
System.out.println(userService2);
applicationContext.close();
}
}
package com.js.demo2;

public class Car {
	private String name;
	private Double price;
	public void setName(String name) {
		this.name = name;
	}
	public void setPrice(Double price) {
		this.price = price;
	}
	@Override
	public String toString() {
		return "Car [name=" + name + ", price=" + price + "]";
	}
}package com.js.demo2;
public class Product {
private String name;
private Double price;
public void setName(String name) {
this.name = name;
}
public void setPrice(Double price) {
this.price = price;
}
@Override
public String toString() {
return "Product [name=" + name + ", price=" + price + "]";
}
}package com.js.demo2;
import org.springframework.context.annotation.Bean;
import org.springframework.context.annotation.Configuration;
@Configuration
public class BeanConfig {
@Bean(name="car")
public Car showCar(){
Car car = new Car();
car.setName("长安");
car.setPrice(40000d);
return car;
}
@Bean(name="product")
public Product initProduct(){
Product product = new Product();
product.setName("空调");
product.setPrice(3000d);
return product;
}
}
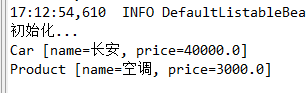
package com.js.demo2;

import org.junit.Test;
import org.springframework.context.ApplicationContext;
import org.springframework.context.support.ClassPathXmlApplicationContext;

public class Test2 {
	@Test
	public void demo1(){
		ApplicationContext applicationContext = new ClassPathXmlApplicationContext("applicationContext.xml");
		Car car = (Car)applicationContext.getBean("car");
		Product product= (Product)applicationContext.getBean("product");
		System.out.println(car);
		System.out.println(product);
	}
}