tp5微信小程序使用阿里云短信接口完成验证码验证
1.最近的项目中用到了阿里云的短信接口,这里来写一下,不得不说,阿里云的接口是很简单,
但是短信接口的权限,真的是好繁琐,关于服务器端开启短信模板,短信签名,和短信权限就不多做介绍了
这里我只做代码的实现介绍
一:在小程序端:
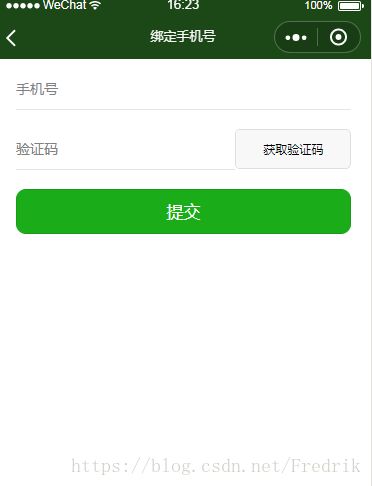
wxml文件中
<
view
class=
"mobile-container">
<
view
class=
'row'>
<
input
class=
'mobile'
type=
'number'
placeholder=
'手机号'
confirm-type=
'确认'
bindinput=
'mobileChange'>
input
>
view
>
<
view
class=
'row'>
<
input
class=
'code-input'
type=
'number'
placeholder=
'验证码'
confirm-type=
'确认'
bindinput=
'codeChange'>
input
>
<
button
class=
'code-btn'
bindtap=
"sendCode"
disabled=
'{{sendDisabled}}'>{{codeText}}
button
>
view
>
<
view
class=
'row'>
<
button
class=
'submit'
bindtap=
"bindMobile"
type=
'primary'>提交
button
>
view
>
view
>
wxss文件中
/* pages/moblie/mobile.wxss */
.mobile-container {
height:
100%;
display:
flex;
flex-direction:
column;
box-sizing:
border-box;
padding:
0
40
rpx;
font-size:
28
rpx;
}
input {
border-bottom:
1px
solid
#E5E5E5;
height:
80
rpx;
}
.row {
display:
flex;
height:
80
rpx;
margin:
20
rpx
0;
}
.row
.mobile {
flex:
5;
}
.row
.code-input {
flex:
5;
}
.row
.code-btn {
flex:
2;
font-size:
24
rpx;
text-align:
center;
line-height:
80
rpx;
}
.row
.submit {
width:
100%;
border-radius:
20
rpx;
height:
90
rpx;
line-height:
90
rpx;
font-size:
35
rpx;
}
js文件中:
// pages/moblie/mobile.js
var app = getApp()
var url = app.globalData.url
var utils =
require(
'../../utils/util.js');
Page({
/**
* 页面的初始数据
*/
data: {
//用户输入的手机号
mobile:
'',
//用户输入的验证码
code:
'',
//服务器返回的验证码
res_code:
'',
//用来控制获取验证码倒计时按钮的时效性
sendDisabled:
false,
forbiddenTime:
0,
codeText:
'获取验证码'
},
/**
* 手机号输入
*/
mobileChange:
function (e) {
var that=
this;
that.setData({
mobile: e.detail.value
});
},
/**
* 验证码输入
*/
codeChange:
function (e) {
var that =
this;
that.setData({
code: e.detail.value
});
},
/**
* 发送验证码
*/
sendCode:
function () {
var that =
this;
let mobile = that.data.mobile;
if (!mobile) {
utils.quickTip(
'请输入手机号');
return;
}
if (!that.mobileValid(mobile)) {
utils.quickTip(
'请输入正确的手机号');
return;
}
wx.request({
url: url +
'Wx_SendCode',
data: {
mobile: mobile
},
method:
'POST',
header: {
"Content-Type":
"application/x-www-form-urlencoded" },
success:
function(res){
let data = res.data;
that.setData({
sendDisabled:
true,
res_code:data.phone_code,
});
that.reflashTime(
120);
}
})
},
/**
* 绑定手机号
*/
bindMobile:
function () {
var that=
this
let mobile = that.data.mobile;
if (!mobile) {
utils.quickTip(
'请输入手机号');
return;
}
let code = that.data.code;
let res_code = that.data.res_code;
if (!code) {
utils.quickTip(
'请输入验证码');
return;
}
if(code==res_code){
var openid=wx.getStorageSync(
'openid');
//将手机号添加入用户信息表中
wx.request({
url: url+
'Wx_AddPnone',
data:{
openid:openid,
mobile: that.data.mobile
},
method:
'POST',
header: {
"Content-Type":
"application/x-www-form-urlencoded" },
success:
function(res){
console.log(res);
//提示用户
wx.showToast({
title:
'绑定成功',
icon:
'success',
success:
function () {
setTimeout(
function () {
wx.switchTab({
url:
'/pages/self/self',
});
},
1000);
}
});
}
})
}
else{
utils.quickTip(
'验证码错误!');
return;
}
},
/**
* 刷新验证码重新获取时间
*/
reflashTime(time) {
var that =
this;
let index = setInterval(
function () {
time -=
1;
if (time <=
0) {
that.setData({
forbiddenTime:
0,
sendDisabled:
false,
codeText:
'获取验证码'
});
index =
null;
}
else {
that.setData({
forbiddenTime: time,
codeText:
'重新获取' + time +
's'
});
}
},
1000);
},
/**
* 手机号校验
*/
mobileValid(mobile) {
var myreg = /^[1][3,4,5,7,8][0-9]{9}$/;
if (!/^[1][3,4,5,7,8][0-9]{9}$/.test(mobile)) {
return
false;
}
else {
return
true;
}
},
/**
* 生命周期函数--监听页面加载
*/
onLoad:
function (options) {
var that=
this
},
/**
* 生命周期函数--监听页面初次渲染完成
*/
onReady:
function () {
},
/**
* 生命周期函数--监听页面显示
*/
onShow:
function () {
},
/**
* 生命周期函数--监听页面隐藏
*/
onHide:
function () {
},
/**
* 生命周期函数--监听页面卸载
*/
onUnload:
function () {
},
/**
* 页面相关事件处理函数--监听用户下拉动作
*/
onPullDownRefresh:
function () {
},
/**
* 页面上拉触底事件的处理函数
*/
onReachBottom:
function () {
},
/**
* 用户点击右上角分享
*/
onShareAppMessage:
function () {
}
})
二:接下来介绍后端怎么接受,以及阿里云短信接口的使用
首先把在阿里云下载出来的sdk打开,把api_sdk命名为alisms,这里只是为了引入方便,因为还需要引入腾讯的支付接口,
为了方便分辨用的那个sdk所以重新命名,不需要其他sdk的完全可以不用重命名,目录结构普如下,放在extends目录下
1.
接下来,可以看到,目录中有一个名为SendSms的php文件,这是我们自己写的类文件,通过此方法即可实现
调用阿里云的短信接口:
内容如下所示:
/**
 * Created by PhpStorm.
 * User: Administrator
 * Date: 2018/7/15
 * Time: 8:14
 */
namespace alisms;

//引入阿里云sdk的命名空间
use Aliyun\Core\Config;
use Aliyun\Core\Profile\DefaultProfile;
use Aliyun\Core\DefaultAcsClient;
use Aliyun\Api\Sms\Request\V20170525\SendSmsRequest;

//引入autoload.php,EXTEND_PATH就是指tp5根目录下的extend目录,系统自带常量。alisms为我们复制api_sdk过来后更改的目录名称
require_once EXTEND_PATH.'alisms/vendor/autoload.php';
Config::load();             //加载区域结点配置


class SendSms
{
    //关键的配置,我们用成员属性
    public $accessKeyId = null; //阿里云短信获取的accessKeyId
    public $accessKeySecret = null; //阿里云短信获取的accessKeySecret
    public $signName = null;    //短信签名,要审核通过
    public $templateCode = null;    //短信模板ID,记得要审核通过的

    public function send($mobile,$templateParam)
    {
        //获取成员属性
        $accessKeyId     = $this->accessKeyId;
        $accessKeySecret = $this->accessKeySecret;
        $signName        = $this->signName;
        $templateCode    = $this->templateCode;
        //短信API产品名(短信产品名固定,无需修改)
        $product = "Dysmsapi";
        //短信API产品域名(接口地址固定,无需修改)
        $domain = "dysmsapi.aliyuncs.com";
        //暂时不支持多Region(目前仅支持cn-hangzhou请勿修改)
        $region = "cn-hangzhou";

        // 初始化用户Profile实例
        $profile = DefaultProfile::getProfile($region, $accessKeyId, $accessKeySecret);
        // 增加服务结点
        DefaultProfile::addEndpoint("cn-hangzhou", "cn-hangzhou", $product, $domain);
        // 初始化AcsClient用于发起请求
        $acsClient= new DefaultAcsClient($profile);

        // 初始化SendSmsRequest实例用于设置发送短信的参数
        $request = new SendSmsRequest();
        // 必填,设置雉短信接收号码
        $request->setPhoneNumbers($mobile);

        // 必填,设置签名名称
        $request->setSignName($signName);

        // 必填,设置模板CODE
        $request->setTemplateCode($templateCode);

        // 可选,设置模板参数
        if($templateParam) {
            $request->setTemplateParam(json_encode($templateParam));
        }

        //发起访问请求
        $acsResponse = $acsClient->getAcsResponse($request);

        //返回请求结果,这里为为数组格式
        $result = json_decode(json_encode($acsResponse),true);
        return $result;
    }


}
然后就可以在我们的控制器方法中调用他了,可以看到这里的方法名就是我的微信小程序中wx.request的url方法名
//接收短信验证码
    public function Wx_SendCode(){
//获取对象,如果上面没有引入命名空间,可以这样实例化:$sms = new \alisms\SendSms()
        $sms = new SendSms();
        //设置关键的四个配置参数,其实配置参数应该写在公共或者模块下的config配置文件中,然后在获取使用,这里我就直接使用了。
        $sms->accessKeyId = 'LTAIljPpRVABAg';
        $sms->accessKeySecret = 'IY1eKafGGafURwMbwdnYWJmmYuBR';
        $sms->signName = '新灿教育';
        $sms->templateCode = 'SMS_139459227';
        //$mobile为微信小程序端传过来的的手机号
        $mobile = \request()->param('mobile');
        //模板参数,自定义了随机数,你可以在这里保存在缓存或者cookie等设置有效期以便逻辑发送后用户使用后的逻辑处理
        $code = mt_rand(100000,999999);
        $templateParam = array("code"=>$code);
        $result = $sms->send($mobile,$templateParam);
        //类中有说明,默认返回的数组格式,如果需要json,在自行修改类,或者在这里将$result转换后在输出
        $result['phone_code']=$code;
        return json_encode($result);

    }
好了,接下来返回的phpone_code即为我们的验证码
欢迎大家的指教!