SpringMVC【校验器、统一处理异常、RESTful、拦截器】
前言
本博文主要讲解的知识点如下:
- 校验器
- 统一处理异常
- RESTful
- 拦截器
Validation
在我们的Struts2中,我们是继承ActionSupport来实现校验的…它有两种方式来实现校验的功能
- 手写代码
- XML配置
- 这两种方式也是可以特定处理方法或者整个Action的
而SpringMVC使用JSR-303(javaEE6规范的一部分)校验规范,springmvc使用的是Hibernate Validator(和Hibernate的ORM无关)
快速入门
导入jar包

配置校验器
    <bean id="validator"
        class="org.springframework.validation.beanvalidation.LocalValidatorFactoryBean">

        <property name="providerClass" value="org.hibernate.validator.HibernateValidator" />

        <property name="validationMessageSource" ref="messageSource" />
    bean>
错误信息的校验文件配置
    <bean id="messageSource"
        class="org.springframework.context.support.ReloadableResourceBundleMessageSource">

        <property name="basenames">
            <list>
                <value>classpath:CustomValidationMessagesvalue>
            list>
        property>

        <property name="fileEncodings" value="utf-8" />

        <property name="cacheSeconds" value="120" />
    bean>
添加到自定义参数绑定的WebBindingInitializer中
    <bean id="customBinder"
        class="org.springframework.web.bind.support.ConfigurableWebBindingInitializer">

        <property name="validator" ref="validator" />
    bean>
最终添加到适配器中
    <bean
        class="org.springframework.web.servlet.mvc.method.annotation.RequestMappingHandlerAdapter">

        <property name="webBindingInitializer" ref="customBinder">property>
    bean>
创建CustomValidationMessages配置文件

定义规则
package entity;

import javax.validation.constraints.NotNull;
import javax.validation.constraints.Size;
import java.util.Date;

public class Items {
    private Integer id;

    //商品名称的长度请限制在1到30个字符
    @Size(min=1,max=30,message="{items.name.length.error}")
    private String name;

    private Float price;

    private String pic;

    //请输入商品生产日期
    @NotNull(message="{items.createtime.is.notnull}")
    private Date createtime;

    private String detail;

    public Integer getId() {
        return id;
    }

    public void setId(Integer id) {
        this.id = id;
    }

    public String getName() {
        return name;
    }

    public void setName(String name) {
        this.name = name == null ? null : name.trim();
    }

    public Float getPrice() {
        return price;
    }

    public void setPrice(Float price) {
        this.price = price;
    }

    public String getPic() {
        return pic;
    }

    public void setPic(String pic) {
        this.pic = pic == null ? null : pic.trim();
    }

    public Date getCreatetime() {
        return createtime;
    }

    public void setCreatetime(Date createtime) {
        this.createtime = createtime;
    }

    public String getDetail() {
        return detail;
    }

    public void setDetail(String detail) {
        this.detail = detail == null ? null : detail.trim();
    }
}
测试:
<%--
  Created by IntelliJ IDEA.
  User: ozc
  Date: 2017/8/11
  Time: 9:56
  To change this template use File | Settings | File Templates.
--%>
<%@ page contentType="text/html;charset=UTF-8" language="java" %>
<html>
<head>
    <title>测试文件上传title>
head>
<body>


<form action="${pageContext.request.contextPath}/validation.action" method="post" >
    名称:<input type="text" name="name">
    日期:<input type="text" name="createtime">
    <input type="submit" value="submit">
form>

body>
html>
Controller需要在校验的参数上添加@Validation注解…拿到BindingResult对象…
    @RequestMapping("/validation")
    public void validation(@Validated Items items, BindingResult bindingResult) {

        List allErrors = bindingResult.getAllErrors();
        for (ObjectError allError : allErrors) {
            System.out.println(allError.getDefaultMessage());
        }

    }
由于我在测试的时候,已经把日期转换器关掉了,因此提示了字符串不能转换成日期,但是名称的校验已经是出来了…

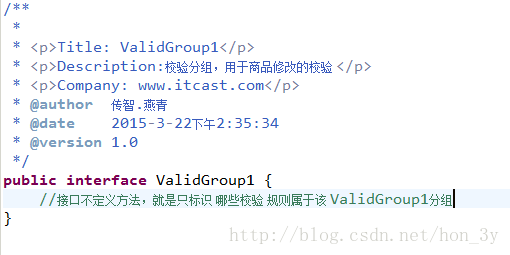
分组校验
分组校验其实就是为了我们的校验更加灵活,有的时候,我们并不需要把我们当前配置的属性都进行校验,而需要的是当前的方法仅仅校验某些的属性。那么此时,我们就可以用到分组校验了…
步骤:
- 定义分组的接口【主要是标识】
- 定于校验规则属于哪一各组
- 在Controller方法中定义使用校验分组


统一异常处理
在我们之前SSH,使用Struts2的时候也配置过统一处理异常…
当时候是这么干的:
- 在service层中自定义异常
- 在action层也自定义异常
- 对于Dao层的异常我们先不管【因为我们管不着,dao层的异常太致命了】
- service层抛出异常,Action把service层的异常接住,通过service抛出的异常来判断是否让请求通过
- 如果不通过,那么接着抛出Action异常
- 在Struts的配置文件中定义全局视图,页面显示错误信息
详情可看:http://blog.csdn.net/hon_3y/article/details/72772559
那么我们这次的统一处理异常的方案是什么呢????
我们知道Java中的异常可以分为两类
- 编译时期异常
- 运行期异常
对于运行期异常我们是无法掌控的,只能通过代码质量、在系统测试时详细测试等排除运行时异常
而对于编译时期的异常,我们可以在代码手动处理异常可以try/catch捕获,可以向上抛出。
我们可以换个思路,自定义一个模块化的异常信息,比如:商品类别的异常
public class CustomException extends Exception {

    //异常信息
    private String message;

    public CustomException(String message){
        super(message);
        this.message = message;

    }

    public String getMessage() {
        return message;
    }

    public void setMessage(String message) {
        this.message = message;
    }


}我们在查看Spring源码的时候发现:前端控制器DispatcherServlet在进行HandlerMapping、调用HandlerAdapter执行Handler过程中,如果遇到异常,在系统中自定义统一的异常处理器,写系统自己的异常处理代码。。


我们也可以学着点,定义一个统一的处理器类来处理异常…
定义统一异常处理器类
public class CustomExceptionResolver implements HandlerExceptionResolver  {

    //前端控制器DispatcherServlet在进行HandlerMapping、调用HandlerAdapter执行Handler过程中,如果遇到异常就会执行此方法
    //handler最终要执行的Handler,它的真实身份是HandlerMethod
    //Exception ex就是接收到异常信息
    @Override
    public ModelAndView resolveException(HttpServletRequest request,
            HttpServletResponse response, Object handler, Exception ex) {
        //输出异常
        ex.printStackTrace();

        //统一异常处理代码
        //针对系统自定义的CustomException异常,就可以直接从异常类中获取异常信息,将异常处理在错误页面展示
        //异常信息
        String message = null;
        CustomException customException = null;
        //如果ex是系统 自定义的异常,直接取出异常信息
        if(ex instanceof CustomException){
            customException = (CustomException)ex;
        }else{
            //针对非CustomException异常,对这类重新构造成一个CustomException,异常信息为“未知错误”
            customException = new CustomException("未知错误");
        }

        //错误 信息
        message = customException.getMessage();

        request.setAttribute("message", message);


        try {
            //转向到错误 页面
            request.getRequestDispatcher("/WEB-INF/jsp/error.jsp").forward(request, response);
        } catch (ServletException e) {
            // TODO Auto-generated catch block
            e.printStackTrace();
        } catch (IOException e) {
            // TODO Auto-generated catch block
            e.printStackTrace();
        }

        return new ModelAndView();
    }

}
配置统一异常处理器
<bean class="cn.itcast.ssm.exception.CustomExceptionResolver">bean>
RESTful支持
我们在学习webservice的时候可能就听过RESTful这么一个名词,当时候与SOAP进行对比的…那么RESTful究竟是什么东东呢???
RESTful(Representational State Transfer)软件开发理念,RESTful对http进行非常好的诠释。
如果一个架构支持RESTful,那么就称它为RESTful架构…
以下的文章供我们了解:
http://www.ruanyifeng.com/blog/2011/09/restful
综合上面的解释,我们总结一下什么是RESTful架构:
- (1)每一个URI代表一种资源;
- (2)客户端和服务器之间,传递这种资源的某种表现层;
- (3)客户端通过四个HTTP动词,对服务器端资源进行操作,实现”表现层状态转化”。
关于RESTful幂等性的理解:http://www.oschina.net/translate/put-or-post
简单来说,如果对象在请求的过程中会发生变化(以Java为例子,属性被修改了),那么此是非幂等的。多次重复请求,结果还是不变的话,那么就是幂等的。
PUT用于幂等请求,因此在更新的时候把所有的属性都写完整,那么多次请求后,我们其他属性是不会变的
在上边的文章中,幂等被翻译成“状态统一性”。这就更好地理解了。
其实一般的架构并不能完全支持RESTful的,因此,只要我们的系统支持RESTful的某些功能,我们一般就称作为支持RESTful架构…
url的RESTful实现
非RESTful的http的url:http://localhost:8080/items/editItems.action?id=1&….
RESTful的url是简洁的:http:// localhost:8080/items/editItems/1
更改DispatcherServlet的配置
从上面我们可以发现,url并没有.action后缀的,因此我们要修改核心分配器的配置
    <servlet>
        <servlet-name>springmvc_restservlet-name>
        <servlet-class>org.springframework.web.servlet.DispatcherServletservlet-class>

        <init-param>
            <param-name>contextConfigLocationparam-name>

            <param-value>classpath:spring/springmvc.xmlparam-value>
        init-param>

    servlet>
    <servlet-mapping>
        <servlet-name>springmvc_restservlet-name>

        <url-pattern>/url-pattern>
    servlet-mapping>
在Controller上使用PathVariable注解来绑定对应的参数
    //根据商品id查看商品信息rest接口
    //@RequestMapping中指定restful方式的url中的参数,参数需要用{}包起来
    //@PathVariable将url中的{}包起参数和形参进行绑定
    @RequestMapping("/viewItems/{id}")
    public @ResponseBody ItemsCustom viewItems(@PathVariable("id") Integer id) throws Exception{
        //调用 service查询商品信息
        ItemsCustom itemsCustom = itemsService.findItemsById(id);

        return itemsCustom;

    }
当DispatcherServlet拦截/开头的所有请求,对静态资源的访问就报错:我们需要配置对静态资源的解析
    <mvc:resources location="/js/" mapping="/js/**" />
    <mvc:resources location="/img/" mapping="/img/**" />
/**就表示不管有多少层,都对其进行解析,/*代表的是当前层的所有资源..
SpringMVC拦截器
在Struts2中拦截器就是我们当时的核心,原来在SpringMVC中也是有拦截器的
用户请求到DispatherServlet中,DispatherServlet调用HandlerMapping查找Handler,HandlerMapping返回一个拦截的链儿(多个拦截),springmvc中的拦截器是通过HandlerMapping发起的。
实现拦截器的接口:
public class HandlerInterceptor1 implements HandlerInterceptor {

    //在执行handler之前来执行的
    //用于用户认证校验、用户权限校验
    @Override
    public boolean preHandle(HttpServletRequest request,
            HttpServletResponse response, Object handler) throws Exception {

        System.out.println("HandlerInterceptor1...preHandle");

        //如果返回false表示拦截不继续执行handler,如果返回true表示放行
        return false;
    }
    //在执行handler返回modelAndView之前来执行
    //如果需要向页面提供一些公用 的数据或配置一些视图信息,使用此方法实现 从modelAndView入手
    @Override
    public void postHandle(HttpServletRequest request,
            HttpServletResponse response, Object handler,
            ModelAndView modelAndView) throws Exception {
        System.out.println("HandlerInterceptor1...postHandle");

    }
    //执行handler之后执行此方法
    //作系统 统一异常处理,进行方法执行性能监控,在preHandle中设置一个时间点,在afterCompletion设置一个时间,两个时间点的差就是执行时长
    //实现 系统 统一日志记录
    @Override
    public void afterCompletion(HttpServletRequest request,
            HttpServletResponse response, Object handler, Exception ex)
            throws Exception {
        System.out.println("HandlerInterceptor1...afterCompletion");
    }

}
配置拦截器
    <mvc:interceptors>


        <mvc:interceptor>

            <mvc:mapping path="/**" />
            <bean class="cn.itcast.ssm.controller.interceptor.LoginInterceptor">bean>
        mvc:interceptor>
    mvc:interceptors>
测试执行顺序
如果两个拦截器都放行
测试结果:
HandlerInterceptor1...preHandle
HandlerInterceptor2...preHandle

HandlerInterceptor2...postHandle
HandlerInterceptor1...postHandle

HandlerInterceptor2...afterCompletion
HandlerInterceptor1...afterCompletion

总结:
执行preHandle是顺序执行。
执行postHandle、afterCompletion是倒序执行
1 号放行和2号不放行
测试结果:
HandlerInterceptor1...preHandle
HandlerInterceptor2...preHandle
HandlerInterceptor1...afterCompletion

总结:
如果preHandle不放行,postHandle、afterCompletion都不执行。
只要有一个拦截器不放行,controller不能执行完成
1 号不放行和2号不放行
测试结果:
HandlerInterceptor1...preHandle
总结:
只有前边的拦截器preHandle方法放行,下边的拦截器的preHandle才执行。
日志拦截器或异常拦截器要求
- 将日志拦截器或异常拦截器放在拦截器链儿中第一个位置,且preHandle方法放行
拦截器应用-身份认证
拦截器拦截
public class LoginInterceptor implements HandlerInterceptor {

    //在执行handler之前来执行的
    //用于用户认证校验、用户权限校验
    @Override
    public boolean preHandle(HttpServletRequest request,
            HttpServletResponse response, Object handler) throws Exception {

        //得到请求的url
        String url = request.getRequestURI();

        //判断是否是公开 地址
        //实际开发中需要公开 地址配置在配置文件中
        //...
        if(url.indexOf("login.action")>=0){
            //如果是公开 地址则放行
            return true;
        }

        //判断用户身份在session中是否存在
        HttpSession session = request.getSession();
        String usercode = (String) session.getAttribute("usercode");
        //如果用户身份在session中存在放行
        if(usercode!=null){
            return true;
        }
        //执行到这里拦截,跳转到登陆页面,用户进行身份认证
        request.getRequestDispatcher("/WEB-INF/jsp/login.jsp").forward(request, response);

        //如果返回false表示拦截不继续执行handler,如果返回true表示放行
        return false;
    }
    //在执行handler返回modelAndView之前来执行
    //如果需要向页面提供一些公用 的数据或配置一些视图信息,使用此方法实现 从modelAndView入手
    @Override
    public void postHandle(HttpServletRequest request,
            HttpServletResponse response, Object handler,
            ModelAndView modelAndView) throws Exception {
        System.out.println("HandlerInterceptor1...postHandle");

    }
    //执行handler之后执行此方法
    //作系统 统一异常处理,进行方法执行性能监控,在preHandle中设置一个时间点,在afterCompletion设置一个时间,两个时间点的差就是执行时长
    //实现 系统 统一日志记录
    @Override
    public void afterCompletion(HttpServletRequest request,
            HttpServletResponse response, Object handler, Exception ex)
            throws Exception {
        System.out.println("HandlerInterceptor1...afterCompletion");
    }

}
Controller
@Controller
public class LoginController {


    //用户登陆提交方法
    @RequestMapping("/login")
    public String login(HttpSession session, String usercode,String password)throws Exception{

        //调用service校验用户账号和密码的正确性
        //..

        //如果service校验通过,将用户身份记录到session
        session.setAttribute("usercode", usercode);
        //重定向到商品查询页面
        return "redirect:/items/queryItems.action";
    }

    //用户退出
    @RequestMapping("/logout")
    public String logout(HttpSession session)throws Exception{

        //session失效
        session.invalidate();
        //重定向到商品查询页面
        return "redirect:/items/queryItems.action";

    }


}
总结
- 使用Spring的校验方式就是将要校验的属性前边加上注解声明。
- 在Controller中的方法参数上加上@Validation注解。那么SpringMVC内部就会帮我们对其进行处理(创建对应的bean,加载配置文件)
- BindingResult可以拿到我们校验错误的提示
- 分组校验就是将让我们的校验更加灵活:某方法需要校验这个属性,而某方法不用校验该属性。我们就可以使用分组校验了。
- 对于处理异常,SpringMVC是用一个统一的异常处理器类的。实现了HandlerExceptionResolver接口。
- 对模块细分多个异常类,都交由我们的统一异常处理器类进行处理。
- 对于RESTful规范,我们可以使用SpringMVC简单地支持的。将SpringMVC的拦截.action改成是任意的。同时,如果是静态的资源文件,我们应该设置不拦截。
- 对于url上的参数,我们可以使用@PathVariable将url中的{}包起参数和形参进行绑定
- SpringMVC的拦截器和Struts2的拦截器差不多。不过SpringMVC的拦截器配置起来比Struts2的要简单。
- 至于他们的拦截器链的调用顺序,和Filter的是没有差别的。
如果文章有错的地方欢迎指正,大家互相交流。习惯在微信看技术文章,想要获取更多的Java资源的同学,可以关注微信公众号:Java3y