Python Tkinter 之Button控件(Python GUI 系列6)
Python Tkinter 之Button控件(Python GUI 系列6)
1. 序言
本章介绍Tkinter的Button控件,本文是Python GUI系列的第6篇文章,整个系统约20篇博客,将全面的介绍Python Tkinter常用控件,最后还将基于Tkinter搭建两个比较完整的小项目。
2. 环境信息
********************************
本系列运行平台:Mac OS 10.13.4
Python 版本:3.6.4
********************************
3. Button控件
Button小部件是一个标准的Tkinter的部件,用于实现各种按钮。按钮可以包含文本或图像,您可以调用Python函数或方法用于每个按钮。Tkinter的按钮被按下时,会自动调用该函数或方法。
按钮文本可跨越一个以上的行。此外,文本字符可以有下划线,例如标记的键盘快捷键。默认情况下,使用Tab键可以移动到一个按钮部件。
用法:Button(根对象, [属性列表]),常用的属性列表如下:
| 函数 |
描述 |
| text |
显示文本内容 |
| command |
指定Button的事件处理函数 |
| compound |
同一个Button既显示文本又显示图片,可用此参数将其混叠起来,compound=’bottom’(图像居下),compound=’center’(文字覆盖在图片上),left,right,top略 |
| bitmap |
指定位图,如bitmap= BitmapImage(file = filepath) |
| image |
Button不仅可以显示文字,也可以显示图片,image= PhotoImage(file="../xxx/xxx.gif") ,目前仅支持gif,PGM,PPM格式的图片 |
| focus_set |
设置当前组件得到的焦点 |
| master |
代表了父窗口 |
| bg |
背景色,如bg=”red”, bg="#FF56EF" |
| fg |
前景色,如fg=”red”, fg="#FF56EF" |
| font |
字体及大小,如font=("Arial", 8),font=("Helvetica 16 bold italic") |
| height |
设置显示高度、如果未设置此项,其大小以适应内容标签 |
| relief |
指定外观装饰边界附近的标签,默认是平的,可以设置的参数:flat、groove、raised、ridge、solid、sunken |
| width |
设置显示宽度,如果未设置此项,其大小以适应内容标签 |
| wraplength |
将此选项设置为所需的数量限制每行的字符,数默认为0 |
| state |
设置组件状态;正常(normal),激活(active),禁用(disabled) |
| anchor |
设置Button文本在控件上的显示位置,可用值:n(north),s(south),w(west),e(east),和ne,nw,se,sw |
| textvariable |
设置Button与textvariable属性 |
| bd |
设置Button的边框大小;bd(bordwidth)缺省为1或2个像素 |
以下是Button常用的函数
| 方法 |
描述 |
| flash() |
Flash the button. This method redraws the button several times, alternating between active and normal appearance. |
| invoke() |
Invoke the command associated with the button. |
4. 一组实例
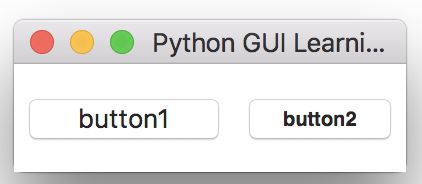
实例1-创建按钮
from Tkinter import*

#初始化Tk()
myWindow = Tk()
#设置标题
myWindow.title('Python GUI Learning')

#创建两个按钮
b1=Button(myWindow, text='button1',bg="red", relief='raised', width=8, height=2)
b1.grid(row=0, column=0, sticky=W, padx=5,pady=5)
b2=Button(myWindow, text='button2', font=('Helvetica 10 bold'),width=8, height=2)
b2.grid(row=0, column=1, sticky=W, padx=5, pady=5)

#进入消息循环
myWindow.mainloop()
运行结果:
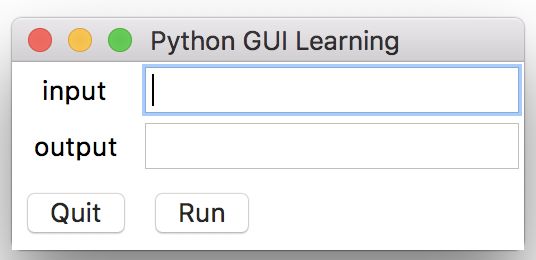
实例2-创建按钮并绑定响应函数,输入半径,计算圆面积并输出。
from Tkinter import*

def printInfo():
    #清理entry2
    entry2.delete(0, END)
    #根据输入半径计算面积
    R=int(entry1.get())
    S= 3.1415926*R*R
    entry2.insert(10, S)
    #清空entry2控件
    entry1.delete(0, END)

#初始化Tk()
myWindow = Tk()
#设置标题
myWindow.title('Python GUI Learning')

#标签控件布局
Label(myWindow, text="input").grid(row=0)
Label(myWindow, text="output").grid(row=1)

#Entry控件布局
entry1=Entry(myWindow)
entry2=Entry(myWindow)
entry1.grid(row=0, column=1)
entry2.grid(row=1, column=1)

#Quit按钮退出;Run按钮打印计算结果
Button(myWindow, text='Quit', command=myWindow.quit).grid(row=2, column=0, sticky=W, padx=5,pady=5)
Button(myWindow, text='Run', command=printInfo).grid(row=2, column=1, sticky=W, padx=5, pady=5)

#进入消息循环
myWindow.mainloop()
运行结果:
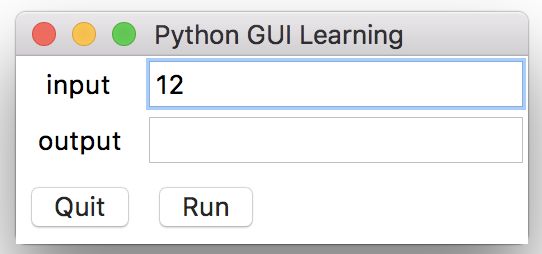
输入半径12
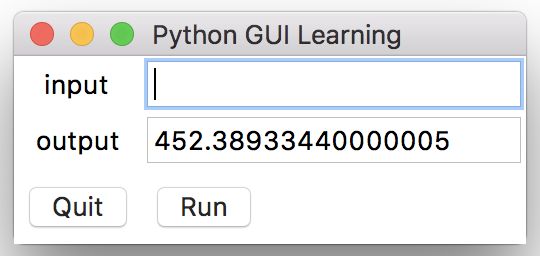
点击按钮“Run”,输出结果
点击按钮“Quit”退出
欢迎学习《Python快速学习》电子书
链接:https://gitbook.cn/gitchat/column/5ad56a79af8f2f35290f6535
