Android Studio:增加蒙板/浮层特效
写在前面的话:每一个实例的代码都会附上相应的代码片或者图片,保证代码完整展示在博客中。最重要的是保证例程的完整性!!!方便自己也方便他人~欢迎大家交流讨论~
接下来要在自定义相机上添加取景框,即中间掏空旁边半透明的浮层/蒙板。我一开始搜索的是“蒙板”,找到的基本是新手指引界面的做法,就是一进某个页面就出现半透明蒙板告诉你应用哪里内容有更新,点击查看更新,另外点击屏幕任意处蒙板消失。我觉得这和我所要达到的结果是相类似的,只要把点击事件从任意屏幕处改为拍照按钮即可。于是我决定先做一个蒙板,最后再和自定义相机的代码结合起来,不过还会有修改,下一篇中我会讲到结合的过程。这一篇先讲怎么做蒙板,另外此篇蒙板代码是可以直接用作新手指引浮层的,再根据自己的需求修修改改就好。如果关心怎么达到取景框效果的可以直接看下一篇了……(好的!下一篇我会尽快写出来)
- 新建项目和文件
- values文件夹
- themetranslucency.xml
- layout文件夹
- activity_main.xml
- activity_second.xml
- translucencyview.xml
- manifests
- AndroidManifest.xml
- Java文件
- MainActivity.java
- SecondActivity.java
- TranslucencyActivity.java
- TranslucencyView.java
新建项目和文件
新建名为的项目,文件名我直接截图出来了,有画重点哦,不然每次复制粘贴手打实在是太麻烦了orz……

values文件夹
themetranslucency.xml
这里编辑了自定义view的style
version="1.0" encoding="utf-8"?>
layout文件夹
activity_main.xml
<android.support.constraint.ConstraintLayout xmlns:android="http://schemas.android.com/apk/res/android"
    xmlns:tools="http://schemas.android.com/tools"
    android:layout_width="match_parent"
    android:layout_height="match_parent"
    tools:context=".MainActivity"
    >

    <Button
        android:id="@+id/button1"
        android:gravity="center"
        android:layout_width="wrap_content"
        android:layout_height="wrap_content"
        android:text="开始拍照"/>

android.support.constraint.ConstraintLayout>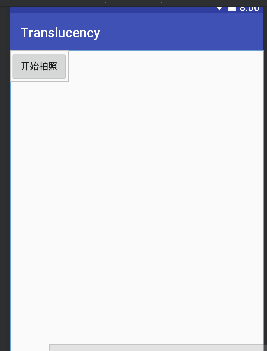
activity_second.xml
<RelativeLayout
    xmlns:android="http://schemas.android.com/apk/res/android"
    android:layout_width="match_parent"
    android:layout_height="match_parent">

    <FrameLayout
        android:layout_width="match_parent"
        android:layout_height="match_parent"
        android:layout_alignParentTop="true">
    FrameLayout>

    <android.support.v7.widget.AppCompatButton
        android:id="@+id/button2"
        android:layout_width="wrap_content"
        android:layout_height="wrap_content"
        android:layout_alignParentBottom="true"
        android:layout_centerHorizontal="true"
        android:background="@drawable/button3" />
RelativeLayout>
这里还要放一下Button的图,因为我不会用PS把原来方的图弄成圆的,所以用PPT的神操作弄了个丑丑的,还有白色边框……orz

translucencyview.xml
这是自定义view,到时会通过编写java文件对这个view进行绘图操作
<RelativeLayout
    xmlns:android="http://schemas.android.com/apk/res/android"
    android:layout_width="match_parent"
    android:layout_height="match_parent"
    android:clickable="true"
    android:id="@+id/translucencyview">

RelativeLayout>
manifests
AndroidManifest.xml
<manifest xmlns:android="http://schemas.android.com/apk/res/android"
    package="com.example.administrator.translucency">

    <application
        android:allowBackup="true"
        android:icon="@mipmap/ic_launcher"
        android:label="@string/app_name"
        android:roundIcon="@mipmap/ic_launcher_round"
        android:supportsRtl="true"
        android:theme="@style/AppTheme">
        <activity android:name=".SecondActivity">
            <intent-filter>
                <action android:name="android.intent.action.MAIN" />

                <category android:name="android.intent.category.LAUNCHER" />
            intent-filter>
        activity>
        <activity android:name=".MainActivity"/>
        <activity android:name=".TranslucencyActivity" android:theme="@style/ThemeOfTranslucency"/>
    application>
manifest>
Java文件
MainActivity.java
package com.example.administrator.translucency;

import android.app.Activity;
import android.content.Intent;
import android.os.Bundle;
import android.view.View;
import android.widget.Button;

public class MainActivity extends Activity{

    @Override
    protected void onCreate(Bundle savedInstanceState) {
        super.onCreate(savedInstanceState);
        setContentView(R.layout.activity_main);
        Button button1=findViewById(R.id.button1);
        //点击监听事件,点击Button1跳转到带有蒙版的第二个界面
        button1.setOnClickListener(new View.OnClickListener() {
            @Override
            public void onClick(View v) {
                Intent intent=new Intent(MainActivity.this,SecondActivity.class);
                startActivity(intent);
            }
        });
    }
}
SecondActivity.java
package com.example.administrator.translucency;

import android.content.Intent;
import android.os.Bundle;
import android.support.v7.app.AppCompatActivity;
import android.support.v7.widget.AppCompatButton;
import butterknife.BindView;
import butterknife.ButterKnife;

public class SecondActivity extends AppCompatActivity {
    private static final String TAG = "SecondActivity";
    @BindView(R.id.button2)
    AppCompatButton mBtCapture;
    private int mHeight;

    @Override
    protected void onCreate( Bundle savedInstanceState) {
        super.onCreate(savedInstanceState);
        setContentView(R.layout.activity_second);
        ButterKnife.bind(this);
        showMask();
    }

    @Override
    protected void onResume() {
        super.onResume();
    }

    @Override
    public void onWindowFocusChanged(boolean hasFocus) {
        super.onWindowFocusChanged(hasFocus);
    }
    //onCreat中直接去测量view的大小是测不出来的 所以在这个demo中我延时500ms去测量
    //实际使用一般在网络加载完成后去测量view的大小然后去显示蒙版
    private void showMask() {
        mBtCapture.postDelayed(new Runnable() {
            @Override
            public void run() {
                runOnUiThread(new Runnable() {
                    @Override
                    public void run() {
                        mHeight = getSupportActionBar().getHeight();
                        int left = mBtCapture.getLeft();
                        int right = mBtCapture.getRight();
                        int top = mBtCapture.getTop() + mHeight;
                        int bottom = mBtCapture.getBottom() + mHeight;
                        int mCoodinate[] = {left, top, right, bottom};
                        Intent intent = new Intent(SecondActivity.this, TranslucencyActivity.class);
                        intent.putExtra("Location", mCoodinate);
                        startActivity(intent);
                    }
                });
            }
        }, 500);
    }
}注意:这里有一个import butterknife.BindView; 不是安卓原来有的库,要自己添加,添加方式如下
import butterknife.ButterKnife;

然后点击右上方红色圆圈图标处,重新build一下
![]()
文后附Butter Knife的官方文档地址和翻译博客。
TranslucencyActivity.java
package com.example.administrator.translucency;
import android.app.Activity;
import android.content.Intent;
import android.os.Bundle;
import android.view.KeyEvent;
import android.view.ViewGroup;
import android.view.Window;
import android.widget.RelativeLayout;
import butterknife.BindView;
 import butterknife.ButterKnife;
import butterknife.OnClick;
public class TranslucencyActivity extends Activity {
private static final String TAG = "TranslucencyActivity";
private int[] mCoodinate;//定义一个放按钮坐标的数组
@BindView(R.id.translucencyview)
RelativeLayout mtranslucencyview;
@Override
protected void onCreate( Bundle savedInstanceState) {
super.onCreate(savedInstanceState);
requestWindowFeature(Window.FEATURE_NO_TITLE);//蒙板Activity不需要标题,所以去取消标题
setContentView(R.layout.translucencyview);//蒙板界面
Intent intent=getIntent();//从SecondActivity来的信使,信使携带坐标信息
mCoodinate=intent.getIntArrayExtra("Location");//根据键key="Location"取得坐标
ButterKnife.bind(this);
initView();
}
private void initView(){
TranslucencyView translucencyView=new TranslucencyView(this); //新建一个自定义view对象,该对象构造蒙板
translucencyView.setCircleLocation(mCoodinate);//设置坐标自定义的蒙板view坐标
RelativeLayout.LayoutParams layoutParams=new RelativeLayout.LayoutParams(ViewGroup.LayoutParams.MATCH_PARENT, ViewGroup.LayoutParams.MATCH_PARENT);//该layout专门用于展示蒙板,此处得到RelativeLayout参数
mtranslucencyview.addView(translucencyView,layoutParams);//使自定义蒙板View匹配RelativeLayout
}
@OnClick(R.id.translucencyview)
public void clickClose(){
finish();
overridePendingTransition(0, 0);
}
@Override
public boolean onKeyDown(int keyCode, KeyEvent event) {
if(keyCode==KeyEvent.KEYCODE_BACK){
finish();
overridePendingTransition(0, 0);
return true; }
return super.onKeyDown(keyCode, event);
}
}TranslucencyView.java
package com.example.administrator.translucency;
import android.content.Context;
import android.graphics.Canvas;
import android.graphics.Color;
import android.graphics.DashPathEffect;
import android.graphics.Paint;
import android.graphics.PathEffect;
import android.graphics.PorterDuff;
import android.graphics.PorterDuffXfermode;
import android.graphics.RectF;
import android.util.AttributeSet;
import android.widget.FrameLayout;
public class TranslucencyView extends FrameLayout {
private final Context mContext;
private int[] mCircleLocation;//声明存放坐标的数组
public TranslucencyView(Context context){this(context,null);}
public TranslucencyView(Context context, AttributeSet attributeSet){this(context,attributeSet,0);}
public TranslucencyView(Context context,AttributeSet attributeSet,int defStyleAttr){
super(context,attributeSet,defStyleAttr);
this.mContext=context;
initView();
}
private void initView(){setBackgroundColor(Color.parseColor("#7f000000"));}//设置半透明底色
public void setCircleLocation(int[] location){
this.mCircleLocation=location;
invalidate();
}
@Override
protected void onDraw(Canvas canvas) {
super.onDraw(canvas);
if(mCircleLocation!=null){
//掏空一个圆形
Paint paintarc=new Paint(Paint.ANTI_ALIAS_FLAG);
PorterDuffXfermode porterDuffXfermode=new PorterDuffXfermode(PorterDuff.Mode.CLEAR);
paintarc.setXfermode(porterDuffXfermode);
paintarc.setAntiAlias(true);
RectF rectF=new RectF(mCircleLocation[0],mCircleLocation[1],mCircleLocation[2],mCircleLocation[3]);
canvas.drawArc(rectF,0,360,true,paintarc);
//画虚线
Paint paintdashed=new Paint(Paint.ANTI_ALIAS_FLAG);
paintdashed.setStyle(Paint.Style.STROKE);
paintdashed.setColor(Color.WHITE);
paintdashed.setStrokeWidth(5);
PathEffect pathEffect=new DashPathEffect(new float[]{10,10},0);
paintdashed.setPathEffect(pathEffect);
canvas.drawArc(rectF,0,360,true,paintdashed);
//画矩形框
Paint paintrect=new Paint(Paint.ANTI_ALIAS_FLAG);
PorterDuffXfermode porterDuffXfermode1=new PorterDuffXfermode(PorterDuff.Mode.CLEAR);
paintrect.setXfermode(porterDuffXfermode1);
paintrect.setAntiAlias(true);
paintdashed.setStrokeWidth(5);
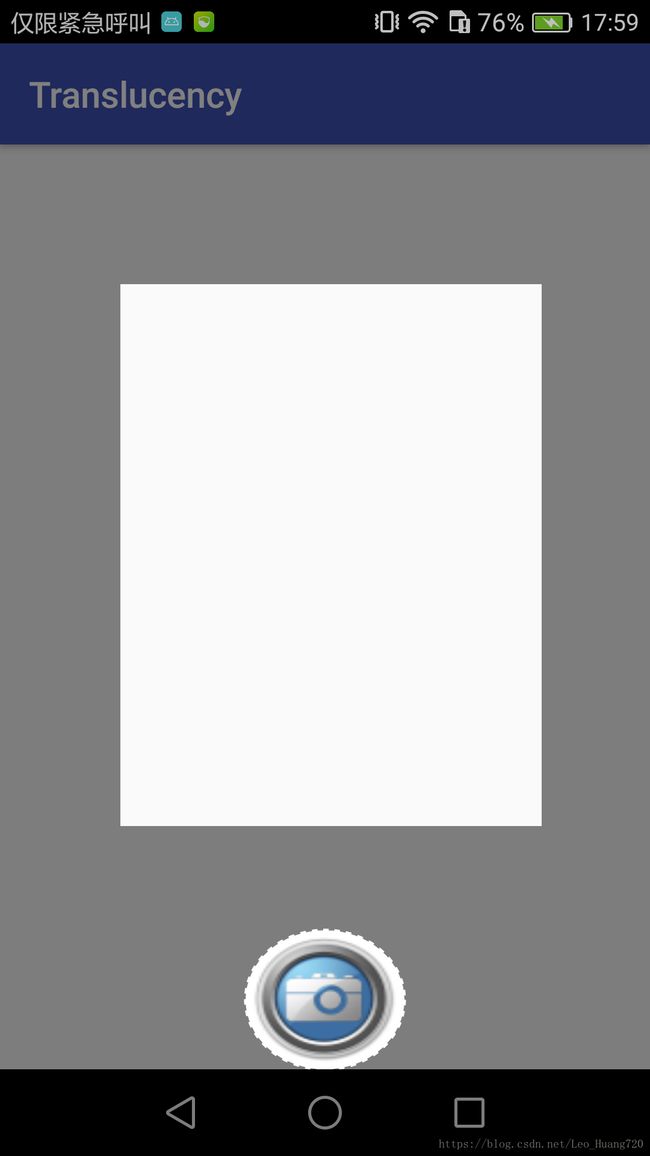
canvas.drawRect(200, 400, 900, 1300, paintrect);
}
}
}执行结果:
附:&Butter Knife https://jakewharton.github.io/butterknife/
&Android Butter Knife 框架——最好用的View注入 - 简书 https://www.jianshu.com/p/9ad21e548b69
&(和Butter Knife类似的框架)AndroidAnnotations http://androidannotations.org/
&参考博客:Android 简单实现半透明新手指引 蒙版 - 简书 https://www.jianshu.com/p/9ad7095b6091