Linux---cifs文件系统之samba的安装配置及共享目录
CIFS是一种通用网络文件系统,主要用于网络设备之间的文件共享。CIFS可以在linux系统和windows系统之间共享文件,因此这种文件系统主要用于客户端是windows系统。提供CIFS的服务是SAMBA,下文将介绍SAMBA服务的一些配置以及用法。
一.samba的安装和配置
1.配置yum源,安装软件
在服务端:
[root@server ~]# yum install samba samba-client samba-common -y ##安装smb服务
(samba服务器的应用程序 samba-client客户端应用程序 samba-common是samba的支持文件)
[root@server ~]# systemctl start smb
[root@server ~]# systemctl enable smb.service
ln -s '/usr/lib/systemd/system/smb.service' '/etc/systemd/system/multi-user.target.wants/smb.service'
[root@server ~]# systemctl stop firewalld
[root@server ~]# systemctl disable firewalld
rm '/etc/systemd/system/basic.target.wants/firewalld.service'
rm '/etc/systemd/system/dbus-org.fedoraproject.FirewallD1.service'
[root@server ~]# netstat -antlupe | grep smb   ##查看smb的服务端口445 139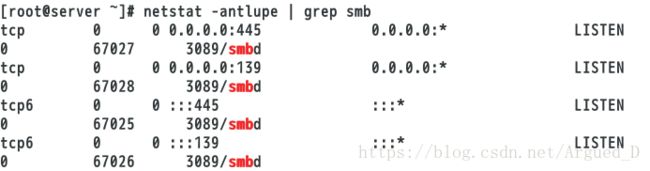
2.添加smb用户
在服务端:
[root@server ~]# smbpasswd -a student   ##添加smb用户student
New SMB password:
Retype new SMB password:
Added user student.      ##建立成功
[root@server ~]# smbpasswd -a westos ##建立smb用户westos
New SMB password:
Retype new SMB password:
Failed to add entry for user westos. 说明这个用户本身不存在注意:建立smb用户时,这个用户必须为主机中真实的存在
[root@server ~]# useradd westos
[root@server ~]# smbpasswd -a westos
[root@server ~]# pdbedit -L   ##查看smb用户信息
student:1000:Student User
westos:1001:
[root@server ~]# pdbedit -x student  ##删除smb用户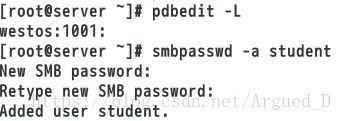
3.共享家目录
在客户端:
[root@client ~]# yum install samba-client -y
[root@client ~]# smbclient -L //172.25.254.228   ##登陆服务端查看信息(此时里面没有任何添加信息)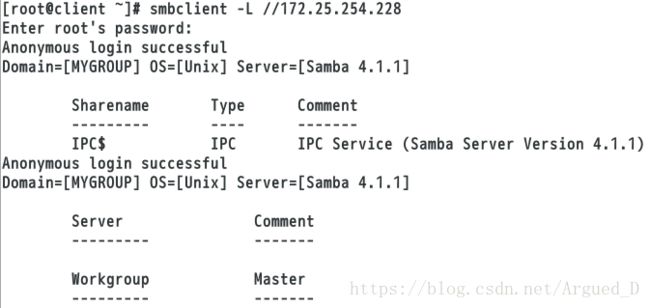
[root@client ~]# smbclient -L //172.25.254.228 -U student ##登陆smb的student列出信息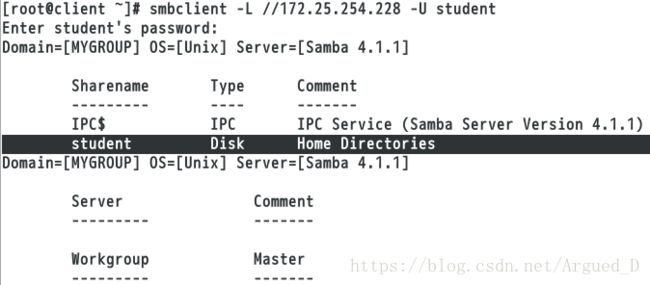
[root@client ~]# smbclient  //172.25.254.228/student -U student
Enter student's password:
session setup failedNT_STATUS_LOGON_FAILURE 注释:这个报错是登陆的密码或用户名不对[root@client ~]# smbclient //172.25.254.228/student -U student ##登陆student用户可以查看共享目录student下的文件
Enter student's password:
Domain=[MYGROUP] OS=[Unix] Server=[Samba 4.1.1]
smb: \> ls
NT_STATUS_ACCESS_DENIED listing \* 注释:这个报错是在SElinux开启的情况下,无法看到里面的文件,需要在服务端开启服务接口在服务端:
[root@server ~]# getsebool -a | grep samba   ##查看smb服务接口
[root@server ~]# setsebool -P samba_enable_home_dirs on  ##开启smb家目录接口
在客户端:
[root@client ~]# smbclient //172.25.254.228/student -U student ##查看student用户共享的家目录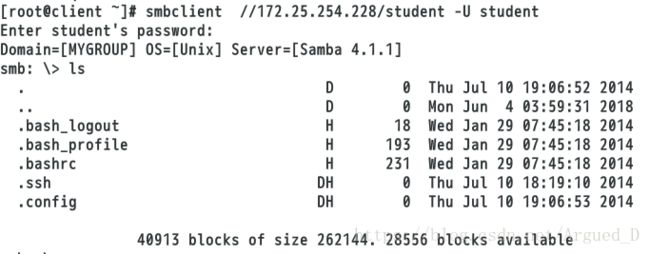
4.永久挂载
在客户端:
[root@client ~]# mount //172.25.254.228/student /mnt/ -o username=student,password=123  ##临时挂载
[root@client ~]# df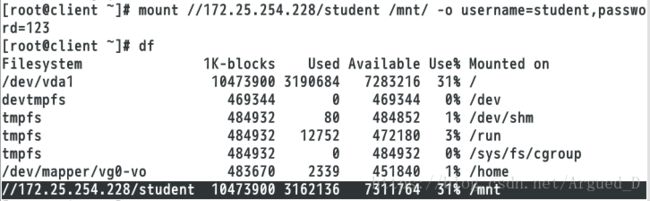
[root@client ~]# vim /etc/rc.d/rc.local ##编写脚本永久挂载
[root@client ~]# chmod +x /etc/rc.d/rc.local   ##给脚本一个可执行权限
[root@client ~]# reboot   ##重启
[root@client ~]# cd /mnt/
[root@client mnt]# touch file{1..5}
[root@client mnt]# ls
file1  file2  file3  file4  file5
在服务端:
[root@server ~]# cd /home/student/
[root@server student]# ls   ##可以查看到文件
file1 file2 file3 file4 file5 
5.改变工作组
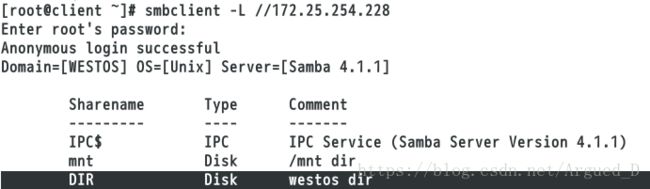
[root@server ~]# smbclient -L //172.25.254.228 ##查看工作组名称(Domain)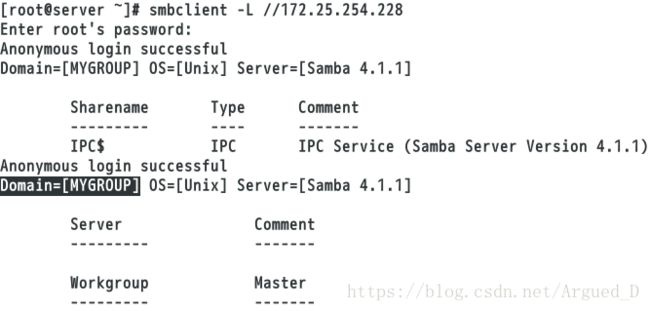
[root@server ~]# rpm -qc samba-common  ##查找samba的主配置文件
/etc/logrotate.d/samba
/etc/samba/lmhosts
/etc/samba/smb.conf
/etc/sysconfig/samba
[root@server ~]# vim /etc/samba/smb.conf  ##将工作组名称改为WESTOS
[root@server ~]# systemctl restart smb.service   ##重启服务
[root@server ~]# smbclient -L //172.25.254.228  ##查看工作组的更改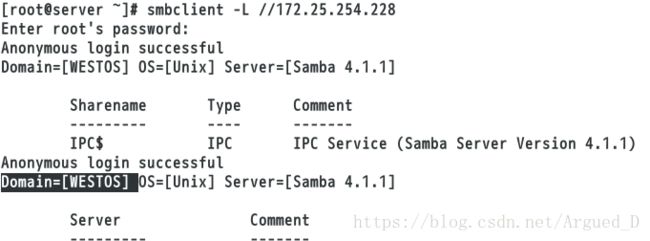
6.添加smb黑白名单
在服务端:
[root@server ~]# vim /etc/samba/smb.conf
98         hosts allow = 172.25.254.128    ##添加白名单
          (hosts deny = 172.25.254.128)  ##添加黑名单
[root@server ~]# systemctl restart smb.service  ##重启服务
在客户端:测试
[root@client ~]# smbclient -L //172.25.254.228  ##不可以登陆,没有访问权限
Enter root's password:
protocol negotiation failed: NT_STATUS_INVALID_NETWORK_RESPONSE
二、设定共享目录
在服务端:
[root@server ~]# mkdir /westos
[root@server ~]# semanage fcontext -a -t samba_share_t '/westos(/.*)?'  ##修改自建目录的安全上下文
[root@server ~]# semanage fcontext -l |grep /westos  ##查看/westos的安全上下文
[root@server ~]# restorecon -FvvR /westos/  ##刷新目录里内容的安全上下文
[root@server ~]# vim /etc/samba/smb.conf
##在配置中写入共享目录的名称
[root@server ~]# systemctl restart smb.service
在客户端:测试
[root@client ~]# smbclient //172.25.254.228/DIR -U student ##查看共享目录信息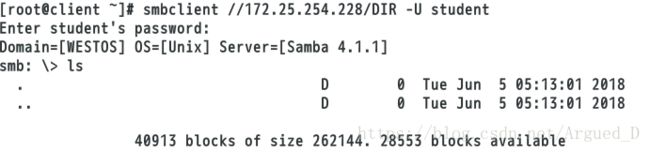
在服务端:
[root@server ~]# touch /mnt/file{1..5}
[root@server ~]# ls /mnt
file1  file2  file3  file4  file5
[root@server ~]# vim /etc/samba/smb.conf  ##写入共享目录名称
[root@server ~]# systemctl restart smb.service
在客户端:测试
[root@client ~]# smbclient //172.25.254.228/mnt -U student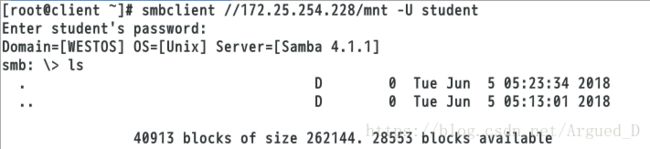
用ls看不到在/mnt下建立的文件,是受SElinux的影响。
在服务端:
方法一:
[root@server ~]# setenforce 0
方法二:
[root@server ~]# setsebool -P samba_export_all_ro on  ##开启samba中的写读共享
在客户端:测试

1.显示目录
服务端:
[root@server ~]# vim /etc/samba/smb.conf
324       browseable = yes ##查询时显示这个DIR目录
客户端:测试
2.用户可写
服务端:
[root@server ~]# vim /etc/samba/smb.conf
325         writable = yes    ##用户可写
[root@server ~]# chmod 777 /westos/
在客户端:测试
3.指定用户可写
在服务端:
[root@server ~]# vim /etc/samba/smb.conf
325         #writable = yes
326         write list = student  ##指定用户可写
[root@server ~]# systemctl restart smb.service
[root@server ~]# chmod 777 /westos/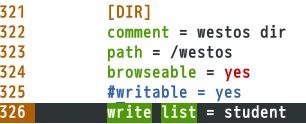
在客户端:测试


用指定用户student登录可以建立文件,但是用westos用户登录没有权限建立文件。
4.可写用户组
在服务端:
[root@server ~]# vim /etc/samba/smb.conf
326         write list = @student  ##可写用户组
[root@server ~]# systemctl restart smb.service
[root@server ~]# id westos
[root@server ~]# usermod -G student westos

在客户端:测试
上图所示:用westos登录,即使是不被允许可写的用户,但是westos的组是student,就可以登录服务端在/mnt下建立文件。
5.给用户root身份
在服务端:
[root@server ~]# chmod 755 /westos
[root@server ~]# vim /etc/samba/smb.conf
327   admin users = westos  ##给westos是root的身份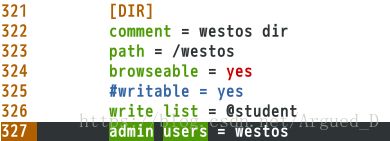
在客户端:测试
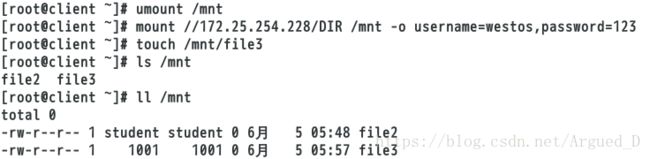
[root@client ~]# umount /mnt
[root@client ~]# mount //172.25.254.228/DIR /mnt -o username=westos,password=123
[root@client ~]# touch /mnt/file4
[root@client ~]# ll /mnt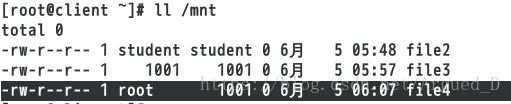
上图所示:登录westos用户建立一个文件,这个文件的所属组是root组
三.多用户挂载
在客户端:
[root@client ~]# yum install cifs-utils -y  ##在客户端上管理的软件是cifs-utils
[root@client ~]# vim /root/smbpass   ##写入smb服务上真实存在的用户和密码
username=student
password=123
[root@client ~]# mount -o credentials=/root/smbpass,sec=ntlmssp,multiuser //172.25.254.228/DIR /mnt  ##挂载多用户(credentials=/root/smbpass指定挂载时用到的用户身份,sec=ntlmssp认证方式为smb认证,multiuser支持多用户认证)
[root@client ~]# useradd test  ##添加一个用户
[root@client ~]# su - test
[test@client ~]$ cd /mnt
[test@client mnt]$ ls   ##因为没有做smb的认证所以无法访问smb共享
ls: reading directory .: Permission denied
[test@client mnt]$ cifscreds add -u westos 172.25.254.228   ##smb用户的认证
Password:
[test@client mnt]$ touch /mnt/file5
[test@client mnt]$ ll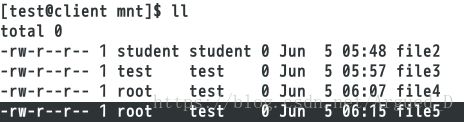
四.匿名用户登陆
在服务端:
[root@server ~]# vim /etc/samba/smb.conf
125         map to guest = bad user   ##使匿名用户登陆或者挂载时以“guest”用户进行
328         guest ok = yes   ##匿名用户登陆
[root@server ~]# systemctl restart smb.service

在客户端:测试
[root@client ~]# smbclient //172.25.254.228/DIR  ##匿名用户登录可以查看文件
[root@client ~]# mount //172.25.254.228/DIR /mnt -o username=guest,password=""   ##可以匿名不需要密码挂载
[root@client ~]# df