Android开发:MPAndroidChart的配置和使用
文章目录
- 前言
- 开发环境
- 安装和配置
- 一个简单的折线图Demo
- 布局文件
- Activity文件
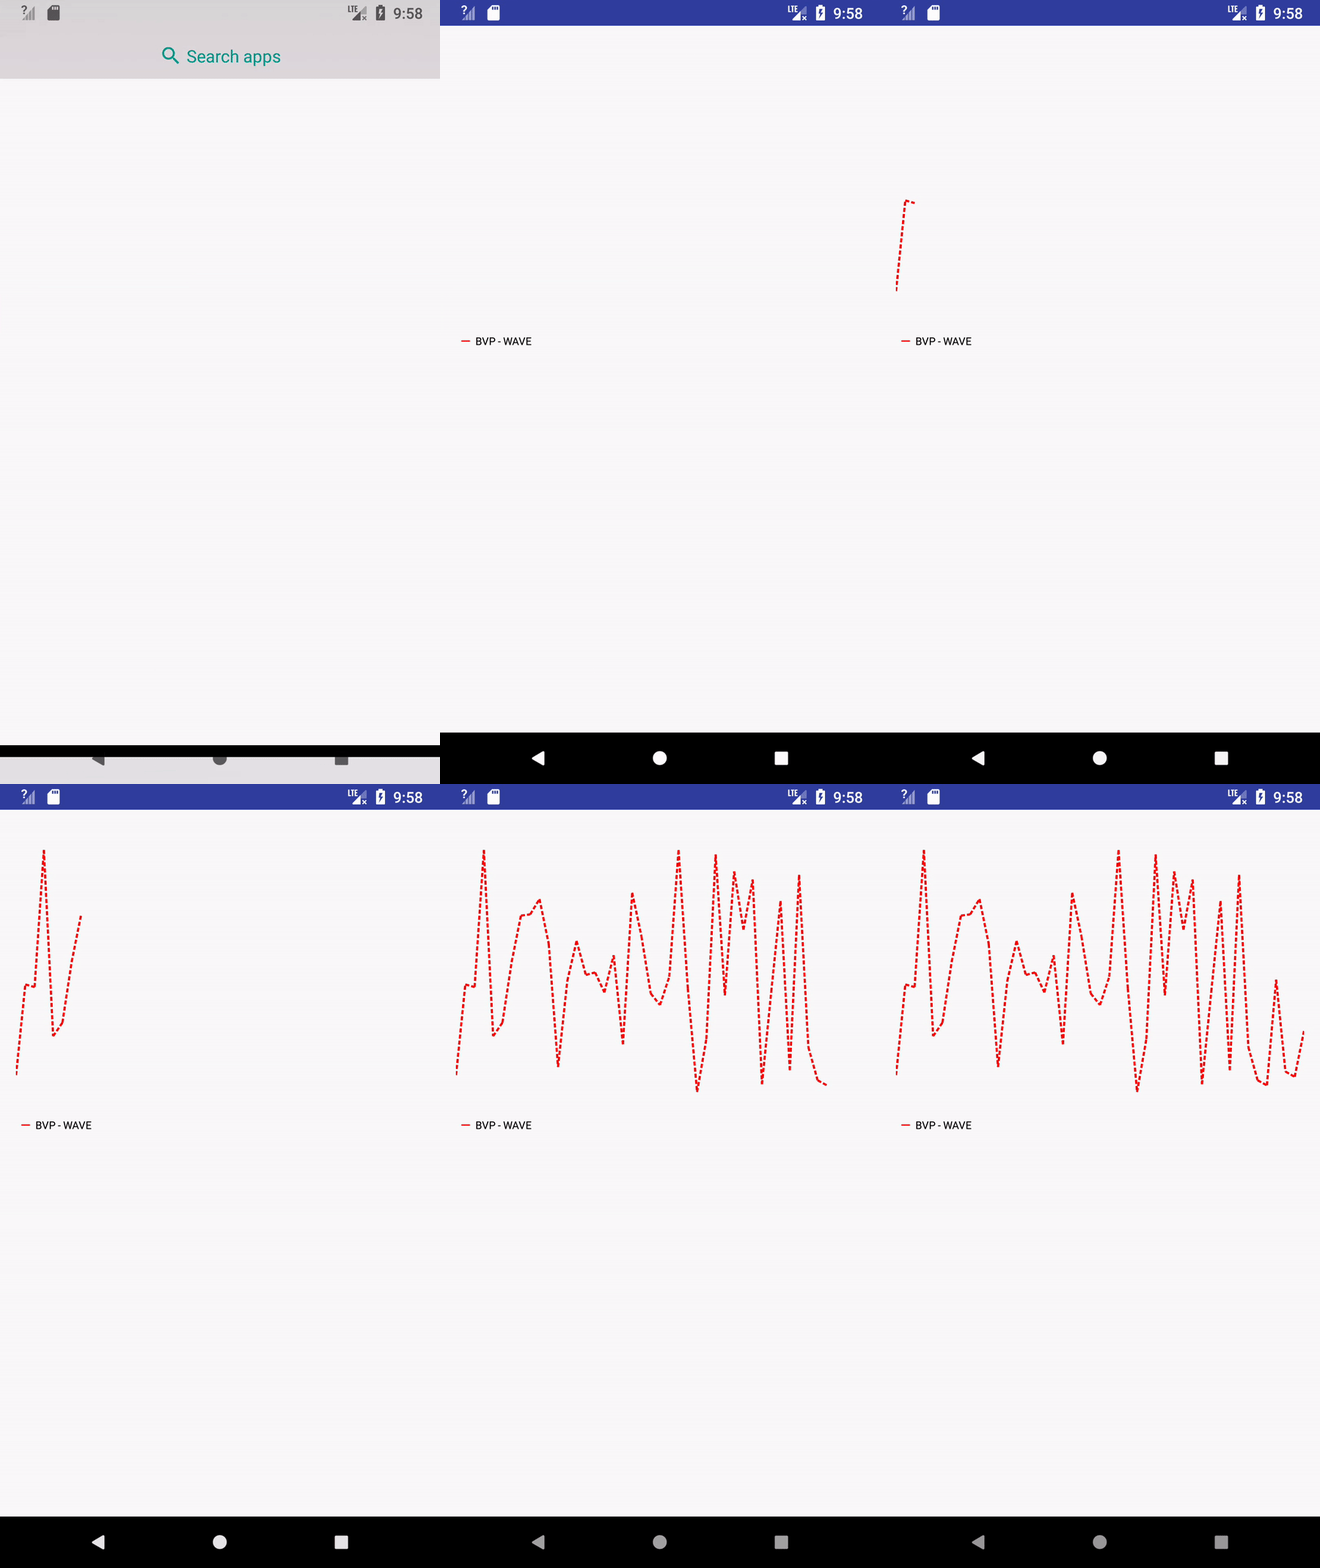
- 效果展示
- 参考链接
前言
实验室的项目需要做一个折线图波形,来显示数据。在MATLAB上,只需要一个plot函数就行了,但是在Android上,需要借助一个第三方开源库MPAndroid来实现。本文是对MPAndroidCharts的一个学习和总结。
MPAndroidChart是一款基于Android的开源图表库,它能实现很多常用的图表类型,如:线型图、饼图、柱状图和散点图。除此之外,它还提供了一些对图表的操作功能,如拖拽、缩放、显示动画效果等。基本上,该开源库能够满足一般性图表绘制需求。
开发环境
开发环境主要包括开源库版本、IDE的环境和操作系统,不同环境会有不同的配置和使用方法,很多技术贴不喜欢在文章开头声明自己所用的开发环境,这样会对人产生很大的误导。
- Windows 10 Enterprise 64bit
- Android Studio 3.1.2
- Gradle 4.1
- MPAndroidChart 2.2.5
安装和配置
在project的build.gradle文件中的buildscript 节点下加入如下代码:
allprojects {
    repositories {
        maven { url 'https://jitpack.io' }
    }
}
在APP的build.gradle 文件中的dependencies配置依赖库,我们使用V2.2.5的版本(并不是最新版):
implementation 'com.github.PhilJay:MPAndroidChart:v2.2.5'
配置完之后,点击Sysnc Now 就行了。
一个简单的折线图Demo
布局文件
Activity文件
package com.example.jason.mpandroidchatrsdemo;

import android.graphics.Color;
import android.graphics.Typeface;
import android.graphics.drawable.Drawable;
import android.os.Bundle;
import android.support.v4.app.FragmentActivity;
import android.support.v4.content.ContextCompat;
import android.util.Log;
import android.view.Menu;
import android.view.MenuItem;
import android.view.MotionEvent;
import android.view.WindowManager;
import android.widget.SeekBar;
import android.widget.SeekBar.OnSeekBarChangeListener;
import android.widget.TextView;
import android.widget.Toast;

import com.github.mikephil.charting.animation.Easing;
import com.github.mikephil.charting.charts.LineChart;

import com.github.mikephil.charting.components.Legend;
import com.github.mikephil.charting.components.Legend.LegendForm;
import com.github.mikephil.charting.components.LimitLine;
import com.github.mikephil.charting.components.LimitLine.LimitLabelPosition;
import com.github.mikephil.charting.components.XAxis;
import com.github.mikephil.charting.components.YAxis;
import com.github.mikephil.charting.data.Entry;
import com.github.mikephil.charting.data.LineData;
import com.github.mikephil.charting.data.LineDataSet;
import com.github.mikephil.charting.highlight.Highlight;
import com.github.mikephil.charting.interfaces.datasets.ILineDataSet;
import com.github.mikephil.charting.listener.ChartTouchListener;
import com.github.mikephil.charting.listener.OnChartGestureListener;
import com.github.mikephil.charting.listener.OnChartValueSelectedListener;
import com.github.mikephil.charting.utils.Utils;
import java.util.ArrayList;

public class MainActivity extends FragmentActivity implements OnChartGestureListener, OnChartValueSelectedListener {

    private LineChart mChart;
    private TextView tvX, tvY;


    @Override
    protected void onCreate(Bundle savedInstanceState) {
        super.onCreate(savedInstanceState);
        setContentView(R.layout.activity_main);

        // 设置表格的一些属性
        mChart = (LineChart) findViewById(R.id.chart1);
        // 在图表执行动作时,为定制回调设置一个动作监听器。
        mChart.setOnChartGestureListener(this);
        // 为图表设置一个既定的监听器
        mChart.setOnChartValueSelectedListener(this);
        // 把这个设为true来绘制网格背景,如果false则不绘制
        mChart.setDrawGridBackground(false);

        // 把这个设置为false,禁用所有手势和图表上的触摸,默认:true
        mChart.setTouchEnabled(false);

        // 设置图标拖动为允许
        mChart.setDragEnabled(true);
        // 设置图表缩放为允许
        mChart.setScaleEnabled(true);
        mChart.setScaleXEnabled(true);
        mChart.setScaleYEnabled(true);

        mChart.setDescription("");

        // 挤压缩放设置为允许,即X轴和Y轴会成比例缩放,如果设置为false,则变成单独缩放
        mChart.setPinchZoom(true);

        // 返回代表所有x标签的对象,这个方法可以用来获得XAxis对象并修改它(例如改变标签的位置、样式等)
        XAxis xAxis = mChart.getXAxis();
        // 返回左y轴对象。在水平的柱状图中,这是最上面的轴。
        YAxis leftAxis = mChart.getAxisLeft();
        leftAxis.removeAllLimitLines();

        // 使网格线在虚线模式下绘制,例如像这个“------”。只有在硬件加速被关闭的情况下才会起作用。记住,硬件加速会提高性能。
        leftAxis.enableGridDashedLine(10f, 10f, 0f);
        // 将其设置为true,无论是否启用其他网格线,都要画出零线。默认值:假
        leftAxis.setDrawZeroLine(false);

        // limit lines are drawn behind data (and not on top)
        // 如果这被设置为true,那么界限就会被绘制在实际的数据后面,否则就在上面。默认值:假
        leftAxis.setDrawLimitLinesBehindData(true);

        mChart.getAxisRight().setEnabled(false);
        mChart.getAxisLeft().setEnabled(false);
        mChart.getXAxis().setEnabled(false);

        // add data
        // 这是自己设定的添加数据的方法,count设置了数据的个数,range设置了波动范围
        setData(45, 100);

        // 调用动画对图表显示进行处理
        mChart.animateX(2500, Easing.EasingOption.EaseInOutQuart);

        // get the legend (only possible after setting data)
        // 返回图表的图例对象。这个方法可以用来获得图例的实例,以便定制自动生成的图例。
        Legend l = mChart.getLegend();
        l.setForm(LegendForm.LINE);
    }

    @Override
    public void onWindowFocusChanged(boolean hasFocus) {
        super.onWindowFocusChanged(hasFocus);
    }

    // 这个应该是设置数据的函数了
    private void setData(int count, float range) {

        // 这个应该就是x轴的数据了
        ArrayList<String> xVals = new ArrayList<String>();
        // 从 0 到 count设置x轴的数据
        for (int i = 0; i < count; i++) {
            xVals.add((i) + "");
        }
        // 这个是y轴的数据
        ArrayList<Entry> yVals = new ArrayList<Entry>();
        // 设置y轴的数据,在这里,是用random函数来生成的
        for (int i = 0; i < count; i++) {

            float mult = (range + 1);
            float val = (float) (Math.random() * mult) + 3;// + (float)
            // ((mult *
            // 0.1) / 10);
            yVals.add(new Entry(val, i));
        }
        // MPAC自定义的一种类
        // create a dataset and give it a type
        LineDataSet set1 = new LineDataSet(yVals, "BVP - WAVE");
        // set1.setFillAlpha(110);
        // set1.setFillColor(Color.RED);

        // set the line to be drawn like this "- - - - - -"
        // 下面是设置线的各种属性
        // 允许在虚线模式下画出线,例如像这个“------”。只有在硬件加速被关闭的情况下才会起作用。记住,硬件加速会提高性能。
        set1.enableDashedLine(10f, 5f, 0f);
        // 允许在虚线模式下画出高光线,例如,像这样“------”
        set1.enableDashedHighlightLine(10f, 5f, 0f);
        set1.setColor(Color.RED);
        set1.setCircleColor(Color.RED);
        set1.setLineWidth(2f);
        set1.setCircleRadius(0f);
        // 把这个设置为true,允许在每个数据圆上画一个洞。
        set1.setDrawCircleHole(false);
        set1.setValueTextSize(0f);
        //

        set1.setDrawFilled(false);


        if(Utils.getSDKInt() >= 18) {
            // fill drawable only supported on api level 18 and above
            //Drawable drawable = ContextCompat.getDrawable(this, R.drawable.fade_red);
            //set1.setFillDrawable(drawable);
            set1.setFillColor(Color.BLUE);
        } else {
            set1.setFillColor(Color.BLACK);
        }

        ArrayList<ILineDataSet> dataSets = new ArrayList<ILineDataSet>();
        dataSets.add(set1); // add the datasets

        // create a data object with the datasets
        LineData data = new LineData(xVals,dataSets);

        // set data
        mChart.setData(data);
    }

    @Override
    public void onChartGestureStart(MotionEvent me, ChartTouchListener.ChartGesture lastPerformedGesture) {
        Log.i("Gesture", "START, x: " + me.getX() + ", y: " + me.getY());
    }

    @Override
    public void onChartGestureEnd(MotionEvent me, ChartTouchListener.ChartGesture lastPerformedGesture) {
        Log.i("Gesture", "END, lastGesture: " + lastPerformedGesture);

        // un-highlight values after the gesture is finished and no single-tap
        if(lastPerformedGesture != ChartTouchListener.ChartGesture.SINGLE_TAP)
            mChart.highlightValues(null); // or highlightTouch(null) for callback to onNothingSelected(...)
    }

    @Override
    public void onChartLongPressed(MotionEvent me) {
        Log.i("LongPress", "Chart longpressed.");
    }

    @Override
    public void onChartDoubleTapped(MotionEvent me) {
        Log.i("DoubleTap", "Chart double-tapped.");
    }

    @Override
    public void onChartSingleTapped(MotionEvent me) {
        Log.i("SingleTap", "Chart single-tapped.");
    }

    @Override
    public void onChartFling(MotionEvent me1, MotionEvent me2, float velocityX, float velocityY) {
        Log.i("Fling", "Chart flinged. VeloX: " + velocityX + ", VeloY: " + velocityY);
    }

    @Override
    public void onChartScale(MotionEvent me, float scaleX, float scaleY) {
        Log.i("Scale / Zoom", "ScaleX: " + scaleX + ", ScaleY: " + scaleY);
    }

    @Override
    public void onChartTranslate(MotionEvent me, float dX, float dY) {
        Log.i("Translate / Move", "dX: " + dX + ", dY: " + dY);
    }

    @Override
    public void onValueSelected(Entry e, int dataSetIndex, Highlight h) {
        Log.i("Entry selected", e.toString());
        Log.i("LOWHIGH", "low: " + mChart.getLowestVisibleXIndex() + ", high: " + mChart.getHighestVisibleXIndex());
        Log.i("MIN MAX", "xmin: " + mChart.getXChartMin() + ", xmax: " + mChart.getXChartMax() + ", ymin: " + mChart.getYChartMin() + ", ymax: " + mChart.getYChartMax());
    }

    @Override
    public void onNothingSelected() {
        Log.i("Nothing selected", "Nothing selected.");
    }
}
效果展示
本例的GitHub链接
参考链接
- MPAndroidChart的GitHub地址
- MPAndroidChart官方文档
- 笑谈Android图表-MPAndroidChart
