写在前面:
开发的时候,前后端不论是否分离,接口多半是滞后于页面开发的。所以建立一个REST风格的API接口,给前端页面提供虚拟的数据,是非常有必要的。json server 作为模拟工具,因为设置简单,容易上手。本文是做一个简单的上手介绍,有需要的朋友可以做一下参考,喜欢的可以点波赞,或者关注一下,希望可以帮到大家。
json server 工具:
在后台还没给接口之前,使用JSON-Server搭建一台JSON服务器,将接口要返回的数据放在json文件里面。然后请求这些数据,这样我们可以先做一些东西,等后台接口好了之后直接替换就可以了,不必一直傻傻的等后端的接口。
安装:
npm install json-server --save //json server
npm install axios --save //使用axios发送请求
json文件:
创建一个json文件,起名叫db.json,文件放置在跟index.html平级的目录中,也可以放置在static文件夹中,db.json文件里面的内容,是一个对象。
设置:
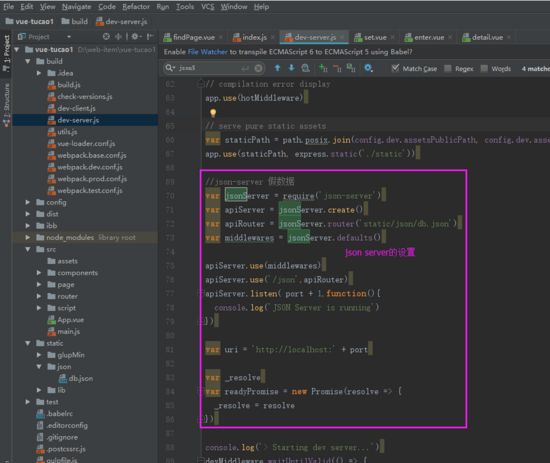
位置: build/dev-server.js
//json-server 假数据
var jsonServer = require('json-server') //引入文件
var apiServer = jsonServer.create(); //创建服务器
var apiRouter = jsonServer.router('db.json') //引入json 文件 ,这里的地址就是你json文件的地址
var middlewares = jsonServer.defaults(); //返回JSON服务器使用的中间件。
apiServer.use(middlewares)
apiServer.use('/json',apiRouter)
apiServer.listen( port + 1,function(){ //json服务器端口:比如你使用8080,这里的json服务器就是8081端口
 console.log('JSON Server is running') //json server成功运行会在git bash里面打印出'JSON Server is running'
})
如图所示:
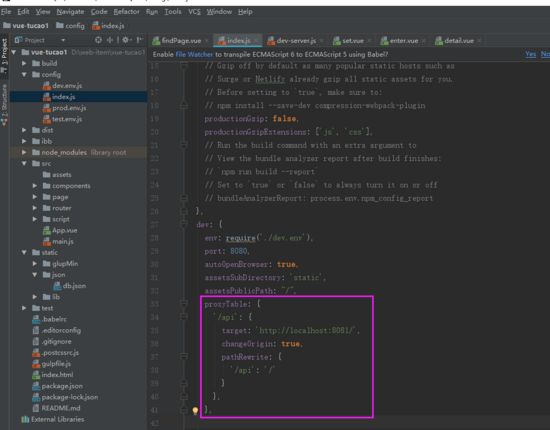
请求接口代理:
proxyTable: {
 '/api': {
  target: 'http://localhost:8081/', // 通过本地服务器将你的请求转发到这个地址
  changeOrigin: true, // 设置这个参数可以避免跨域
  pathRewrite: {
   '/api': '/'
  }
 },
},
如下图所示:
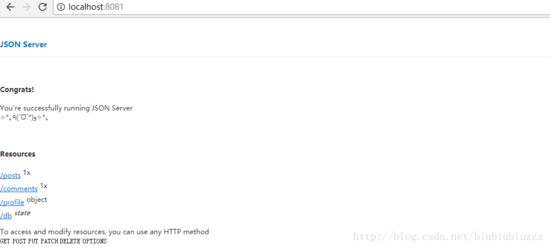
npm run dev启动项目可以访问到你的json文件:
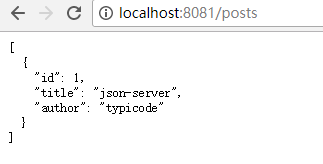
现在服务器已经成功启动,在地址栏输入 localhost:8081,就可以看到的json文件,加上相应后缀即可访问文件里面的数据。
jsonserver服务器:
jsonserver服务器
json数据:
json数据
axios请求json数据:
光看到这些数据可不行,我们还需要发起请求,请求到这些数据,然后执行各种各样的骚操作。
main.js文件中:
import axios from 'axios';//引入文件
Vue.prototype.$ajax = axios;//将axios挂载到Vue实例中的$ajax上面,在项目中的任何位置通过this.$ajax使用
在组件中的使用方式,比如:
  this.$ajax({
    url:'/api/articles',//api 代理到json文件地址,后面的后缀是文件中的对象或者是数组
    method:'get',//请求方式
    //这里可以添加axios文档中的各种配置
   }).then(function (res) {
    console.log(res,'成功');
   }).catch(function (err) {
    console.log(err,'错误');
   })
//还可以像下面这么简写
 this.$ajax.get('api/publishContent').then((res) => {
  console.log(res,'请求成功')
 },(err)=>{
  console.log(err,'请求失败');
 });
JSON-Server只接受GET请求,GitHub上提到:
If you make POST, PUT, PATCH or DELETE requests, changes will be automatically and safely saved to db.json using lowdb.
文档:
附上json server的github,和axios的中文文档,大家可以进去研究一下。
json server设置和使用起来还是蛮方便的,大家感兴趣的话,可以跟着文章设置一波。
以上就是本文的全部内容,希望对大家的学习有所帮助,也希望大家多多支持脚本之家。


