前言
读者:对spring、spring boot有一定了解
难度:初中级,旨在快速应用于项目
参考文献:网络、书籍、官方文档,有任何错误欢迎大家留言拍砖指正
实战模拟源码:https://github.com/yhqnh/demo-springcloud,使用spring-cloud dalston版本
Spring Cloud Config为分布式系统中的外部配置提供服务器和客户端支持。使用Config Server,您可以在所有环境中管理应用程序的外部属性。客户端和服务器上的概念映射与Spring Environment和PropertySource抽象相同。Spring Cloud Config支持在Git, SVN和本地存放配置文件,使用Git或者SVN存储库可以很好地支持版本管理,Spring默认配置是使用Git存储库,因此它轻松支持标签版本的配置环境,以及可以访问用于管理内容的各种工具。
7.1. 服务器端
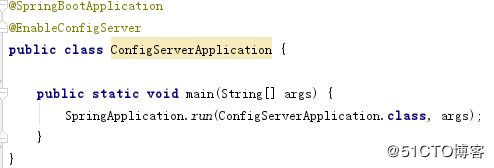
新建spring boot项目demo-springcloud-config-server,新建启动ConfigServerApplication,@EnableConfigServer开启配置中心功能
项目依赖spring-cloud-config-server对配置中心支持
配置文件application.properties,读者自行填上自己的github账号和密码以便访问配置地址https://github.com/yhqnh/spring-cloud-demo-config-server-git.git
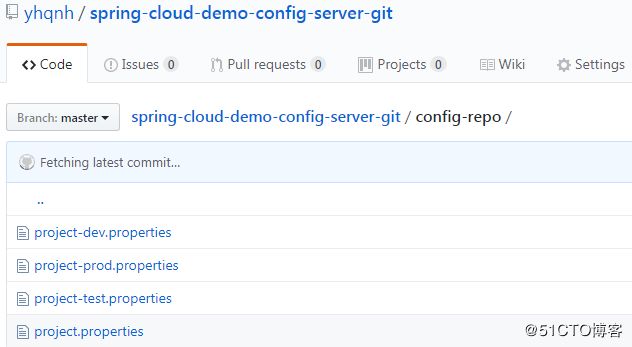
Github配置地址https://github.com/yhqnh/spring-cloud-demo-config-server-git.git是公开的,并且项目下面创建了config-repo目录,创建了四个配置文件project.properties,
project-dev.properties,
project-test.properties,
project-prod.properties
分别配置了
github=github-default-1.0,
github=github-dev-1.0,
github=github-test-1.0,
github=github-prod-1.0
Spring cloud config配置信息的URL与配置文件的映射关系如下所示:
/{application}/{profile}[/{label}]
/{application}-{profile}.yml
/{label}/{application}-{profile}.yml
/{application}-{profile}.properties
/{label}/{application}-{profile}.properties
上面的url会映射{application}-{profile}.properties对应的配置文件,其中{label}对应git上不同的分支,默认为master。启动应用用浏览器访问http://localhost:5551/project/dev会映射成project-dev.properties以此访问dev配置文件
7.2. 客户端
新建spring boot 项目并命名为demo-springcloud-config-client,创建启动类ConfigClientApplication
配置文件bootstrap.properties,多环境配置spring.profiles.active=dev表示激活dev配置
本地新建配置文件application-dev.properties
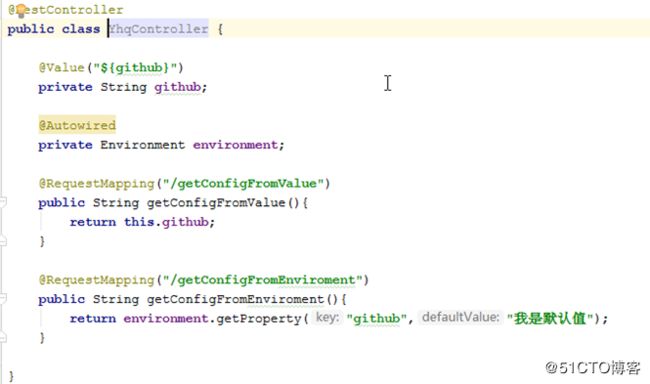
新建YhqController,获取配置文件我们采用两种方式,一种@Value,一种Environment
关键依赖
启动应用浏览器访问http://localhost:5552/getConfigFromValue和http://localhost:5552/getConfigFromEnviroment读取之前本地配置文件变量值github-local-1.0
通过前面讲的加载顺序7优先于8,我们做一个验证。设置bootstrap.properties的spring.cloud.config.uri值让配置从上面搭建的配置服务端获取配置
启动应用浏览器http://localhost:5552/getConfigFromValue和http://localhost:5552/getConfigFromEnviroment获取到了github-dev-1.0而并非github-local-1.0
下面 我们来实现动态刷新github的值,动态刷新依赖于/refresh端点,添加依赖spring-boot-starter-actuator为我们提供刷新端点/refresh并修改bootstrap.properties配置management.security.enabled=false来关闭springboot 1.5.X 以上默认开通的安全认证访问/refresh端点。
为YhqController添加刷新注解@RefreshScope启动应用访问http://localhost:5552/getConfigFromValue和http://localhost:5552/getConfigFromEnviroment返回结果如上图github-dev-1.0
这时我们修改配置中心服务端的github值为github-dev-1.0-modify
再次访问http://localhost:5552/getConfigFromValue和http://localhost:5552/getConfigFromEnviroment返回结果还是如上图github-dev-1.0
怎么配置没有动态刷新,这时需要post方式访问http://localhost:5552/refresh端点
再次访问http://localhost:5552/getConfigFromValue和http://localhost:5552/getConfigFromEnviroment看看配置是否动态生效


