Android图片合成/裁剪原理(转)
概览:
- 采用Porter-Duff 图片合成方法
- 采用Shader着色器重新绘制图片
- 不规则图片裁剪
- 心形图片裁剪
- 参考链接
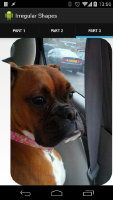
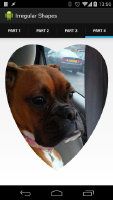
先看下效果:
1. 采用Porter-Duff 图片合成方法
先说说Porter-Duff是什么意思:Porter-Duff是Thomas Porter 和 Tom Duff 的简称,就是两个人名字的合成。
Porter-Duff 操作是 1 组 12 项用于描述数字图像合成的基本手法,包括 Clear、Source Only、Destination Only、Source Over、Source In、Source Out、Source Atop、Destination Over、Destination In、Destination Out、Destination Atop、XOR。通过组合使用 Porter-Duff 操作,可完成任意 2D 图像的合成。
合成图片,顾名思义就是拿两张图片取需要的部分放到第三张图片上,合成一张新的图片。
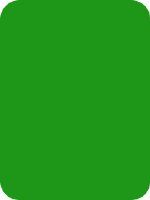
看看我们采用的两张图片吧:
绿色的mask并不会把小狗整成绿色,因为合成的时候只取了mask的形状,alpha值为0。代码如下:
public class Part1Fragment extends Fragment {

    @Override
    public View onCreateView(LayoutInflater inflater, ViewGroup container, Bundle savedInstanceState) {
        View view = inflater.inflate(R.layout.fragment_layout, container, false);
        ImageView image = (ImageView) view.findViewById(R.id.image);
        Bitmap dog = BitmapFactory.decodeResource(container.getResources(), R.drawable.betty);
        Bitmap mask = BitmapFactory.decodeResource(container.getResources(), R.drawable.mask);
        image.setImageBitmap(combineImages(mask, dog));
        dog.recycle();
        mask.recycle();
        return view;
    }

    public Bitmap combineImages(Bitmap mask, Bitmap dog) {
        Bitmap bmp;

        int width = mask.getWidth() > dog.getWidth() ? mask.getWidth() : dog.getWidth();
        int height = mask.getHeight() > dog.getHeight() ? mask.getHeight() : dog.getHeight();

        bmp = Bitmap.createBitmap(width, height, Bitmap.Config.ARGB_8888);
        Paint paint = new Paint();
        paint.setXfermode(new PorterDuffXfermode(PorterDuff.Mode.SRC_ATOP));

        Canvas canvas = new Canvas(bmp);
        canvas.drawBitmap(mask, 0, 0, null);
        canvas.drawBitmap(dog, 0, 0, paint);

        return bmp;
    }
}
合成之后就变成圆角图片了,如下:
原理: 我们先是用两张图片的最大尺寸创建了一个mutable的Bitmap,用来作为Canvas的画东西的地方。然后先画了mask,即Dst,接着把画笔Paint 的XFerMode设置成SRC_ATOP,然后把dog画上去,这样就实现了裁剪效果。
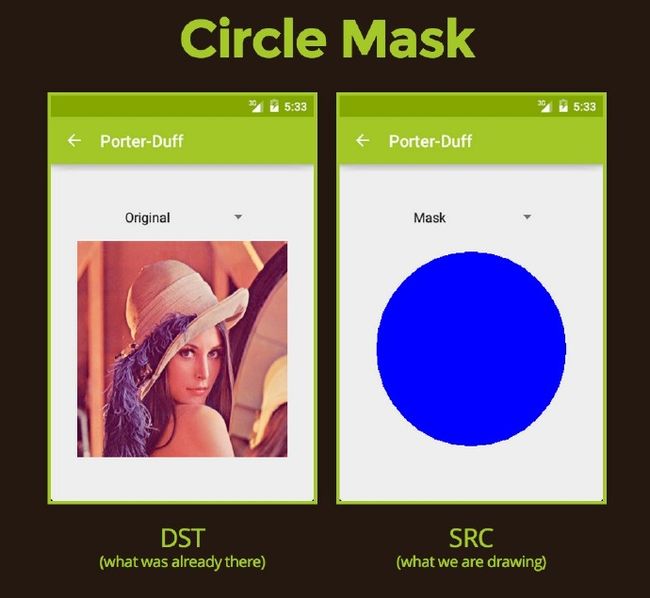
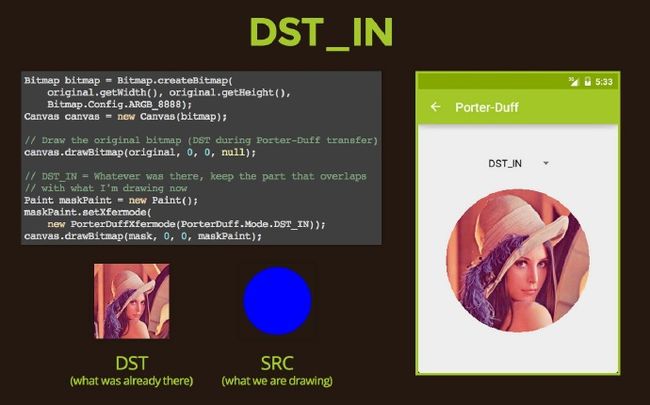
估计你不太理解我说的东西,看下面一张图你就明白了(蓝色正方形是Src,就是你将要画上去的东西,黄色圆圈是Dst,即原来画布上有的东西):
上面是一种合成方式,看另外一种合成方式:
好了,效果是达到了,但这样做有没有问题呢?问题如下:
- mask的尺寸必须和原图一致,我们当然可以缩放mask,但如果缩放的宽高比和原图不一致会出现失真。
- 最大的问题还是效率!为了实现裁剪,我们加载了两个图,如果图片很大就会
OutOfMemoryError。
2. 采用Shader着色器重新绘制图片
Shaders着色器让我们可以在画东西的时候定义填充风格,Shaders是设置在画笔上的。BitmapShader是用一张Bitmap着色,而且还支持三种瓦片铺盖方式。所谓瓦片铺盖方式就是当我们画的区域比采用的Bitmap还大时,超出部分该怎么画。如下图(小方块就代表Bitmap):
代码如下:
public class Part2Fragment extends Fragment {
    private static final float RADIUS_FACTOR = 8.0f;

    @Override
    public View onCreateView(LayoutInflater inflater, ViewGroup container, Bundle savedInstanceState) {
        View view = inflater.inflate(R.layout.fragment_layout, container, false);
        ImageView image = (ImageView)view.findViewById(R.id.image);
        Bitmap bitmap = BitmapFactory.decodeResource(container.getResources(), R.drawable.betty);
        image.setImageBitmap(processImage(bitmap));
        bitmap.recycle();
        return view;
    }

    public Bitmap processImage(Bitmap bitmap) {
        Bitmap bmp;

        bmp = Bitmap.createBitmap(bitmap.getWidth(), bitmap.getHeight(), Bitmap.Config.ARGB_8888);
        BitmapShader shader = new BitmapShader(bitmap, BitmapShader.TileMode.CLAMP, BitmapShader.TileMode.CLAMP);

        float radius = Math.min(bitmap.getWidth(), bitmap.getHeight()) / RADIUS_FACTOR;
        Canvas canvas = new Canvas(bmp);
        Paint paint = new Paint();
        paint.setAntiAlias(true);
        paint.setShader(shader);

        RectF rect = new RectF(0, 0, bitmap.getWidth(), bitmap.getHeight());
        canvas.drawRoundRect(rect, radius, radius, paint);

        return bmp;
    }
}
效果如下:
3. 不规则图片裁剪
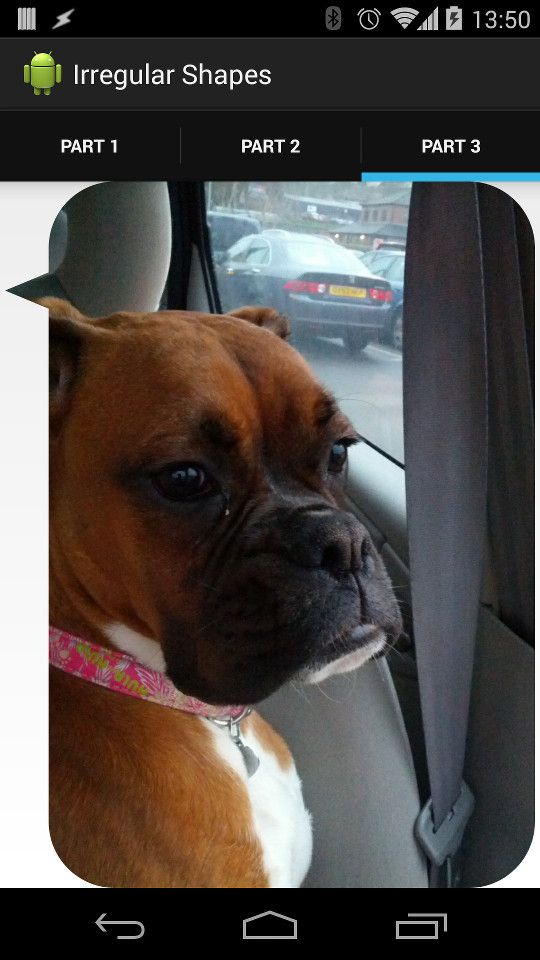
对话框气泡,原理是一样的,看代码如下:
public class Part3Fragment extends Fragment {
    private static final float RADIUS_FACTOR = 8.0f;
    private static final int TRIANGLE_WIDTH = 120;
    private static final int TRIANGLE_HEIGHT = 100;
    private static final int TRIANGLE_OFFSET = 300;

    @Override
    public View onCreateView(LayoutInflater inflater, ViewGroup container, Bundle savedInstanceState) {
        View view = inflater.inflate(R.layout.fragment_layout, container, false);
        ImageView image = (ImageView)view.findViewById(R.id.image);
        Bitmap bitmap = BitmapFactory.decodeResource(container.getResources(), R.drawable.betty);
        image.setImageBitmap(processImage(bitmap));
        bitmap.recycle();
        return view;
    }

    public Bitmap processImage(Bitmap bitmap) {
        Bitmap bmp;

        bmp = Bitmap.createBitmap(bitmap.getWidth(), bitmap.getHeight(), Bitmap.Config.ARGB_8888);
        BitmapShader shader = new BitmapShader(bitmap, BitmapShader.TileMode.CLAMP, BitmapShader.TileMode.CLAMP);

        float radius = Math.min(bitmap.getWidth(), bitmap.getHeight()) / RADIUS_FACTOR;
        Canvas canvas = new Canvas(bmp);
        Paint paint = new Paint();
        paint.setAntiAlias(true);
        paint.setShader(shader);

        RectF rect = new RectF(TRIANGLE_WIDTH, 0, bitmap.getWidth(), bitmap.getHeight());
        canvas.drawRoundRect(rect, radius, radius, paint);

        Path triangle = new Path();
        triangle.moveTo(0, TRIANGLE_OFFSET);
        triangle.lineTo(TRIANGLE_WIDTH, TRIANGLE_OFFSET - (TRIANGLE_HEIGHT / 2));
        triangle.lineTo(TRIANGLE_WIDTH, TRIANGLE_OFFSET + (TRIANGLE_HEIGHT / 2));
        triangle.close();
        canvas.drawPath(triangle, paint);

        return bmp;
    }
}
效果如下:
4. 心形图片裁剪
先设置BitmapShader, Canvas, 和 Paint 对象:
Bitmap bmp;

bmp = Bitmap.createBitmap(bitmap.getWidth(),
    bitmap.getHeight(), Bitmap.Config.ARGB_8888);
BitmapShader shader = new BitmapShader(bitmap,
    BitmapShader.TileMode.CLAMP,
    BitmapShader.TileMode.CLAMP);

Canvas canvas = new Canvas(bmp);
Paint paint = new Paint();
paint.setAntiAlias(true);
paint.setShader(shader);
再初始化一些后面需要用到的东西:
float width = bitmap.getWidth();
float height = bitmap.getHeight();

Path oval = new Path();
Matrix matrix = new Matrix();
Region region = new Region();
把长方形变成椭圆:
RectF ovalRect = new RectF(width / 8, 0,
    width - (width / 8), height);

oval.addOval(ovalRect, Path.Direction.CW);
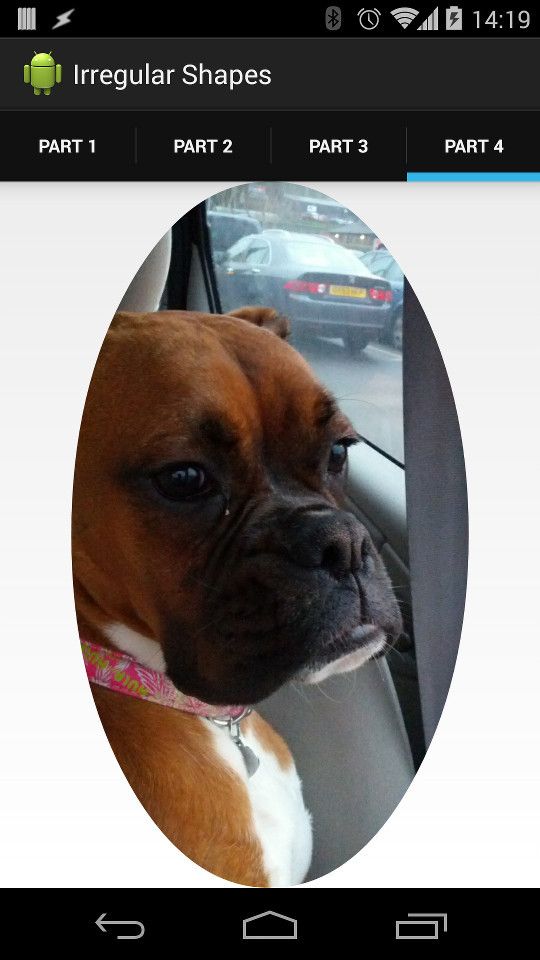
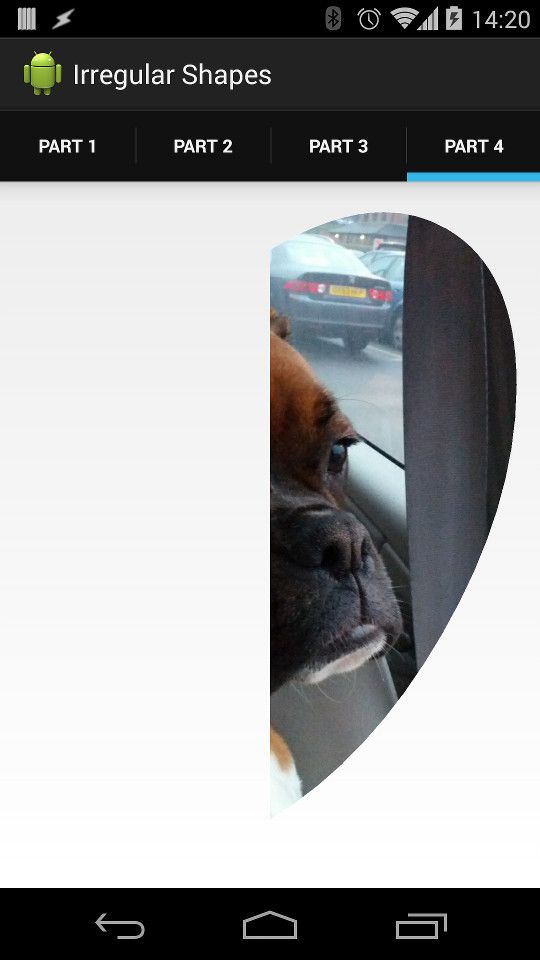
得到如下图形:
旋转30度:
matrix.postRotate(30, width / 2, height / 2);
oval.transform(matrix, oval);
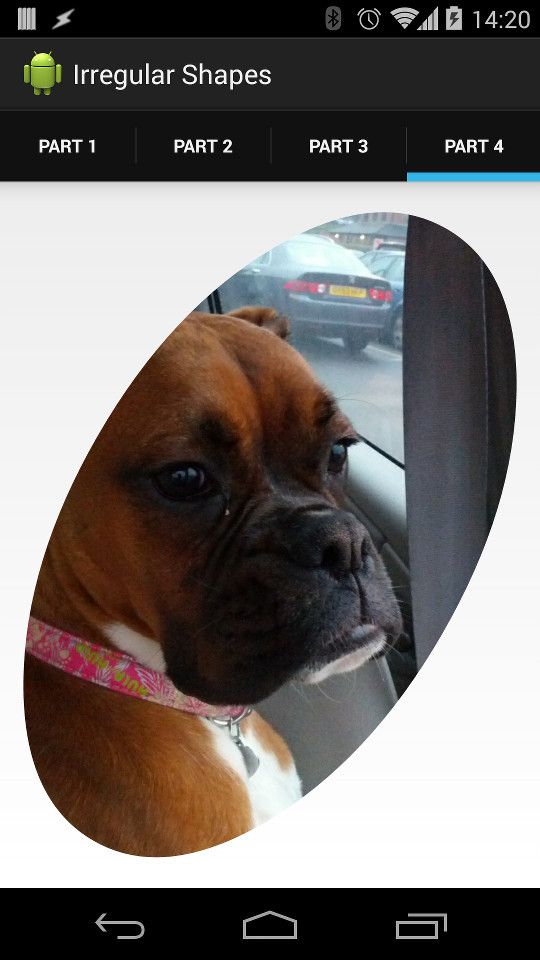
得到如下图形:
再用Region裁剪:
region.setPath(oval, new Region((int)width / 2, 0,
    (int)width, (int)height));
canvas.drawPath(region.getBoundaryPath(), paint);
得到如下图形:
同理再画另一边,画之前先复位:
matrix.reset();
oval.reset();
oval.addOval(ovalRect, Path.Direction.CW);
matrix.postRotate(-30, width / 2, height / 2);
oval.transform(matrix, oval);
region.setPath(oval,
    new Region(0, 0, (int)width / 2, (int)height));
canvas.drawPath(region.getBoundaryPath(), paint);
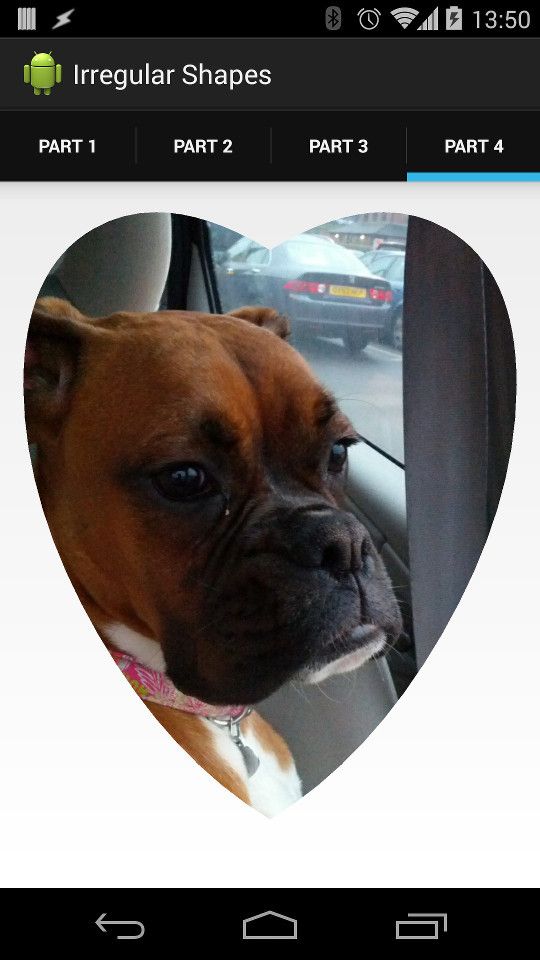
得到如下图形:
全部代码放一起如下:
public class Part4Fragment extends Fragment {

    @Override
    public View onCreateView(LayoutInflater inflater, ViewGroup container, Bundle savedInstanceState) {
        View view = inflater.inflate(R.layout.fragment_layout, container, false);
        ImageView image = (ImageView)view.findViewById(R.id.image);
        Bitmap bitmap = BitmapFactory.decodeResource(container.getResources(), R.drawable.betty);
        image.setImageBitmap(processImage(bitmap));
        bitmap.recycle();
        return view;
    }

    public Bitmap processImage(Bitmap bitmap) {
        Bitmap bmp;

        bmp = Bitmap.createBitmap(bitmap.getWidth(), bitmap.getHeight(), Bitmap.Config.ARGB_8888);
        BitmapShader shader = new BitmapShader(bitmap, BitmapShader.TileMode.CLAMP, BitmapShader.TileMode.CLAMP);

        Canvas canvas = new Canvas(bmp);
        Paint paint = new Paint();
        paint.setAntiAlias(true);
        paint.setShader(shader);

        float width = bitmap.getWidth();
        float height = bitmap.getHeight();

        Path oval = new Path();
        Matrix matrix = new Matrix();
        Region region = new Region();
        RectF ovalRect = new RectF(width / 8, 0, width - (width / 8), height);

        oval.addOval(ovalRect, Path.Direction.CW);
        matrix.postRotate(30, width / 2, height / 2);
        oval.transform(matrix, oval);
        region.setPath(oval, new Region((int)width / 2, 0, (int)width, (int)height));
        canvas.drawPath(region.getBoundaryPath(), paint);

        matrix.reset();
        oval.reset();
        oval.addOval(ovalRect, Path.Direction.CW);
        matrix.postRotate(-30, width / 2, height / 2);
        oval.transform(matrix, oval);
        region.setPath(oval, new Region(0, 0, (int)width / 2, (int)height));
        canvas.drawPath(region.getBoundaryPath(), paint);

        return bmp;
    }
}
5. 参考链接
http://www.douban.com/note/143111853/
http://blog.stylingandroid.com/category/canvas/
http://chiuki.github.io/android-shaders-filters/#/
原文地址:https://github.com/Reacoder/BlogBackup/blob/master/source/_posts/irregular-image-shape.md

