RMI 浅析
本文目录
1 RMI简介
2 实现步骤:Server端
3 实现步骤:Client端
4 执行步骤
1 RMI简介
RMI是Remote Method Invocation的简称,即远程方法调用。通过RMI,Client可以调用Server的方法。
首先,Server生成Stub和Skeleton,用于描述方法和解析方法调用。
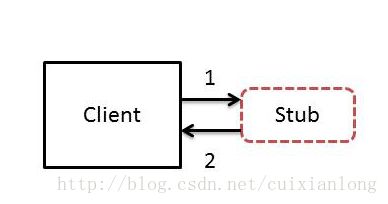
然后,Client获取Stub,即获取Server提供的方法的描述,从而知道Server提供了哪些方法及相应的参数(如图:步骤1)。
接着,Client通过Stub调用Server的方法(如图:步骤2),调用信息被传递到Server(如图:步骤3),由Server的Skeleton解析。
解析后,Server根据信息,调用相应的方法(如图:步骤4),最后,将方法返回的数据传递给Client(如图:步骤5、6、7)。
单看Client方面,在不考虑从Server获取Stub的步骤前提下,Client的操作就是调用一个方法,然后获得返回值,与调用本地方法一样。
同样,单看Server方面,就是某个方法被调用,Server运行该方法,然后将结果返回给调用者。
但是,对于步骤1来讲,Client如何知道在哪里下载Server的Stub?或者说,Client如何知道这个Server位置?
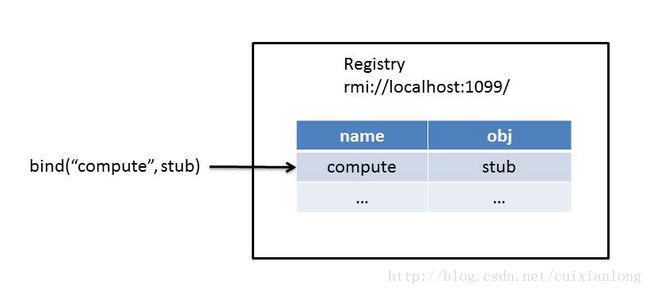
这里,要用到的就是Registry。首先,Server将方法绑定在Registry上。接着,Client可以通过Registry来获取相关信息。然后,Client就可以调用该Server的方法了。
类似于以前学校里的公告板(互联网还不发达的时候),学校各部门的通知会张贴(注册)在公告板上,学生通过公告板来获取相关的信息。
若对Web Service有了解,会发现RMI与Web Service有一些相似。在Web Service中,客户端是通过获取Service Description来知道服务端提供了哪些方法及相关信息,并根据获取的信息,传递相应的数据至服务端,服务端解析并调用相应方法后,将结果返回至客户端。
但是,RMI与Web Service各有各的优势与特点。在RMI中,客户端可以传递一个包含方法的对象给服务端,服务端可以执行该对象的方法,Web Service是通过HTTP协议进行数据传输,只能传递值,而不能传递方法。由于 Web Service是通过HTTP协议进行数据传输,因此,Web Service可以实现跨平台的调用,而RMI的客户端和服务端都必须是Java平台。
2 实现步骤:Server端
2.1 定义接口(Interface)
在Server定义一个接口,该接口描述了Server提供的方法。接口仅定义抽象方法(仅方法名、参数及返回值等信息),不需要给出具体的逻辑实现。这个接口被作为Stub来使用。
Client通过获取该接口(Stub),从而知道Server提供了哪些方法,包括方法名、参数及返回值等信息,但并不知道这些方法的具体实现。
注意:由于该接口将用于远程调用,因此,接口需要继承Remote类,且接口方法需要声明可能会抛出RemoteException。
Public interface Compute extends Remote {
	public int multiply(int a, int b) throws RemoteException;
}
若参数为某类的对象,该类需要继承Serializable(可序列化)。
public interface Compute extends Remote {
	public Object executeTask(Task task) throws RemoteException;
}

public interface Task extends Serializable {
	public Object execute();
}
2.2 实现接口
当Client调用Server提供的方法时,Server需要执行该方法并返回结果至Client。因此,Server需要提供方法的具体逻辑实现,即Server需要实现上述定义的接口。
public class ComputeEngine implements Compute {

	public ComputeEngine() throws RemoteException {
		super();
	}

	public int multiply(int a, int b) throws RemoteException {
		return a * b;
	}
}
2.3 公开接口
当Server完成接口的定义和实现后,需要将该接口公开,以表示该接口是用于远程调用的接口。有两种方法来完成这一操作。
方法一:使实现该接口的类继承UnicastRemoteObject类
public class ComputeEngine extends UnicastRemoteObject implements Compute {

	public ComputeEngine() throws RemoteException {
		super();
	}

	public int multiply(int a, int b) throws RemoteException {
		return a * b;
	}
}
方法二:通过UnicastRemoteObject.exportObject()方法将某个对象设置为公开接口对象
public static void main(String[] args) {

	// 省略其它代码

	ComputeEngine computeEngine = new ComputeEngine();
	UnicastRemoteObject.exportObject(computeEngine);

	// 省略其它代码
}
2.4 绑定接口
2.4.1 绑定对象
由于Server对外公开的是接口,或者说,向Client提供的是Stub,因此,在绑定接口时,应该将Stub对象绑定至Registry。做法是,创建实现接口的类的对象,赋值给接口对象。(多态技术)
// 通过 2.3中方法一 公开接口
Compute compute = new ComputeEngine();

// 通过 2.3中方法二 公开接口
ComputeEngine computeEngine = new ComputeEngine();
Compute compute = (Compute) UnicastRemoteObject.exportObject(computeEngine);
2.4.2 获取Registry
LocateRegistry类相关方法:
// 在本地创建一个Registry并指定端口
Registry registry = LocateRegistry.createRegistry(int port);

// 获得一个本地Registry对象并使用默认端口(1099)
Registry registry = LocateRegistry.getRegistry();

// 获得一个本地Registry对象并指定端口
Registry registry = LocateRegistry.getRegistry(int port);

// 获得一个指定服务器的Registry对象并使用默认端口(1099)
Registry registry = LocateRegistry.getRegistry(String host);

// 获得一个指定服务器的Registry对象并指定端口
Registry registry = LocateRegistry.getRegistry(String host, int port);
2.4.3 绑定Registry
Registry相关方法:
// 在registry上将name与obj绑定
registry.bind(String name, Remote obj);

// 在registry上将name与obj重新绑定(替换原name的绑定)
registry.rebind(String name, Remote obj);

// 在registry上将name解绑(删除name的绑定)
registry.unbind(String name);

// 在registry上查找指定name并返回相应的obj对象
registry.lookup(String name);
2.4.4 Naming
有的时候,直接使用Naming类,而不使用LocateRegistry和Registry类。但是,Naming类实际上就是对LocateRegistry和Registry的再一次封装,其内部还是通过这两个类的方法实现绑定操作的。
例如,我们通过LocateRegistry.getRegistry方法来确定Registry的位置,然后通过registry.bind方法绑定name和obj。上述两步骤,可以通过Naming.bind方法一步直接完成,代码如下:
Naming.bind(“rmi://localhost:1099/compute”, stub);即,通过Naming类方法,在指定name时,需要加上host地址。
Naming类相关方法:
// 将name与obj绑定
Naming.bind(String name, Remote obj);

// 将name与obj重新绑定(替换原name的绑定)
Naming.rebind(String name, Remote obj);

// 将name解绑(删除name的绑定)
Naming.unbind(String name);

// 查找指定name并返回相应的obj对象
Naming.lookup(String name);
3 实现步骤:Client端
3.1 添加接口
将Server的接口文件添加至Client项目。
Public interface Compute extends Remote {
	public int multiply(int a, int b) throws RemoteException;
}
3.2 调用接口
public static void main(String args[]) {
	try {
		String name = "rmi://localhost:1099/compute";
		Compute compute = (Compute) Naming.lookup(name);
		int result = compute.multiply(3, 5);
	} catch (Exception e) {
		e.printStackTrace();
	}
}
4 执行步骤
4.1 系统参数
java.rmi.server.codebase=”…”
指定类文件路径,远程调用时可能会从该路径加载类文件。
java.rmi.server.useCodebaseOnly=true/false
如果设置为true,将禁用自动加载类文件,仅从CLASSPATH和java.rmi.server.codebase指定路径加载类文件。
java.security.policy=”…”
指定附加或不同的安全策略文件。
4.2 启动Registry
指定系统参数:
-J-D(name=value)
Windows终端:
start rmiregistry –J-Djava.rmi.server.useCodebaseOnly=false
Linux/Mac终端:
rmiregistry –J-Djava.rmi.server.useCodebaseOnly=false
4.3 启动Server
指定系统参数:
-D(name=value)
启动Server:
java -Djava.rmi.server.useCodebaseOnly=false -Djava.security.policy="policy.permission" Server
4.4 启动Client
指定系统参数:
-D(name=value)
启动Client:
java -Djava.rmi.server.useCodebaseOnly=false -Djava.security.policy="policy.permission" Client


