在VSCode中使用TensorForce调试DQN算法
严正声明:本文系作者davidhopper原创,未经许可,不得转载。
2015年,DeepMind的Volodymyr Mnih等研究员在《自然》杂志上发表著名论文“Human-level control through deep reinforcement learning”,提出一个结合深度学习(Deep Learning, DL)技术和强化学习(Reinforcement Learning, RL)思想的模型Deep Q-Network (DQN),在Atari游戏平台上展示出超越人类水平的表现。自此以后,结合DL与RL的深度强化学习(Deep Reinforcement Learning, DRL)迅速成为人工智能界的焦点。GitHub网站有很多实现DQN算法的代码,我认为比较好的是基于TensorFlow实现的TensorForce。
下面介绍TensorForce的安装步骤及其在VSCode中调试DQN的方法。
注意:安装TensorForce前,请按照我另一篇博客《Ubuntu 16.04安装tensorflow_gpu 1.9.0的方法》的方法安装TensorFlow。
一、安装TensorForce
我们从GitHub网站下载源代码进行安装,命令如下:
注意:使用Git从GitHub网站下载源代码的方法与技巧可参见我另一篇博客《对Github中Apollo项目进行版本控制的方法》。
git clone [email protected]:reinforceio/tensorforce.git
cd tensorforce
sudo pip install -e .[tf_gpu]
二、安装游戏模拟器OpenAI Gym
我们从GitHub网站下载源代码进行安装,命令如下:
git clone [email protected]:openai/gym.git
cd gym
sudo pip install -e .[all]
三、在VSCode中调试DQN算法
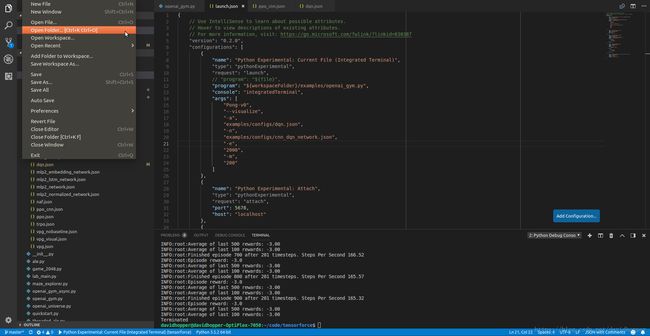
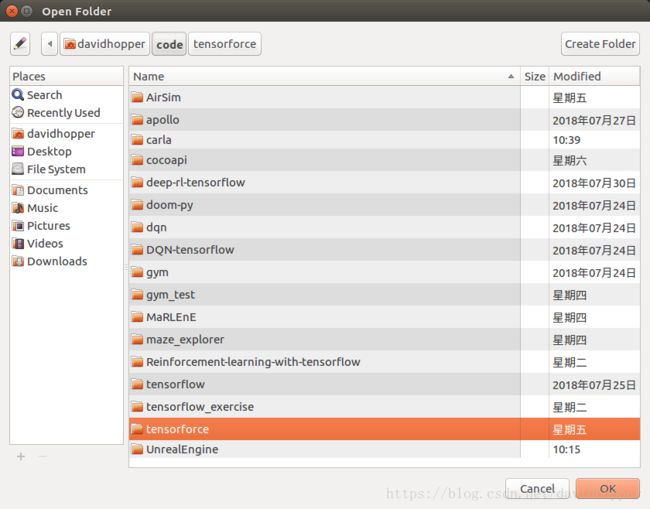
在VSCode中打开TensorForce目录,如下图所示:


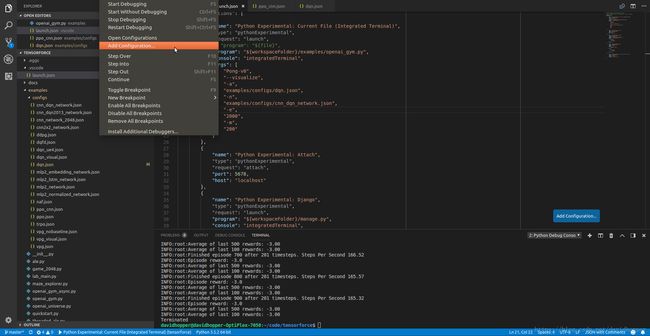
然后生成调试配置文件,如下图所示:

因为普通的Python环境启动速度实在太慢,令人无法忍受,我们使用Python Experimental环境进行调试,配置文件内容如下:
{
    // Use IntelliSense to learn about possible attributes.
    // Hover to view descriptions of existing attributes.
    // For more information, visit: https://go.microsoft.com/fwlink/?linkid=830387
    "version": "0.2.0",
    "configurations": [
        {
            "name": "Python Experimental: Current File (Integrated Terminal)",
            "type": "pythonExperimental",
            "request": "launch",
            // "program": "${file}",
            "program": "${workspaceFolder}/examples/openai_gym.py",
            "console": "integratedTerminal",
            "args": [
                "Pong-v0",
                "--visualize",
                "-a",
                "examples/configs/dqn.json",
                "-n",
                "examples/configs/cnn_dqn_network.json",
                "-e",
                "2000",
                "-m",
                "200"
            ]
        },
        {
            "name": "Python Experimental: Attach",
            "type": "pythonExperimental",
            "request": "attach",
            "port": 5678,
            "host": "localhost"
        },
        {
            "name": "Python Experimental: Django",
            "type": "pythonExperimental",
            "request": "launch",
            "program": "${workspaceFolder}/manage.py",
            "console": "integratedTerminal",
            "args": [
                "runserver",
                "--noreload",
                "--nothreading"
            ],
            "django": true
        },
        {
            "name": "Python Experimental: Flask",
            "type": "pythonExperimental",
            "request": "launch",
            "module": "flask",
            "env": {
                "FLASK_APP": "app.py"
            },
            "args": [
                "run",
                "--no-debugger",
                "--no-reload"
            ],
            "jinja": true
        },
        {
            "name": "Python Experimental: Current File (External Terminal)",
            "type": "pythonExperimental",
            "request": "launch",
            "program": "${file}",
            "console": "externalTerminal"
        }
    ]
}
我们需要修改的内容仅仅是前面一小部分,其他内容无需改变:
"version": "0.2.0",
    "configurations": [
        {
            "name": "Python Experimental: Current File (Integrated Terminal)",
            "type": "pythonExperimental",
            "request": "launch",
            // "program": "${file}",
            "program": "${workspaceFolder}/examples/openai_gym.py",
            "console": "integratedTerminal",
            "args": [
                "Pong-v0",
                "--visualize",
                "-a",
                "examples/configs/dqn.json",
                "-n",
                "examples/configs/cnn_dqn_network.json",
                "-e",
                "2000",
                "-m",
                "200"
            ]
},因为默认的配置文件examples/configs/dqn.json中指定的replay memory过大,除非你的显卡内存超过8GB,否则就会报ResourceExhaustedError。

为避免此错误,我们修改配置文件examples/configs/dqn.json的memory节如下:
    "memory": {
        "type": "replay",
        "capacity": 1000,
        "include_next_states": true
    },