移植Uboot2017到TINY4412

梦想还是要有的,万一实现了呢

移植相关

硬件:
-核心板:Tiny4412 - 1412
-底板: Tiny4412/Super4412SDK 1506
软件:
-移植uboot版本: u-boot-2017.05.tar.bz2
-工具链:arm-linux-gcc 4.5.1
工具链就不介绍如何安装了。

新版的UBOOT增加了SPL的支持。
SPL:Secondary Program Loader,第二阶段程序加载器(其实就相当于uboot的第一阶段,只不过单独编译成一个文件了)。编译u-boot-spl.bin复用的是u-boot的代码。通过宏定义CONFIG_SPL_BUILD进行条件编译,当然有一些函数虽然名字相同,但是调用的不同源文件里的函数,比如init_board_f(),后面再继续说。

我们要移植的处理器为三星公司的exynos4412。所以我到board/samsung/找到一款基于exynos4xxx(4412、4210)的处理器进行移植。在/board/samsung目录下基于exynos4xxx的开发板有:origen、odroid、trats、trats2,smdkv310。origen和smdkv310支持spl配置,这里笔者选择了origen进行移植。

创建板级相关文件

首先
#make clean
#make distclean
然后
#grep “origen” * -nR
#grep “ORIGEN” * -nR
搜索,哪些文件跟origen相关
然后依葫芦画瓢。复制,粘贴, 修改。将origen修改为tiny4412,ORIGEN修改为TINY4412。
移植Uboot2017到TINY4412_第1张图片
(注:mach-types.h这个文件是自动生成的,不需要修改。在include/configs/tiny4412.h:#define CONFIG_MACH_TYPE MACH_TYPE_TINY4412后就会自动生成编号)
拷贝,修改之后
#make tiny4412_defconfig
#make ARCH=arm CROSS_COMPILE=arm-linux- V=1 -j8
(V=1:表示显示编译详细信息。 -j8:笔者电脑是四核八线程,加该选项为了提高编译速度)
如果修改正确,此时是可以编译通过,如果不能编译通过,请检查,是否有文件遗漏未修改。
编译通过后在根目录生成
u-boot.bin(完整的uboot)
spl目录生成
u-boot-spl.bin(SPL)
当然,此时的镜像文件,烧写到SD是没有反应的,还需要做相应的修改。

修改制作BL2的工具

(参考:Android_Exynos4412_iROM_Secure_Booting_Guide_Ver.1.00.00.pdf)
移植Uboot2017到TINY4412_第2张图片
官方提供了BL1文件(E4412_N.bl1.bin),所以我们就将SPL镜像制作成BL2。(当然也可以不使用官方的BL1文件,将SPL镜像制作成BL1,为了简单,方便,笔者选择使用了官方的BL1)如果对启动流程不是很清楚的话请查看笔者的另一篇文章:《exynos4412启动流程》。
移植Uboot2017到TINY4412_第3张图片
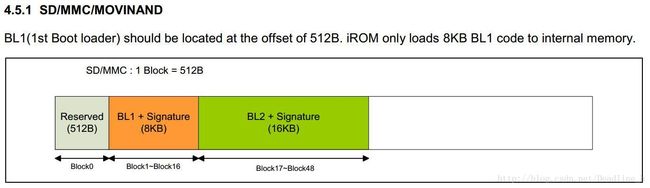
该片内内存映射反应了,BL2主要为主体+校验和+签名。在官方文档中有描述,BL2的签名已经写在BL1中,所以制作BL2不需要加签名,校验为前(14*1024-4)字节的校验和,并将校验和写在(14*1024-4)地址处,即完成BL2制作。
制作BL2的源码为/u-boot-2017.05/board/samsung/tiny4412/tools/mktiny4412spl.c(其实是复制mkorigenspl.c)

#include 
#include 
#include 
#include 
#include 
#include 
#include 
/*
 * no make BL1,so don't need add header
 */
#define BUFSIZE         (16*1024)
#define IMG_SIZE        ((14*1024)-4)
#define FILE_PERM       (S_IRUSR | S_IWUSR | S_IRGRP \
                | S_IWGRP | S_IROTH | S_IWOTH)

/*
* Requirement:
* IROM code reads first 14K bytes from boot device.
* It then calculates the checksum of 14K-4 bytes and compare with data at
* 14K-4 offset.
*
* This function takes two filenames:
* IN  "u-boot-spl.bin" and
* OUT "$(BOARD)-spl.bin as filenames.
* It reads the "u-boot-spl.bin" in 16K buffer.
* It calculates checksum of 14K-4 Bytes and stores at 14K-4 offset in buffer.
* It writes the buffer to "$(BOARD)-spl.bin" file.
*/


/* in /scripts/Makefile.spl   274line在该Makefile会调用该工具制作BL2。
 -  argc = 3    
 - mktiny4412spl  $(obj)/u-boot-spl.bin    $(obj)/$(BOARD)-spl.bin
 -    argv[0]             argv[1]                argv[2]
 */

int main(int argc, char **argv)
{
    int i, len;
    unsigned char buffer[BUFSIZE] = {0};
    int ifd, ofd;
    unsigned int checksum = 0, count;

    if (argc != 3) {
        printf(" %d Wrong number of arguments\n", argc);
        exit(EXIT_FAILURE);
    }

    ifd = open(argv[1], O_RDONLY);//open inputfile
    if (ifd < 0) {
        fprintf(stderr, "%s: Can't open %s: %s\n",
            argv[0], argv[1], strerror(errno));
        exit(EXIT_FAILURE);
    }

    ofd = open(argv[2], O_WRONLY | O_CREAT | O_TRUNC, FILE_PERM);//open output file ,if no exist,creat
    if (ofd < 0) {
        fprintf(stderr, "%s: Can't open %s: %s\n",
            argv[0], argv[2], strerror(errno));
        if (ifd)
            close(ifd);
        exit(EXIT_FAILURE);
    }

    len = lseek(ifd, 0, SEEK_END);
    lseek(ifd, 0, SEEK_SET);


    count = (len < IMG_SIZE)? (len) : (IMG_SIZE); //read 1024*14-4

    if (read(ifd, buffer, count) != count) {
        fprintf(stderr, "%s: Can't read %s: %s\n",
            argv[0], argv[1], strerror(errno));

        if (ifd)
            close(ifd);
        if (ofd)
            close(ofd);

        exit(EXIT_FAILURE);
    }

    for (i = 0; i < IMG_SIZE; i++)//calculates the checksum
    {
        checksum += (unsigned char)(buffer[i]);
    }
    *(unsigned int*)(buffer+i) = checksum;//write checksum


    if (write(ofd, buffer, BUFSIZE) != BUFSIZE) {
        fprintf(stderr, "%s: Can't write %s: %s\n",
            argv[0], argv[2], strerror(errno));

        if (ifd)
            close(ifd);
        if (ofd)
            close(ofd);

        exit(EXIT_FAILURE);
    }

    if (ifd)
        close(ifd);
    if (ofd)
        close(ofd);

    return EXIT_SUCCESS;
}

校验和就是简单相加,然后将校验和写入14*1024-4的位置,就OK了,很简单的工作。
因为我们制作的是BL2,所以需要将用来作BL1加头的代码去掉。
编译uboot之后在spl目录下生成的tiny4412-spl.bin(BL2)。

烧写UBOOT(SPL)到SD卡

使用linux命令dd进行烧写。
#man dd 可知
dd:主要用于拷贝和转化文件
重要参数:

  • iflag=读取时采用同步方式

  • oflag=写入时采用同步方式

  • if = 输入文件

  • of =输出文件

  • seek=从输出文件开头跳过 blocks 个块后再开始复制。(通常只有当输出文件是磁盘或磁带时才有效)。
    为了减少反复输入命令,将烧写命令写成一个脚本。(参考开放板厂商代码的sd_fuse里面脚本修改)

源码根目录/sd_fuse/tiny4412/sd_fusing.sh
#
# Copyright (C) 2011 Samsung Electronics Co., Ltd.
#              http://www.samsung.com/
#
# This program is free software; you can redistribute it and/or modify
# it under the terms of the GNU General Public License version 2 as
# published by the Free Software Foundation.
#
####################################
if [ -z $1 ]
then
    echo "usage: ./sd_fusing.sh "
    exit 0
fi

if [ -b $1 ]
then
    echo "$1 reader is identified."
else
    echo "$1 is NOT identified."
    exit 0
fi

####################################
#

BDEV_NAME=`basename $1`
BDEV_SIZE=`cat /sys/block/${BDEV_NAME}/size`

if [ ${BDEV_SIZE} -le 0 ]; then
    echo "Error: NO media found in card reader."
    exit 1
fi

if [ ${BDEV_SIZE} -gt 32000000 ]; then
    echo "Error: Block device size (${BDEV_SIZE}) is too large"
    exit 1
fi
####################################
# check files
E4412_UBOOT=../../u-boot.bin
E4412_UBOOT_SPL=../../spl/tiny4412-spl.bin

if [ ! -f ${E4412_UBOOT} ]; then
    echo "Error: u-boot.bin NOT found, please build it & try again."
    exit -1
fi

if [ ! -f ${E4412_UBOOT_SPL} ]; then
    echo "Error: tiny4412-spl.bin(BL2) NOT found, please build it & try again."
    exit -1
fi

####################################
# fusing images

signed_bl1_position=1
bl2_position=17
uboot_position=49
tzsw_position=705

#
echo "---------------------------------------"
echo "BL1 fusing"
dd iflag=dsync oflag=dsync if=./E4412_N.bl1.bin of=$1 seek=$signed_bl1_position

#
echo "---------------------------------------"
echo "BL2 fusing"
dd iflag=dsync oflag=dsync if=./${E4412_UBOOT_SPL} of=$1 seek=$bl2_position

#
echo "---------------------------------------"
echo "u-boot fusing"
dd iflag=dsync oflag=dsync if=${E4412_UBOOT} of=$1 seek=$uboot_position

#
echo "---------------------------------------"
echo "TrustZone S/W fusing"
dd iflag=dsync oflag=dsync if=./E4412_tzsw.bin of=$1 seek=$tzsw_position

#
sync

####################################
#
echo "***************************************"
echo "U-boot image is fused successfully."

插入读卡器,此时发现设备文件/dev/sdc
进入到脚本的目录,执行脚本,完成烧写。
#sd_fusing /dev/sdc
当然在该目录还要有官方的BL1文件和E4412_tzsw.bin文件。

点亮调试LED

1.修改链接地址
include/configs/tiny4412.h

54:#define CONFIG_SPL_TEXT_BASE      0x02023400

2.添加调试LED代码
2.1 查看原理图,确定LED引脚
->
移植Uboot2017到TINY4412_第4张图片
->
这里写图片描述
通过原理图可知,LED占用的GPM4 0-3引脚,低电平点亮。
2.2 查看芯片手册,确定寄存器地址
这里写图片描述
这里写图片描述
2.3 写驱动代码

arch/arm/cpu/armv7/start.S
...
reset:
    bl light_led
...
@在文件后面添加代码
    .globl light_led
light_led:
    ldr     r0, =0x110002E0      @ GPM4CON Register
    ldr     r1, =0x00001111      @ Configurate GPM4_0GPM4_1GPM4_2GPM4_3 output
    str     r1, [r0]

    mov     r1, #0xF0            @ light All led on
    ldr     r0, =0x110002E4      @ GPM4DAT Register
    str     r1, [r0]
    mov pc, lr

执行编译命令:
#make ARCH=arm CROSS_COMPILE=arm-linux- V=1 -j8
烧写,将启动选择开关拨到SD卡启动,则可以看到开发板上的4颗LED灯被点亮。

结束

本节内容结束,uboot移植未完待续。。。

你可能感兴趣的:(uboot)