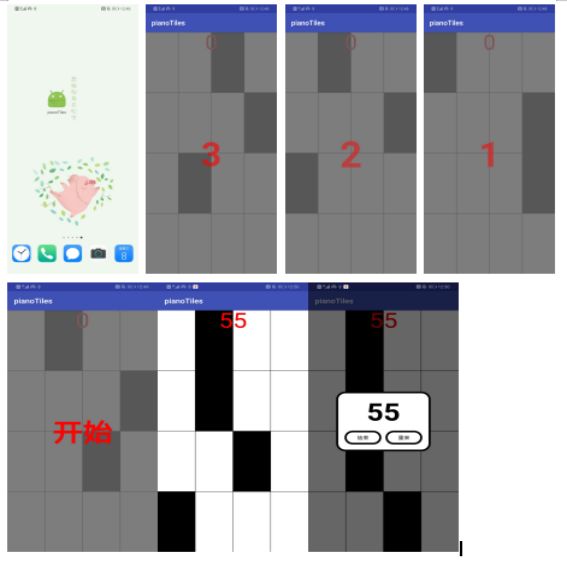
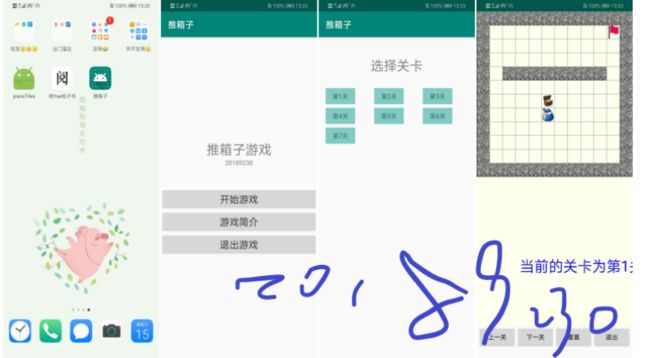
代码组成部分:
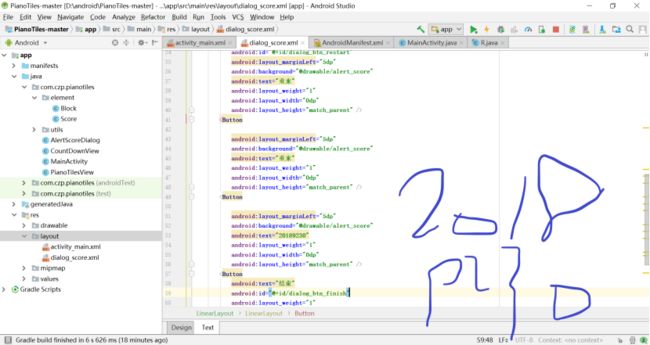
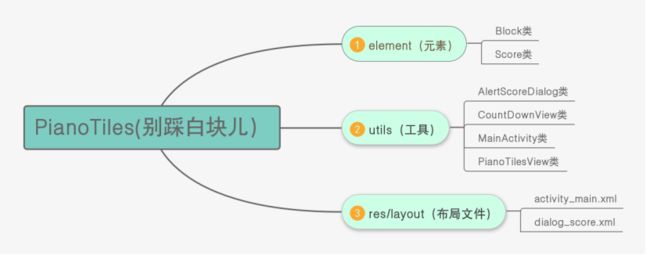
关键代码主要分为三大部分,如下图所示(用思维导图的形式展示):
代码调用关系
通过MainActivity调用其他类❤,具体见核心代码分析!
核心代码分析
public class PiecesRectF extends RectF {
    private int type;

    public final static int BLAKE = 0;//黑块
    public final static int WRITE = 1;//白块
    public final static int BLUE = 2;//黑块按下时的显示蓝块
    public final static int START = 3;//标记有开始的黑块
    public final static int RED = 4;//按到白块,或有黑块漏按

    public PiecesRectF(){
        super();
        type = Math.random() > 0.5 ? 0:1;//初始化时,给type随机一个白块或黑块
    }

    public void setType(int type) {
        this.type = type;
    }

    public int getType() {
        return type;
    }
}
可以看到别踩白块儿,将屏幕的宽和高都分成了四部分,十六小块,然后将不同的小块填充为不同的颜色,在原游戏中还有一种长长的黑块,而我们这个是简化板,只保留了每个黑块只占一小块。
由于每个小块,都是矩形块,我们选择用canvas.drawRect()方法来绘制,那么首先要定义一个PiecesRectF类继承自RectF,并在PiecesRectF类中定义矩形块不同的状态。
public class PiecesRectF extends RectF {
    private int type;

    public final static int BLAKE = 0;//黑块
    public final static int WRITE = 1;//白块
    public final static int BLUE = 2;//黑块按下时的显示灰块
    public final static int START = 3;//标记有开始的黑块
    public final static int RED = 4;//按到白块,或有黑块漏按

    public PiecesRectF(){
        super();
        type = Math.random() > 0.5 ? 0:1;//初始化时,给type随机一个白块或黑块
    }

    public void setType(int type) {
        this.type = type;
    }

    public int getType() {
        return type;
    }
}
接着就是最关键的自定义view了
    public WhitePiecesView(Context context) {
        this(context,null);
    }

    public WhitePiecesView(Context context, AttributeSet attrs) {
        this(context, attrs,0);
    }

    public WhitePiecesView(Context context, AttributeSet attrs, int defStyleAttr) {
        super(context, attrs, defStyleAttr);

        mPaint = new Paint();
        initOvals();//初始化方块
    }

    private void initOvals(){

        for (int i = 0;i < 5;i++){
            for (int j = 0;j<4;j++){

                ovals[i][j] = new PiecesRectF();
                if (j == 1){
                    //如果是第二列,则若第一列的是黑块将这个方块设为白块
                    if (ovals[i][j-1].getType() == PiecesRectF.BLAKE ||
                            ovals[i][j-1].getType() == PiecesRectF.START) {
                        ovals[i][j].setType(PiecesRectF.WRITE);
                    }
                }else if (j == 3){
                    //如果是第四列,同样若第一列的是黑块将这个方块设为白块
                    if (ovals[i][j-1].getType() == PiecesRectF.BLAKE ||
                            ovals[i][j-1].getType() == PiecesRectF.START) {
                        ovals[i][j].setType(PiecesRectF.WRITE);
                    }
                    //如果是第四列,且前四列的都为白块,则设为黑块
                    else if (ovals[i][j-2].getType() == PiecesRectF.WRITE &&
                            ovals[i][j-3].getType() == PiecesRectF.WRITE) {
                        ovals[i][j].setType(PiecesRectF.BLAKE);
                    }
                }

                if (i == 4){
                    if (ovals[i][j].getType() == PiecesRectF.BLAKE)
                        ovals[i][j].setType(PiecesRectF.START);//若是最后一行,将黑块的type替换为START

                }
            }
        }
    }
根据对原游戏的观察,在方块向下移动过程中,一共有5 * 4个,因此定义一个二维数组,并且在每一行的第一第二列只会有一个黑块,同样第三第四列也是。而且每一行一定会有一个黑块。因此在初始化时加上以上的判断条件,并且设置type。
再来设置一个监听,来监听分数变化和游戏是否结束。
private WhitePiecesListener MyWhitePiecesListener;

    public void setWhitePiecesListener(WhitePiecesListener myWhitePiecesListener) {
        MyWhitePiecesListener = myWhitePiecesListener;
    }

    public interface WhitePiecesListener{
        void getScore(int score);
        void gameOver();
    }
重写onDraw方法,绘制方块。
在drawRect()中,对二维数组进行遍历,并设定每个方块的位置,然后根据每个方块type的不同,进行了不同的绘制方法,最后绘制白色边框。
绘制完后,我们需要设定点击事件,在点击STRAT的方块时,游戏开始所有方块向下滑,得分+1,开始后点击BLACK,得分+1,点击WHITE,游戏结束。因此重写onTouchEvent(MotionEvent event),并且使用多点触控。
  @Override
    public boolean onTouchEvent(MotionEvent event) {
        int index = event.getActionIndex();
        switch (event.getActionMasked()){
            case ACTION_DOWN:
            case ACTION_POINTER_DOWN: {
                int id = event.getPointerId(index);
                for (int i = 0; i < 5; i++) {
                    for (int j = 0; j < 4; j++) {
                        PiecesRectF f = ovals[i][j];
                        if (event.getX() > f.left && event.getX() < f.right
                                && event.getY() > f.top && event.getY() < f.bottom) {
                            selectOvals.put(id, f);//点击选中的方块存入SparseArray

                            switch (f.getType()){
                                case PiecesRectF.BLAKE:{
                                    if (!once) {
                                        f.setType(PiecesRectF.BLUE);
                                        score++;
                                    }
                                    break;
                                }
                                case PiecesRectF.START:{
                                    if (once){
                                        //判断第一次按中
                                        startThread();
                                        once = false;
                                    }
                                    //按黑块处理
                                    f.setType(PiecesRectF.BLUE);
                                    score++;
                                    break;
                                }
                                case PiecesRectF.WRITE:{
                                    if (!once) {
                                        //点中白块GameOver
                                        f.setType(PiecesRectF.RED);
                                        isGameOver = true;
                                        invalidate();
                                    }
                                    break;
                                }
                            }
                            MyWhitePiecesListener.getScore(score);
                        }
                    }
                }
                break;
            }
            case ACTION_UP:
            case ACTION_POINTER_UP:{
                int id = event.getPointerId(index);
                PiecesRectF f = selectOvals.get(id,null);//得到某个手指选中的方块
                if (f != null && f.getType() == PiecesRectF.BLUE ){
                    f.setType(PiecesRectF.WRITE);
                }
                break;
            }
        }
        return true;
    }
在onTouchEvent(MotionEvent event)方法中,对点击不同方块进行了不同的处理,并且在第一次按下START的白块时,执行了startThread()方法来,实现所有方块的向下滑动.
private void startThread(){
        new Thread(new Runnable() {
            @Override
            public void run() {
                while(true){
                    topOvalHeight =topOvalHeight + 7;//这里写死了滑动速度
                    if (isGameOver) {//如果游戏已经结束,结束循环
                        return;
                    }
                    if (topOvalHeight > getHeight()/4) {
                        topOvalHeight = 0;//若最顶层的方块的高,超出正常方块的的高,清零。
                        if (checkBottomOvals()){//检测是否有黑色方块漏点
                            //有漏点,游戏结束
                            isGameOver = true;
                            postInvalidate();
                            return;
                        }else
                            //没有漏点,更新方块游戏结束
                            updateRectF();
                    }
                    try {
                        Thread.sleep(15);
                    } catch (InterruptedException e) {
                        e.printStackTrace();
                    }
                    postInvalidate();
                }
            }
        }).start();
    }
然后是检测是否有黑色方块漏点的checkBottomOvals(),和更新滑块的updateRectF()。
    /**
      *检测是否有漏点
      */
    private boolean checkBottomOvals(){
        boolean haveBlake = false;
        for (int i = 0;i < 4;i++){
            if (ovals[4][i].getType() == PiecesRectF.BLAKE
                    || ovals[4][i].getType() == PiecesRectF.START) {
                //判断最后一行是否存在BLAKE或START方块
                //如果有将其设为红色
                ovals[4][i].setType(PiecesRectF.RED);
                haveBlake = true;
            }
        }
        return haveBlake;
    }

    /**
     * 更新方块
     */
    private void updateRectF(){

        for (int i = 4; i >= 0; i--) {
            for (int j = 0; j < 4; j++) {
                if (i == 0) {//如果是第一行,重新初始化一行
                    ovals[i][j] = new PiecesRectF();

                    if (j == 1){
                        if (ovals[i][j-1].getType() == PiecesRectF.BLAKE)
                            ovals[i][j].setType(PiecesRectF.WRITE);
                    }else if (j == 3){
                        if (ovals[i][j-1].getType() == PiecesRectF.BLAKE)
                            ovals[i][j].setType(PiecesRectF.WRITE);
                        else if (ovals[i][j-2].getType() == PiecesRectF.WRITE &&
                                ovals[i][j-3].getType() == PiecesRectF.WRITE)
                            ovals[i][j].setType(PiecesRectF.BLAKE);
                    }
                }
                else//否则,将行数后移
                    ovals[i][j] = ovals[i - 1][j];
            }
        }
    }
最后在加上一个重新开始的方法。
public void restart(){
        once = true;
        topOvalHeight = 0;//顶层高度归零
        score = 0;//分数归零
        MyWhitePiecesListener.getScore(score);
        initOvals();//重新初始化
        invalidate();//再次绘制
    }
2.实测——
布局文件:
MainActivity——
import android.os.Bundle;
import android.support.v7.app.AppCompatActivity;
import android.util.Log;
import android.view.View;
import android.widget.RelativeLayout;

import java.util.Arrays;

public class MainActivity extends AppCompatActivity {//主函数,有一个继承的关系
    private CountDownView mCountDownView;
    private PianoTilesView mPianoTilesView;
    private RelativeLayout mMarkRela;
    private AlertScoreDialog mAlertScoreDialog;//创建了类的实例
    @Override
    protected void onCreate(Bundle savedInstanceState) {//开始一个活动
        super.onCreate(savedInstanceState);
        setContentView(R.layout.activity_main);//调用一个主活动界面
        initView();
    }
    private void initView() {
        mPianoTilesView = (PianoTilesView) findViewById(R.id.pianoTilesView);//通过id名字找到配置
        mCountDownView = (CountDownView) findViewById(R.id.countTextView);
        mMarkRela = (RelativeLayout) findViewById(R.id.markRela);
        mCountDownView.setData(Arrays.asList("3","2","1","开始"));
        mCountDownView.init();
        mCountDownView.setCountDownListener(new CountDownView.CountDownListener() {//创建一个监听器
            @Override
            public void finish() {
                mMarkRela.setVisibility(View.GONE);
                mPianoTilesView.setZOrderOnTop(true);
                mPianoTilesView.startGame();
            }
        });

        mAlertScoreDialog = new AlertScoreDialog.Builder(MainActivity.this)
                .setFinishClickListener(new View.OnClickListener() {
                    @Override
                    public void onClick(View v) {
                        Log.e("DEMO","点击点击");
                        finish();
                        mAlertScoreDialog.dismiss();
                    }
                })
                .setRestartClickListener(new View.OnClickListener() {
                    @Override
                    public void onClick(View v) {
                        mAlertScoreDialog.dismiss();
                        mPianoTilesView.restart();
                        mMarkRela.setVisibility(View.VISIBLE);
                        mCountDownView.init();

                    }
                })
                .builder();


        mPianoTilesView.setGameListener(new PianoTilesView.GameListener() {
            @Override
            public void gameEnd(final  String number) {
                runOnUiThread(new Runnable() {
                    @Override
                    public void run() {
                        Log.e("DEMO","number == "+number);
                        if(mAlertScoreDialog!=null){
                            mAlertScoreDialog.setScore(number);
                            mAlertScoreDialog.show();
                        }

                    }
                });

            }
        });
    }
}