UEditor富文本编辑器整合SpringMVC
最近公司项目需要使用到一个H5的富文本编辑器,在搜索网上一些资料后决定选用百度出的UEditor编辑器,其提供了5个版本,分别是 完整源码版,ASP版本,JSP版本,.NET版本和PHP版本。由于需要进行编辑器与Springmvc的整合,所以这里选用的完整源码版本,下载下来后的目录结构如图所示: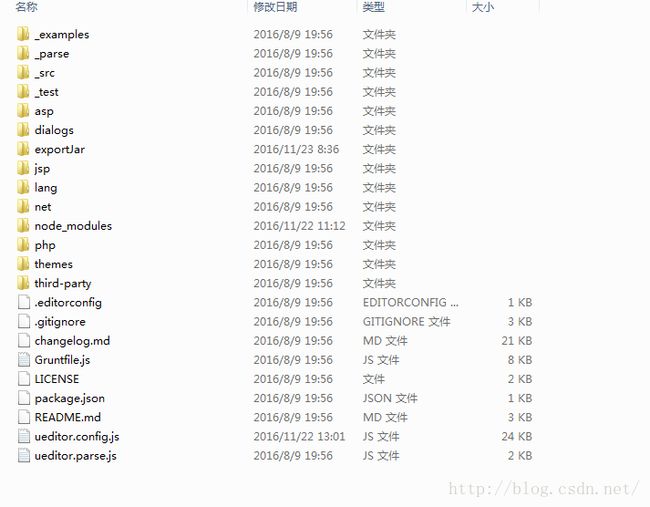
根据http://fex.baidu.com/ueditor/#dev-bale_width_grunt提供的源码打包教程后再该文件夹下将出现一个dist文件夹,里面就是打包好的文件,但是该文件夹下的
jsp/lib文件夹下的ueditor-1.1.2.jar包为了之后的整合需要修改其源码并重新编译形成新的jar包,OK,开始进行整合了(相信知道要整合的读者已经知道了前面的一些基本信息,例如该空间的后台统一入口controller.jsp)
第一步,修改源码编译新的Jar包
在Eclipse中新建一个Dymatic Web project,,并将上图jsp/src/下的源码复制黏贴到项目src下,并将jsp/lib下的
这几个包导入,注意不导入ueditor-1.1.2.jar,
然后找到ConfigManager类中的getConfigPath()方法,该方法直接影响到控件是否能正确加载后台配置文件,从不能正确加载则不能使用上传功能!
将该方法内部修改成,并且重写其私有的初始化方法
private String getConfigPath () {
return this.rootPath +"ueditor"+File.separator+"jsp"+File.separator+ ConfigManager.configFileName;//roorPath为项目的根目录带"/"号,指到WebRoot下
}
	private ConfigManager ( String rootPath, String contextPath, String uri ) throws FileNotFoundException, IOException {

		rootPath = rootPath.replace( "\\", "/" );

        this.rootPath = rootPath;
        this.contextPath = contextPath;

        /*if ( contextPath.length() > 0 ) {
            this.originalPath = this.rootPath + uri.substring(contextPath.length() );
        } else {
            this.originalPath = this.rootPath + uri;
        }*/

        this.originalPath = rootPath +"ueditor"+File.separator+"jsp"+File.separator+ "controller.jsp";
        ///EdwManage/src/main/webapp/static/lib/ueditor/1.4.3/jsp/controller.jsp
        this.initEnv();

	}
然后通过Ecelipse导出为Jar包。
第二步
a.插件正式导入SpringMVC项目,
在WebRoot下新建一个文件夹命名为"ueditor"将整个dist\utf8-jsp/下的 所有文件拷进去
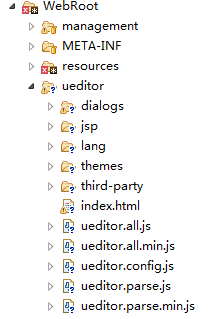
然后将jsp/lib下的文件除了ueditor-1.1.2.jar的Jar包导入进WEB-INF/lib,注意如果项目中已有的JAR就不用导入了,然后导入刚才我们第一步重新编译的生成的JAR包。
b.新建一个Controller,替代之前的插件统一入口controller.jsp,代码如下:
@Controller
@RequestMapping(value = "/ueditor")
public class UEditorController {

        @RequestMapping("/dispatch")
        public void config(HttpServletRequest request,  HttpServletResponse response, String action) {
                response.setContentType("application/json");
                String rootPath = request.getSession().getServletContext().getRealPath("/");
                try {
                        String exec = new ActionEnter(request, rootPath).exec();
                        PrintWriter writer = response.getWriter();
                        writer.write(exec);
                        writer.flush();
                        writer.close();
                } catch (IOException e) {
                        e.printStackTrace();
                }
        }
}
    window.UEDITOR_CONFIG = {

        //为编辑器实例添加一个路径,这个不能被注释
        UEDITOR_HOME_URL: URL

        // 服务器统一请求接口路径
       // , serverUrl: URL + "jsp/controller.jsp"
       , serverUrl: serverURL + "/ueditor/dispatch"
...
    var getRootPath = function (){
        //获取当前网址
        var curWwwPath=window.document.location.href;
        //获取主机地址之后的目录
        var pathName=window.document.location.pathname;

        var pos=curWwwPath.indexOf(pathName);
        //获取主机地址
        var localhostPaht=curWwwPath.substring(0,pos);
        //获取带"/"的项目名,如:/uimcardprj
        var projectName=pathName.substring(0,pathName.substr(1).indexOf('/')+1);

        return(localhostPaht+projectName);
    }
    //获取路径
    var applicationPath = getRootPath();
    var URL = window.UEDITOR_HOME_URL || getUEBasePath();
    var serverURL = applicationPath;
   "imageUrlPrefix": "http://localhost:80/draven", /* 图片访问路径前缀 */
"imagePathFormat": "/upload/file/temp/{yyyy}{mm}{dd}/{time}{rand:6}", 第三部,配置Springmvc
如果ueditor文件下不是新建的还是放在之前配置好的静态资源目录下则可以忽略此步,如果不是,则需要在springmvc的配置文件中将其配置为静态资源,否则js不能正确加载,
public class CommonsMultiparResolver extends CommonsMultipartResolver {

    @Override
      public boolean isMultipart(javax.servlet.http.HttpServletRequest request) {
       String uri = request.getRequestURI();
       System.out.println(uri);
       //过滤使用百度UEditor的URI
       if (uri.indexOf("ueditor") > 0) {     //此处拦截路径即为上面编写的controller路径
        System.out.println("commonsMultipartResolver 放行");
        return false;
       }
       System.out.println("commonsMultipartResolver 拦截");
       return super.isMultipart(request);
      }
}