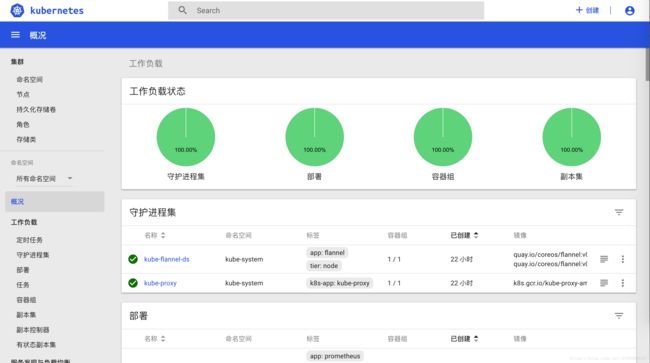
使用kubeadm安装k8s all-in-one单机测试环境 1.11.1
-
- 准备工作
- 安装kubelet,kubectl,kubeadm,kubernetes-cni
- 拉取镜像
- kubeadm安装k8s
- 安装 flannel
- 安装dashboard
- 查看运行端口
- 获取令牌
- 安装heapster
本文为安装快速笔记,如有疑问可直接留言
准备工作
# 关闭防火墙
$ systemctl stop firewalld && systemctl disable firewalld
# 关闭selinux
$ setenforce 0
$ vim /etc/selinux/config
SELINUX=disabled
# 配置hosts文件
10.1.1.191 tp4dd
# 安装docker-ce
curl -fsSL https://get.docker.com/ | sh
# 配置docker仓库加速
vim /etc/docker/daemon.json
{
  "registry-mirrors": ["https://********.mirror.aliyuncs.com"]
}
# 重启docker,配置自起
systemctl enable docker && systemctl start docker
# 配置系统参数
cat <.d/k8s.conf
net.ipv4.ip_forward = 1
net.bridge.bridge-nf-call-ip6tables = 1
net.bridge.bridge-nf-call-iptables = 1
EOF
sysctl -p /etc/sysctl.d/k8s.conf
# 关闭swap
swapoff -a && sysctl -w vm.swappiness=0
vim /etc/fstab
# 注释swap挂载
安装kubelet,kubectl,kubeadm,kubernetes-cni
cat < /etc/yum.repos.d/kubernetes.repo
[kubernetes]
name=Kubernetes
baseurl=https://mirrors.aliyun.com/kubernetes/yum/repos/kubernetes-el7-x86_64
enabled=1
gpgcheck=0
EOF
yum -y install epel-release
yum clean all
yum makecache
yum -y install kubelet kubeadm kubectl kubernetes-cni

systemctl enable docker && systemctl start docker
systemctl enable kubelet && systemctl start kubelet
拉取镜像
#!/bin/bash
images=(kube-proxy-amd64:v1.11.1 kube-scheduler-amd64:v1.11.1 kube-controller-manager-amd64:v1.11.1 kube-apiserver-amd64:v1.11.1
etcd-amd64:3.1.12 pause-amd64:3.1 kubernetes-dashboard-amd64:v1.8.3 k8s-dns-sidecar-amd64:1.14.10 k8s-dns-kube-dns-amd64:1.14.10
k8s-dns-dnsmasq-nanny-amd64:1.14.10)
for imageName in ${images[@]} ; do
  docker pull dolphintwo/$imageName
  docker tag dolphintwo/$imageName k8s.gcr.io/$imageName
  docker rmi dolphintwo/$imageName
done
kubeadm安装k8s
[root@tp4dd k8s]# kubeadm init --kubernetes-version=v1.11.1 --pod-network-cidr=10.244.0.0/16
[init] using Kubernetes version: v1.11.1
[preflight] running pre-flight checks
I0802 18:05:01.775351  28357 kernel_validator.go:81] Validating kernel version
I0802 18:05:01.775620  28357 kernel_validator.go:96] Validating kernel config
[preflight/images] Pulling images required for setting up a Kubernetes cluster
[preflight/images] This might take a minute or two, depending on the speed of your internet connection
[preflight/images] You can also perform this action in beforehand using 'kubeadm config images pull'
[kubelet] Writing kubelet environment file with flags to file "/var/lib/kubelet/kubeadm-flags.env"
[kubelet] Writing kubelet configuration to file "/var/lib/kubelet/config.yaml"
[preflight] Activating the kubelet service
[certificates] Generated ca certificate and key.
[certificates] Generated apiserver certificate and key.
[certificates] apiserver serving cert is signed for DNS names [tp4dd kubernetes kubernetes.default kubernetes.default.svc kubernetes.default.svc.cluster.local] and IPs [10.96.0.1 10.1.1.191]
[certificates] Generated apiserver-kubelet-client certificate and key.
[certificates] Generated sa key and public key.
[certificates] Generated front-proxy-ca certificate and key.
[certificates] Generated front-proxy-client certificate and key.
[certificates] Generated etcd/ca certificate and key.
[certificates] Generated etcd/server certificate and key.
[certificates] etcd/server serving cert is signed for DNS names [tp4dd localhost] and IPs [127.0.0.1 ::1]
[certificates] Generated etcd/peer certificate and key.
[certificates] etcd/peer serving cert is signed for DNS names [tp4dd localhost] and IPs [10.1.1.191 127.0.0.1 ::1]
[certificates] Generated etcd/healthcheck-client certificate and key.
[certificates] Generated apiserver-etcd-client certificate and key.
[certificates] valid certificates and keys now exist in "/etc/kubernetes/pki"
[kubeconfig] Wrote KubeConfig file to disk: "/etc/kubernetes/admin.conf"
[kubeconfig] Wrote KubeConfig file to disk: "/etc/kubernetes/kubelet.conf"
[kubeconfig] Wrote KubeConfig file to disk: "/etc/kubernetes/controller-manager.conf"
[kubeconfig] Wrote KubeConfig file to disk: "/etc/kubernetes/scheduler.conf"
[controlplane] wrote Static Pod manifest for component kube-apiserver to "/etc/kubernetes/manifests/kube-apiserver.yaml"
[controlplane] wrote Static Pod manifest for component kube-controller-manager to "/etc/kubernetes/manifests/kube-controller-manager.yaml"
[controlplane] wrote Static Pod manifest for component kube-scheduler to "/etc/kubernetes/manifests/kube-scheduler.yaml"
[etcd] Wrote Static Pod manifest for a local etcd instance to "/etc/kubernetes/manifests/etcd.yaml"
[init] waiting for the kubelet to boot up the control plane as Static Pods from directory "/etc/kubernetes/manifests"
[init] this might take a minute or longer if the control plane images have to be pulled
[apiclient] All control plane components are healthy after 42.003279 seconds
[uploadconfig] storing the configuration used in ConfigMap "kubeadm-config" in the "kube-system" Namespace
[kubelet] Creating a ConfigMap "kubelet-config-1.11" in namespace kube-system with the configuration for the kubelets in the cluster
[markmaster] Marking the node tp4dd as master by adding the label "node-role.kubernetes.io/master=''"
[markmaster] Marking the node tp4dd as master by adding the taints [node-role.kubernetes.io/master:NoSchedule]
[patchnode] Uploading the CRI Socket information "/var/run/dockershim.sock" to the Node API object "tp4dd" as an annotation
[bootstraptoken] using token: drlx3f.6ohu0q917om2nvmb
[bootstraptoken] configured RBAC rules to allow Node Bootstrap tokens to post CSRs in order for nodes to get long term certificate credentials
[bootstraptoken] configured RBAC rules to allow the csrapprover controller automatically approve CSRs from a Node Bootstrap Token
[bootstraptoken] configured RBAC rules to allow certificate rotation for all node client certificates in the cluster
[bootstraptoken] creating the "cluster-info" ConfigMap in the "kube-public" namespace
[addons] Applied essential addon: CoreDNS
[addons] Applied essential addon: kube-proxy

Your Kubernetes master has initialized successfully!

To start using your cluster, you need to run the following as a regular user:

  mkdir -p $HOME/.kube
  sudo cp -i /etc/kubernetes/admin.conf $HOME/.kube/config
  sudo chown $(id -u):$(id -g) $HOME/.kube/config

You should now deploy a pod network to the cluster.
Run "kubectl apply -f [podnetwork].yaml" with one of the options listed at:
  https://kubernetes.io/docs/concepts/cluster-administration/addons/

You can now join any number of machines by running the following on each node
as root:

  kubeadm join 10.1.1.191:6443 --token drlx3f.6ohu0q917om2nvmb --discovery-token-ca-cert-hash sha256:b80f96d27b1421e9c7b1dd22ab11d41086f4896d2adc352bd31b1a3ed6c105ef

# master节点负载node
kubectl taint nodes --all node-role.kubernetes.io/master-
安装 flannel
mkdir -p /etc/cni/net.d/
cat <<EOF> /etc/cni/net.d/10-flannel.conf
{
“name”: “cbr0”,
“type”: “flannel”,
“delegate”: {
“isDefaultGateway”: true
}
}
EOF
mkdir /usr/share/oci-umount/oci-umount.d -p
mkdir /run/flannel/
cat <<EOF> /run/flannel/subnet.env
FLANNEL_NETWORK=10.244.0.0/16
FLANNEL_SUBNET=10.244.1.0/24
FLANNEL_MTU=1450
FLANNEL_IPMASQ=true
EOF
kubectl apply -f https://raw.githubusercontent.com/coreos/flannel/v0.9.1/Documentation/kube-flannel.yml
安装dashboard
kubectl apply -f https://raw.githubusercontent.com/kubernetes/dashboard/master/src/deploy/recommended/kubernetes-dashboard.yaml查看运行端口
kubectl describe --namespace kube-system service kubernetes-dashboard获取令牌
kubectl -n kube-system describe secret $(kubectl -n kube-system get secret | grep admin-user | awk '{print $1}')安装heapster
git clone https://github.com/dolphintwo/k8s-manual-files.git
cd  k8s-manual-files/addons
kubectl create -f kube-heapster/influxdb/
kubectl create -f kube-heapster/rbac/
kubectl get pods --all-namespaces
NAMESPACE    NAME                                    READY    STATUS    RESTARTS  AGE
kube-system  coredns-78fcdf6894-7bgnc                1/1      Running  0          18h
kube-system  coredns-78fcdf6894-hnbc6                1/1      Running  0          18h
kube-system  etcd-tp4dd                              1/1      Running  0          18h
kube-system  heapster-69ddb98c78-xjrmj              1/1      Running  0          15m
kube-system  kube-apiserver-tp4dd                    1/1      Running  0          18h
kube-system  kube-controller-manager-tp4dd          1/1      Running  0          18h
kube-system  kube-flannel-ds-g8lcs                  1/1      Running  0          18h
kube-system  kube-proxy-n6c2w                        1/1      Running  0          18h
kube-system  kube-scheduler-tp4dd                    1/1      Running  0          18h
kube-system  kubernetes-dashboard-84fff45879-x5wlm  1/1      Running  0          11m
kube-system  monitoring-grafana-55f898595d-fxl88    1/1      Running  0          15m
kube-system  monitoring-influxdb-6c99b7b496-5s4ch    1/1      Running  0          15m
# 重启dashboard即可见