下面是自定义tabBar的一种效果, 如果有错误请留言, 我会修改
一、目标
-
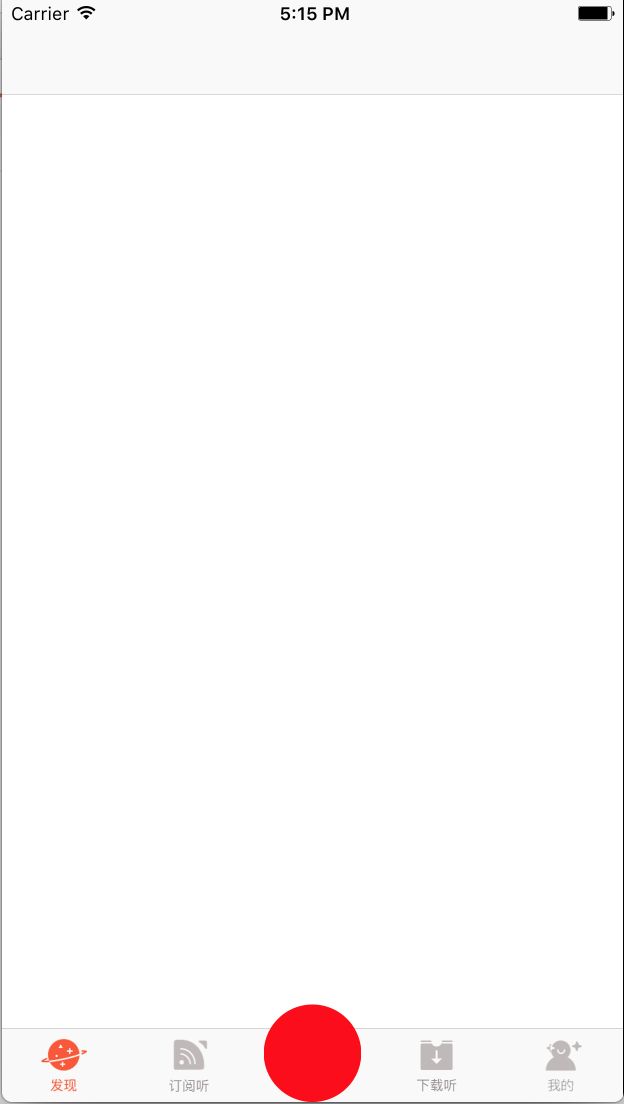
目标效果
- tabBar中间添加一个红色的圆形按钮, 并且按钮上所有位置都可以触发点击事件
二、实现方式
-
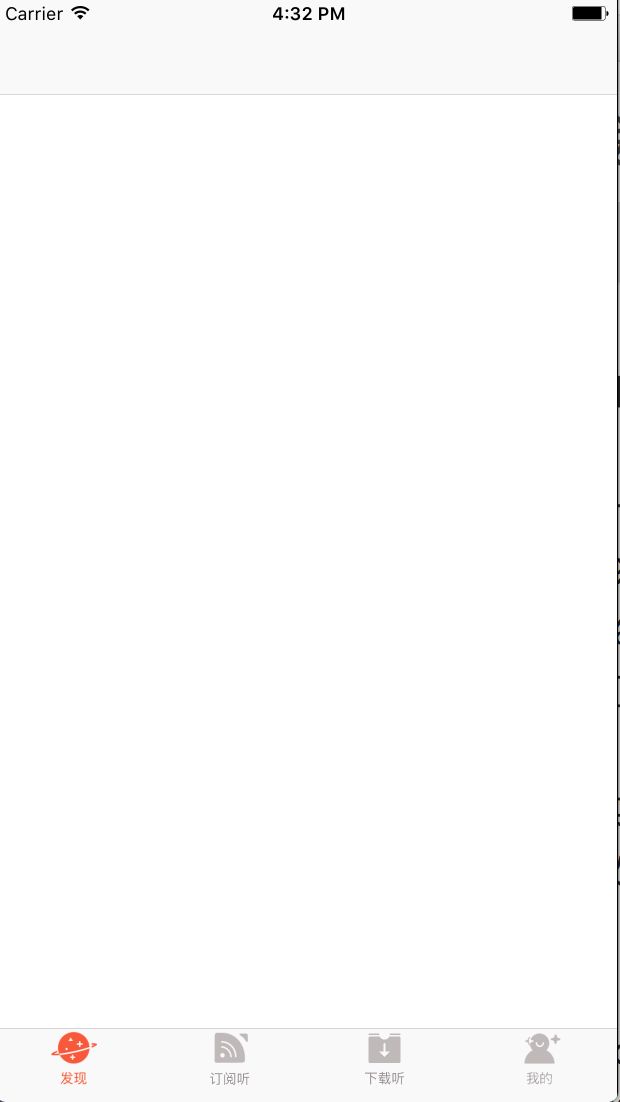
1: 自定义标签控制器(继承自UITabBarController), 并添加四个子控制器
- 图中的四个按钮位置靠上是因为 图片文字 整体是一张图的原因, 稍后会调整
- 2: 自定义类LTTabBar(继承自UITabBar)
- 3: 在自定义的标签控制器中使用KVC替换tabBar
- (void)viewDidLoad {
    [super viewDidLoad];

    // 替换掉系统的tabBar, 换成自己自定义的TabBar
    [self setValue:[LTTabBar new] forKey:@"tabBar"];
}
- 在LTTabBar类中重写 layoutSubviews 方法调整四个按钮位置
- (void)layoutSubviews
{
    [super layoutSubviews];

    NSInteger count = self.items.count;

    NSInteger index = 0;

    CGFloat width = self.width / (count + 1);
    CGFloat height = self.height;

    // 遍历所有按钮, 调整按钮位置
    for (UIView *subView in self.subviews) {
        if ([subView isKindOfClass:NSClassFromString(@"UITabBarButton")]) {
            // 当遇到第三个按钮(标记是2)时, 调整数值
            if (index == 2) index++;
            CGFloat x = index * width;
            CGFloat y = 5;
            subView.frame = CGRectMake(x, y, width, height);
            index++;
        }
    }
}
-
调整后的效果图
在按钮的中间添加一个视图, 这个视图的大小根据需求而定
- (instancetype)initWithFrame:(CGRect)frame
{
    self = [super initWithFrame:frame];
    if (self) {
        [self setUpInit];
    }
    return self;
}

- (UIView *)middleView
{
    if (!_middleView) {
        UIView *middleView = [[UIView alloc] init];
        [self addSubview:middleView];
        _middleView = middleView;
    }
    return _middleView;
}

- (void)setUpInit
{
    // 设置中间视图的大小 和 颜色
    // 这里颜色为蓝色, 方便看效果, 在这上面可以添加任意的视图 或者 图片
    self.middleView.frame = CGRectMake(0, 0, 65, 65);
    self.middleView.backgroundColor = [UIColor blueColor];
}
-
效果图
在蓝色视图上添加我们需要的红色按钮
@interface LTTabBar ()

/** 中间View */
@property (nonatomic, weak) UIView *middleView;

/** 中心的红色圆 */
@property (nonatomic, weak) UIButton *circleBtn;

@end

@implementation LTTabBar

- (instancetype)initWithFrame:(CGRect)frame
{
    self = [super initWithFrame:frame];
    if (self) {
        [self setUpInit];
    }
    return self;
}

- (UIView *)middleView
{
    if (!_middleView) {
        UIView *middleView = [[UIView alloc] init];
        [self addSubview:middleView];
        _middleView = middleView;
    }
    return _middleView;
}

- (void)setUpInit
{
    // 设置中间视图的大小 和 颜色
    // 这里颜色为透明, 这样就看不见了, 在这上面可以添加任意的视图 或者 图片
    self.middleView.frame = CGRectMake(0, 0, 65, 65);
    self.middleView.backgroundColor = [UIColor blueColor];

    // 添加红色的圆形按钮
    UIButton *circleBtn = [UIButton new];
    circleBtn.frame = self.middleView.frame;
    circleBtn.layer.cornerRadius = circleBtn.width * 0.5;
    circleBtn.layer.masksToBounds = YES;
    circleBtn.backgroundColor = [UIColor redColor];
    [self.middleView addSubview:circleBtn];
    _circleBtn = circleBtn;
    // 添加点击事件
    [circleBtn addTarget:self action:@selector(circleBtnClick:) forControlEvents:(UIControlEventTouchUpInside)];
}

// 红色按钮点击事件
- (void)circleBtnClick:(UIButton *)sender
{
    NSLog(@"红色按钮被点击了");
}

- (void)layoutSubviews
{
    [super layoutSubviews];

    NSInteger count = self.items.count;

    NSInteger index = 0;

    CGFloat width = self.width / (count + 1);
    CGFloat height = self.height;

    // 遍历所有按钮, 调整按钮位置
    for (UIView *subView in self.subviews) {
        if ([subView isKindOfClass:NSClassFromString(@"UITabBarButton")]) {
            // 当遇到第三个按钮(标记是2)时, 调整数值
            if (index == 2) index++;
            CGFloat x = index * width;
            CGFloat y = 5;
            subView.frame = CGRectMake(x, y, width, height);
            index++;
        }
    }

    self.middleView.centerX = self.width * 0.5;
    self.middleView.y = self.height - self.middleView.height;
}
@end
-
效果图 : 红色按钮可以换成需要的任意视图或图片
-
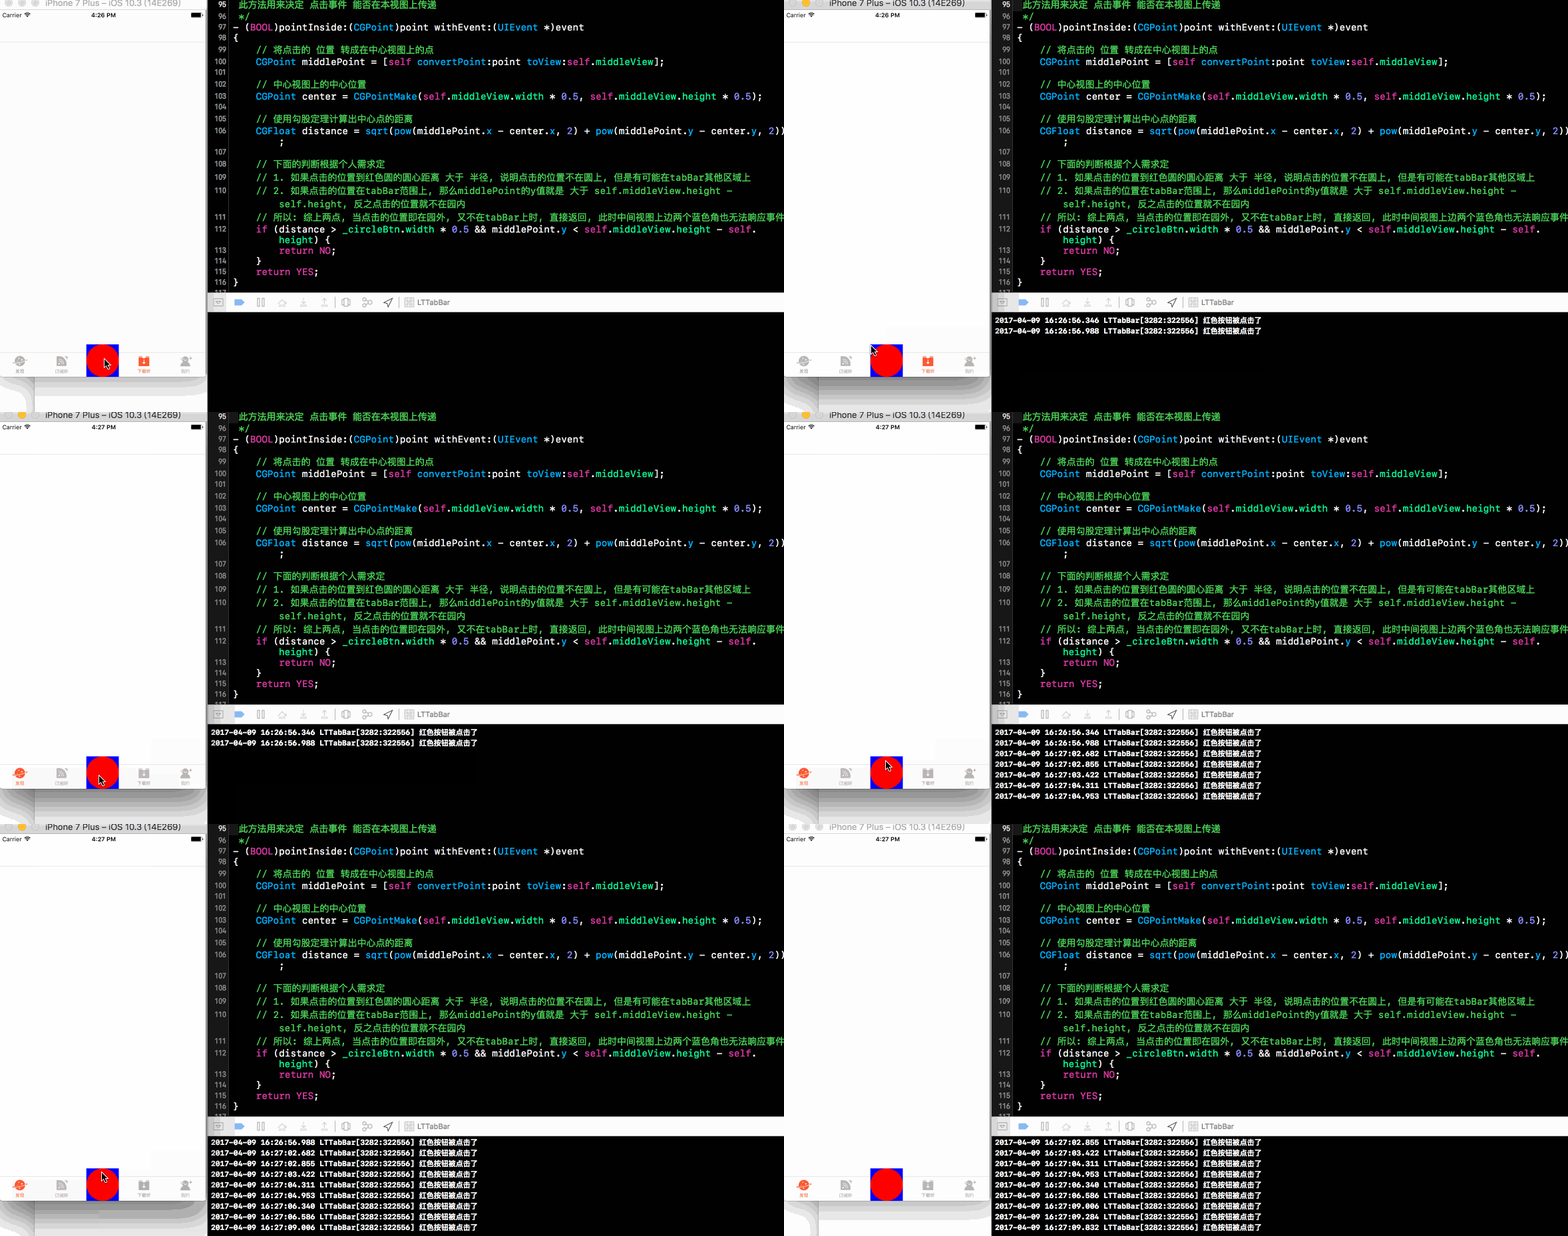
接下来需要重写方法- (BOOL)pointInside:(CGPoint)point withEvent:(UIEvent *)event来确定当用户点在什么地方时才会响应点击事件
- 目标: 点击tabBar和红色按钮上时响应点击事件
- 红色按钮有超出父视图(tabBar)的部分, 不处理的话, 超出部分没办法响应事件, 在这里处理
/**
 此方法用来决定 点击事件 能否在本视图上传递
 */
- (BOOL)pointInside:(CGPoint)point withEvent:(UIEvent *)event
{
    // 将点击的 位置 转成在中心视图上的点
    CGPoint middlePoint = [self convertPoint:point toView:self.middleView];

    // 中心视图上的中心位置
    CGPoint center = CGPointMake(self.middleView.width * 0.5, self.middleView.height * 0.5);

    // 使用勾股定理计算出中心点的距离
    CGFloat distance = sqrt(pow(middlePoint.x - center.x, 2) + pow(middlePoint.y - center.y, 2));

    // 下面的判断根据个人需求定
    // 1. 如果点击的位置到红色圆的圆心距离 大于 半径, 说明点击的位置不在圆上, 但是有可能在tabBar其他区域上
    // 2. 如果点击的位置在tabBar范围上, 那么middlePoint的y值就是 大于 self.middleView.height - self.height, 反之点击的位置就不在圆内
    // 所以: 综上两点, 当点击的位置即在圆外, 又不在tabBar上时, 直接返回, 此时中间视图上边两个蓝色角也无法响应事件
    if (distance > _circleBtn.width * 0.5 && middlePoint.y < self.middleView.height - self.height) {
        return NO;
    }
    return YES;
}
-
效果图
此时将蓝色视图的颜色改为透明就可以了, 大家也可以根据自己的需求将红色按钮换成其他任意的视图
-
最后效果
蓝色视图的存在意义是, 方便控制红色按钮的位置, 去掉也可以
三、代码
- LTTabBar.h中代码
#import

@interface LTTabBar : UITabBar

@end
- LTTabBar.m中代码 #import "UIView+LTLayout.h"是我自定义的布局分类, UIView的分类
#import "LTTabBar.h"
#import "UIView+LTLayout.h"

@interface LTTabBar ()

/** 中间View */
@property (nonatomic, weak) UIView *middleView;

/** 中心的红色圆 */
@property (nonatomic, weak) UIButton *circleBtn;

@end

@implementation LTTabBar

- (instancetype)initWithFrame:(CGRect)frame
{
    self = [super initWithFrame:frame];
    if (self) {
        [self setUpInit];
    }
    return self;
}

- (UIView *)middleView
{
    if (!_middleView) {
        UIView *middleView = [[UIView alloc] init];
        [self addSubview:middleView];
        _middleView = middleView;
    }
    return _middleView;
}

- (void)setUpInit
{
    // 设置中间视图的大小 和 颜色
    // 这里颜色为透明, 这样就看不见了, 在这上面可以添加任意的视图 或者 图片
    self.middleView.frame = CGRectMake(0, 0, 65, 65);
    self.middleView.backgroundColor = [UIColor clearColor];

    // 添加红色的圆形按钮
    UIButton *circleBtn = [UIButton new];
    circleBtn.frame = self.middleView.frame;
    circleBtn.layer.cornerRadius = circleBtn.width * 0.5;
    circleBtn.layer.masksToBounds = YES;
    circleBtn.backgroundColor = [UIColor redColor];
    [self.middleView addSubview:circleBtn];
    _circleBtn = circleBtn;

    [circleBtn addTarget:self action:@selector(circleBtnClick:) forControlEvents:(UIControlEventTouchUpInside)];
}

- (void)circleBtnClick:(UIButton *)sender
{
    NSLog(@"红色按钮被点击了");
}

- (void)layoutSubviews
{
    [super layoutSubviews];

    NSInteger count = self.items.count;

    NSInteger index = 0;

    CGFloat width = self.width / (count + 1);
    CGFloat height = self.height;

    // 遍历所有按钮, 调整按钮位置
    for (UIView *subView in self.subviews) {
        if ([subView isKindOfClass:NSClassFromString(@"UITabBarButton")]) {
            // 当遇到第三个按钮(标记是2)时, 调整数值
            if (index == 2) index++;
            CGFloat x = index * width;
            CGFloat y = 5;
            subView.frame = CGRectMake(x, y, width, height);
            index++;
        }
    }

    self.middleView.centerX = self.width * 0.5;
    self.middleView.y = self.height - self.middleView.height;
}

/**
 此方法用来决定 点击事件 能否在本视图上传递
 */
- (BOOL)pointInside:(CGPoint)point withEvent:(UIEvent *)event
{
    // 将点击的 位置 转成在中心蓝色视图上的点
    CGPoint middlePoint = [self convertPoint:point toView:self.middleView];

    // 中心蓝色视图上的中心位置
    CGPoint center = CGPointMake(self.middleView.width * 0.5, self.middleView.height * 0.5);

    // 使用勾股定理计算出中心点的距离
    CGFloat distance = sqrt(pow(middlePoint.x - center.x, 2) + pow(middlePoint.y - center.y, 2));

    // 下面的判断根据个人需求定
    // 1. 如果点击的位置到红色圆的圆心距离 大于 半径, 说明点击的位置不在圆上, 但是有可能在tabBar其他区域上
    // 2. 如果点击的位置在tabBar范围上, 那么middlePoint的y值就是 大于 self.middleView.height - self.height, 反之点击的位置就不在圆内
    // 所以: 综上两点, 当点击的位置即在圆外, 又不在tabBar上时, 直接返回, 此时中间视图上边两个蓝色角也无法响应事件
    if (distance > _circleBtn.width * 0.5 && middlePoint.y < self.middleView.height - self.height) {
        return NO;
    }
    return YES;
}

@end


