Jenkins+GitLab+蒲公英_持续集成
本文旨在自动完成打ipa包及上传蒲公英及发送邮件通知测试.
1.安装Jenkins
安装Jenkins有两种方式:一种是直接下载Jenkins安装包安装.另一种是使用命令行安装.
本文使用命令行安装Jenkins.使用命令行安装前首先下载安装Homebrew.
安装Homebrew:打开终端窗口, 粘贴脚本:
$ /usr/bin/ruby -e "$(curl -fsSL https://raw.githubusercontent.com/Homebrew/install/master/install)"
参考网站:http://brew.sh/index_zh-cn.html
Homebrew安装好后,再安装Jenkins.
安装Jenkins:$ brew install jenkins
安装好Jenkins后,还需要安装Java,因为Jenkins是运行在java上的.
安装java:$ brew install Caskroom/cask/java
以上完成后,就可以启动Jenkins了.
启动jenkins:$ java -jar /usr/local/opt/jenkins/libexec/jenkins.war --httpPort=8888
(上述端口号默认是8080,可修改)
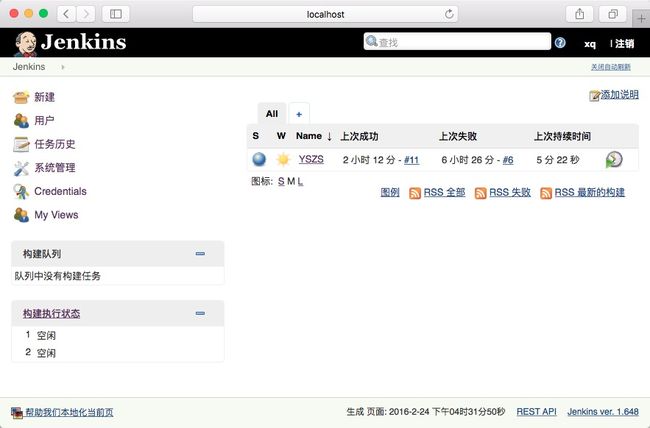
启动jenkins完成后,在浏览器输入http://localhost:8888便可打开Jenkins了.如下图:
2.安装必要插件
安装插件可以让Jenkins功能更强大,配置更方便.
git插件(GIT plugin)
ssh插件(SSH Credentials Plugin)
Xcode插件(Xcode integration)
可能会用到的其他插件:
Credentials Binding Plugin
GitLab Plugin
Gitlab Hook Plugin
Keychains and Provisioning Profiles Management
Post-Build Script Plug-in
Publish Over FTP
Role-based Authorization Strategy
Translation Assistance plugin
点击"系统管理"->"管理插件",在"可选插件"中查找并安装上述插件.
安装时老失败,可以尝试重启Jenkins.
安装时一直进度条中,刷新页面就好了.
3.新建及配置一个Item
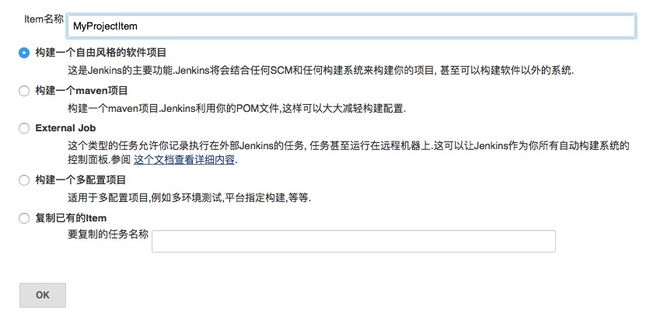
点击"新建",
Item名称最好和你的工程名字一样.点击"OK".
点击左上角的"Jenkins",回到Jenkins首页,此时你就可以看到你刚刚新建的Item了.
配置"Credentials"
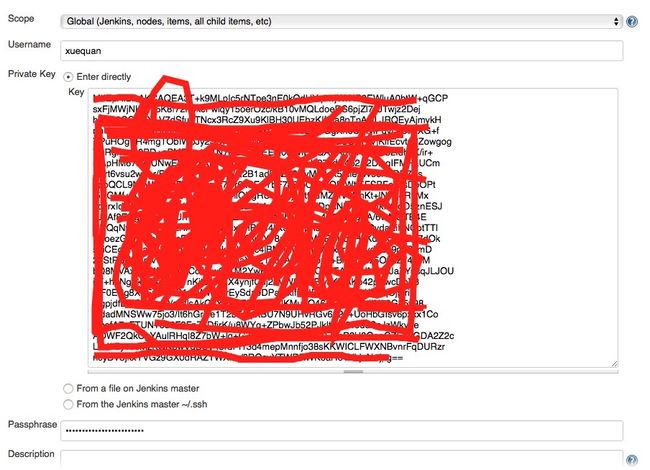
点击Credentials,进入如下页面:
点击添加
注意:添加你的Private Key,这里没配置好,有可能连接不上你的GitLab的工程,提示无法连接到[email protected],没有权限.ssh key路径是:
/Users/xuequan/.ssh.弄好后点击保存.
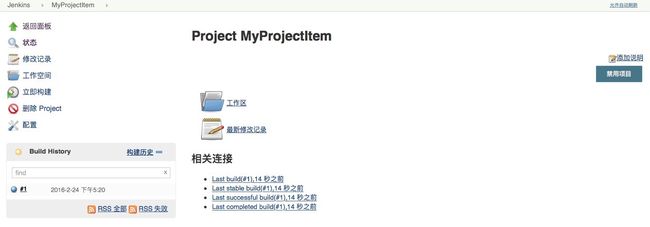
继续点击你新建的工程,进入到下图页面:
点击"配置".
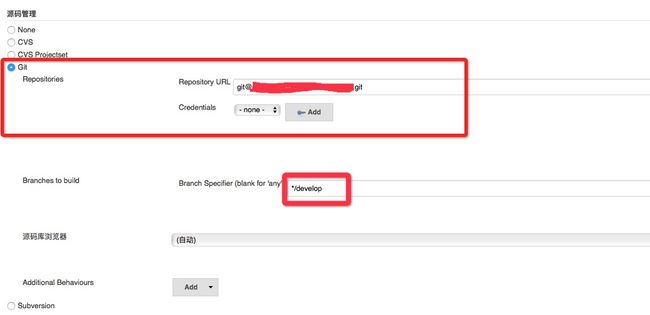
设置"源码管理"
找到"源码管理"一栏,并进行如下设置.
"Repository URL"填写GitLab上的工程URL.
"Branches to build"可根据需要填写.
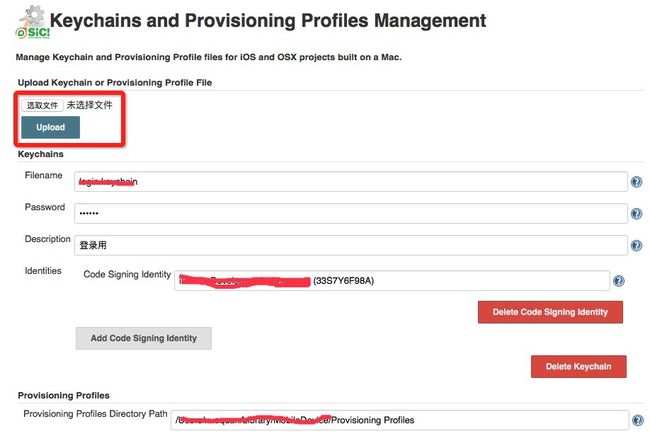
设置"Keychains and Provisioning Profiles Management"
在"系统管理"中找到"Keychains and Provisioning Profiles Management",点击进去.
如下图:
上传"login.keychain"文件(路径:/Users/xuequan/Library/MobileDevice/Provisioning Profiles)和".mobileprovision"文件(/Users/xuequan/Library/Keychains/login.keychain).点击保存.
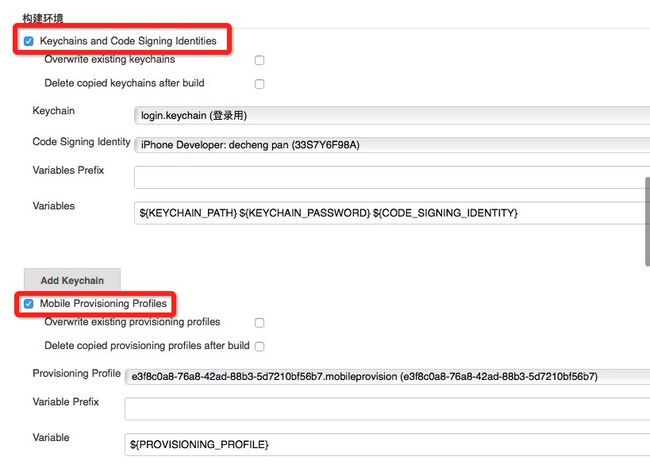
配置"构建环境"
回到刚才设置找到"构建环境"一栏,并进行如下设置.
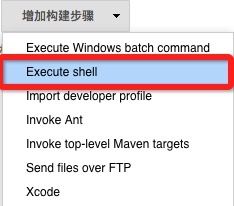
配置"构建"
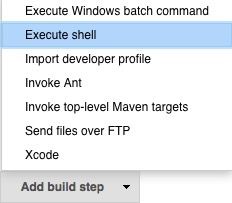
找到"构建"一栏,点击"增加构建步骤",选择"Execute shell"
shell命令:
xcodebuild -workspace yourProjectName.xcworkspace -scheme "yourScheme" -destination generic/platform=iOS -configuration Release(or Debug,if you like) archive -archivePath  ${WORKSPACE}/builds/${BUILD_NUMBER}/archive
xcodebuild -exportArchive -exportFormat ipa -archivePath ${WORKSPACE}/builds/${BUILD_NUMBER}/archive.xcarchive -exportPath ${WORKSPACE}/builds/${BUILD_NUMBER}/${JOB_NAME}_${BUILD_NUMBER}.ipa -exportProvisioningProfile 'yourProfileName'
上述命令需要根据你的实际情况设置的,这里只是示例.
其中命令:-exportProvisioningProfile 'yourProfileName',这里的"yourProfileName"应该填写你的xcode项目的配置文件名字.
提示:这一步也可以是选择下拉框里的"Xcode"进行配置,如果你不喜欢用shell的话.
设置Publish over FTP
在设置此项之前,先开启Mac FTP-server.
Mac电脑本身是支持FTP服务的,只不过系统默认关闭了,Mountain Tweaks 这款软件可以很方便的修改系统的一些设置,比如是否开启打开 Window 动画,是否显示用户的 Library 文件夹,其中有一个选项就是是否开启系统的FTP-server 功能。下载好Mountain Tweaks将FTP-server功能使能即可.
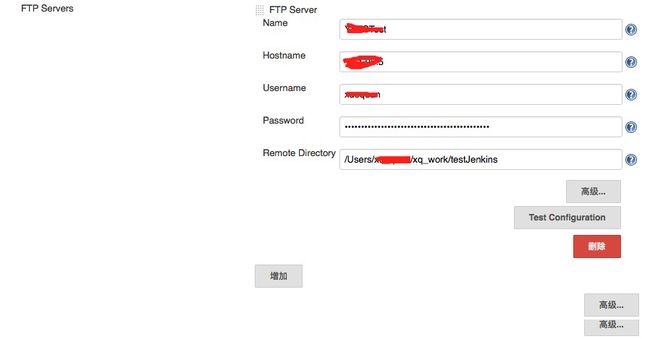
回到Jenkins,在"系统管理"中找到"系统设置",点击进去.并找到Publish over FTP设置
设置好后保存.
设置增加构建后操作步骤
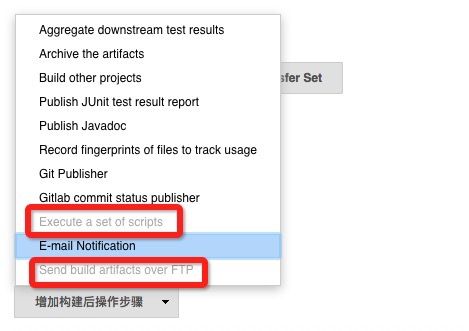
继续你刚刚新建的项目的配置,找到增加构建后操作步骤.
选择图上红框内容.
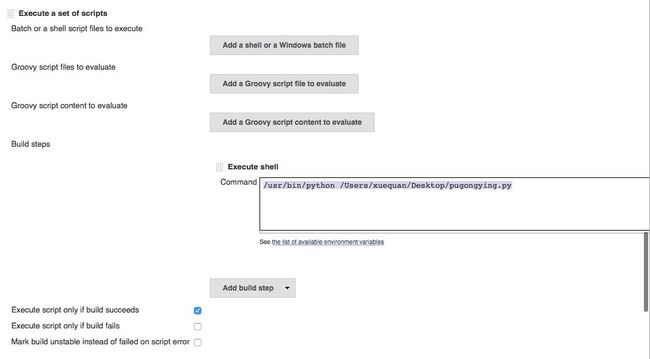
找到"Execute a set of scripts"下的
添加如下:
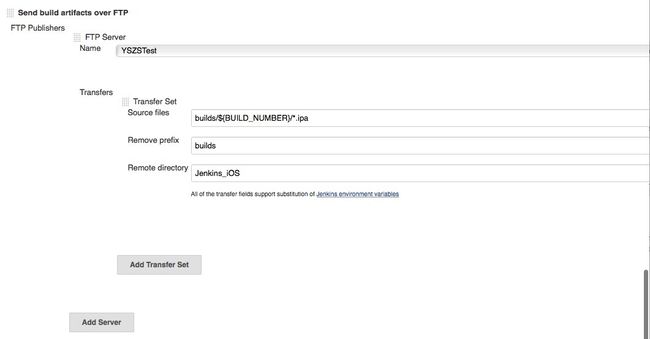
设置Send build artifacts over FTP
找到"Send build artifacts over FTP",设置
点击保存.
完成后,可以点击"立即构建".
注意:如果你的是CocoaPods的工程,可能会遇到打印日志一直卡住不动,此时需要在你的工程target后面的share勾选上.
附Execute a set of scripts下的Python文件内容:
# coding=utf-8
"""
* User: answer.huang
* Email: [email protected]
* Date: 15/3/31
* Time: 18:33
* Blog: answerhuang.duapp.com
"""
import time
import urllib2
import time
import json
import mimetypes
import os
import smtplib
import datetime
from email.MIMEText import MIMEText
from email.MIMEMultipart import MIMEMultipart
#蒲公英应用上传地址
url = 'http://www.pgyer.com/apiv1/app/upload'
#蒲公英提供的用户Key
uKey = 'xxxxxx'
#上传文件的文件名(这个可随便取,但一定要以ipa结尾)
file_name = 'xxxx.ipa'
#蒲公英提供的 API Key
_api_key = 'xxxx'
#安装应用时需要输入的密码,这个可不填
installPassword = '123456'
# 运行时环境变量字典
environsDict = os.environ
#此次 jenkins 构建版本号
jenkins_build_number = environsDict['BUILD_NUMBER']
#项目名称,用在拼接tomcat文件地址
project_name = 'yourProjectName'
#ipa文件在tomcat服务器上的地址
#ipa_file_tomcat_http_url = 'http://10.1.95.5:8080/' + project_name + '/static/' + jenkins_build_number + '/' + jenkins_build_number + '.ipa'
#获取 ipa 文件路径
def get_ipa_file_path():
#工作目录下面的 ipa 文件
ipa_file_workspace_path = '/Users/xuequan/.jenkins/jobs/' + project_name + '/workspace/builds/' + jenkins_build_number + '/' + project_name + '_' + jenkins_build_number + '.ipa'
#tomcat 上的 ipa 文件
# ipa_file_tomcat_path = '/usr/local/tomcat/webapps/' + project_name + '/static/' + jenkins_build_number + '/' + jenkins_build_number + '.ipa'
if os.path.exists(ipa_file_workspace_path):
return ipa_file_workspace_path
# elif os.path.exists(ipa_file_tomcat_path):
# return ipa_file_tomcat_path
#ipa 文件路径
ipa_file_path = get_ipa_file_path()
print ipa_file_path
#请求字典编码
def _encode_multipart(params_dict):
boundary = '----------%s' % hex(int(time.time() * 1000))
data = []
for k, v in params_dict.items():
data.append('--%s' % boundary)
if hasattr(v, 'read'):
filename = getattr(v, 'name', '')
content = v.read()
decoded_content = content.decode('ISO-8859-1')
data.append('Content-Disposition: form-data; name="%s"; filename="kangda.ipa"' % k)
data.append('Content-Type: application/octet-stream\r\n')
data.append(decoded_content)
else:
data.append('Content-Disposition: form-data; name="%s"\r\n' % k)
data.append(v if isinstance(v, str) else v.decode('utf-8'))
data.append('--%s--\r\n' % boundary)
return '\r\n'.join(data), boundary
#处理 蒲公英 上传结果
def handle_resule(result):
json_result = json.loads(result)
if json_result['code'] is 0:
send_Email(json_result)
#发送邮件
def send_Email(json_result):
appName = json_result['data']['appName']
appKey = json_result['data']['appKey']
appVersion = json_result['data']['appVersion']
appBuildVersion = json_result['data']['appBuildVersion']
appShortcutUrl = json_result['data']['appShortcutUrl']
#邮件接受者
mail_receiver = ['[email protected]']
#根据不同邮箱配置 host,user,和pwd
mail_host = 'smtp.exmail.qq.com:465'
mail_user = '[email protected]'
mail_pwd = 'senderEmailPassword'
mail_to = ','.join(mail_receiver)
msg = MIMEMultipart()
environsString = '移动端iOS安装包
'
#environsString += '
ipa 包下载地址 : ' + ipa_file_tomcat_http_url + '
'
environsString += '
蒲公英网站在线安装 : ' + 'http://www.pgyer.com/' + str(appShortcutUrl) + ' 密码 : ' + installPassword + '
'
#environsString += '
点我直接安装 '
message = environsString
body = MIMEText(message, _subtype='html', _charset='utf-8')
msg.attach(body)
msg['To'] = mail_to
msg['from'] = mail_user
#获得当前时间
now = datetime.datetime.now() #这是时间数组格式
#转换为指定的格式
otherStyleTime = now.strftime("%Y%m%d")
msgSubject = 'iOS' + '_' + otherStyleTime + '_' + jenkins_build_number +'安装包'
msg['subject'] = msgSubject
try:
s = smtplib.SMTP_SSL() #使用SMTP_SSL()
s.connect(mail_host)
s.login(mail_user, mail_pwd)
s.sendmail(mail_user, mail_receiver, msg.as_string())
s.close()
print '发送邮件成功'
except Exception, e:
print e
#############################################################
#请求参数字典
params = {
'uKey': uKey,
'_api_key': _api_key,
'file': open(ipa_file_path, 'rb'),
'publishRange': '2',
'password': installPassword
}
coded_params, boundary = _encode_multipart(params)
req = urllib2.Request(url, coded_params.encode('ISO-8859-1'))
req.add_header('Content-Type', 'multipart/form-data; boundary=%s' % boundary)
try:
resp = urllib2.urlopen(req)
body = resp.read().decode('utf-8')
print body
handle_resule(body)
except urllib2.HTTPError as e:
print(e.fp.read())
上述代码中一些东西需要根据你的实际配置更改的. 这里面需要改动的基本上就是路径, 如果你的路径不对,你不可能成功.
回到你的工程,点击立即构建.就可以完成自动打包了.
参考:
http://answerhuang.duapp.com/index.php/2015/04/19/jenkins/
http://www.jianshu.com/p/c69deb29720d
http://www.techv5.com/topic/363/(设置Jenkins登录权限)
以上.
