想要做出悬浮在屏幕上的按钮效果,按钮可以随便移动位置, 其实很简单的,没有想象中的那么难, 其中有两种方法可以做出这样的效果. 看下面,一一介绍两种方法,根据需要,选择适合自己的呦!!
效果图呈现:
接下来看代码:
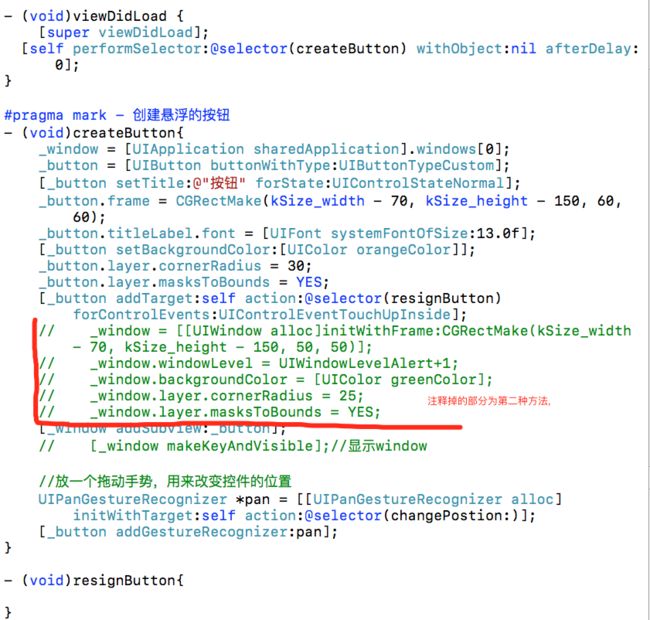
1. 创建button
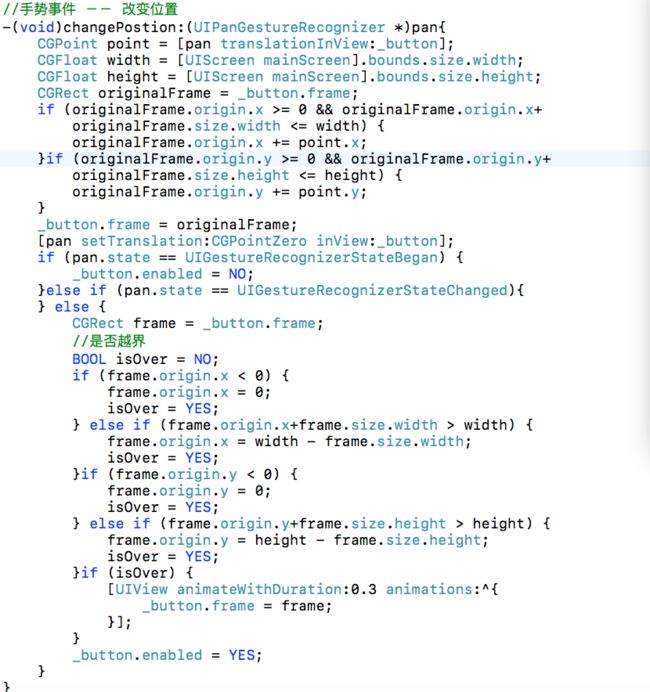
2.添加手势,移动button
下面我就将我写的代码全部放在这, 想试试的亲可以粘贴到自己的工程里试试看效果呦!
#import "ViewController.h"@interface ViewController ()@property (weak, nonatomic) IBOutlet UITableView *tableView;
@property(strong,nonatomic)UIWindow *window;
@property(strong,nonatomic)UIButton *button;
@end
@implementation ViewController
- (void)viewDidLoad {
[super viewDidLoad];
[self performSelector:@selector(createButton) withObject:nil afterDelay:0];
}
#pragma mark - 创建悬浮的按钮
- (void)createButton{
_window = [UIApplication sharedApplication].windows[0];
_button = [UIButton buttonWithType:UIButtonTypeCustom];
[_button setTitle:@"按钮" forState:UIControlStateNormal];
_button.frame = CGRectMake(kSize_width - 70, kSize_height - 150, 60, 60);
_button.titleLabel.font = [UIFont systemFontOfSize:13.0f];
[_button setBackgroundColor:[UIColor orangeColor]];
_button.layer.cornerRadius = 30;
_button.layer.masksToBounds = YES;
[_button addTarget:self action:@selector(resignButton) forControlEvents:UIControlEventTouchUpInside];
// _window = [[UIWindow alloc]initWithFrame:CGRectMake(kSize_width - 70, kSize_height - 150, 50, 50)];
// _window.windowLevel = UIWindowLevelAlert+1;
// _window.backgroundColor = [UIColor greenColor];
// _window.layer.cornerRadius = 25;
// _window.layer.masksToBounds = YES;
[_window addSubview:_button];
// [_window makeKeyAndVisible];//显示window
//放一个拖动手势,用来改变控件的位置
UIPanGestureRecognizer *pan = [[UIPanGestureRecognizer alloc] initWithTarget:self action:@selector(changePostion:)];
[_button addGestureRecognizer:pan];
}
- (void)resignButton{
}
//手势事件 -- 改变位置
-(void)changePostion:(UIPanGestureRecognizer *)pan{
CGPoint point = [pan translationInView:_button];
CGFloat width = [UIScreen mainScreen].bounds.size.width;
CGFloat height = [UIScreen mainScreen].bounds.size.height;
CGRect originalFrame = _button.frame;
if (originalFrame.origin.x >= 0 && originalFrame.origin.x+originalFrame.size.width <= width) {
originalFrame.origin.x += point.x;
}if (originalFrame.origin.y >= 0 && originalFrame.origin.y+originalFrame.size.height <= height) {
originalFrame.origin.y += point.y;
}
_button.frame = originalFrame;
[pan setTranslation:CGPointZero inView:_button];
if (pan.state == UIGestureRecognizerStateBegan) {
_button.enabled = NO;
}else if (pan.state == UIGestureRecognizerStateChanged){
} else {
CGRect frame = _button.frame;
//是否越界
BOOL isOver = NO;
if (frame.origin.x < 0) {
frame.origin.x = 0;
isOver = YES;
} else if (frame.origin.x+frame.size.width > width) {
frame.origin.x = width - frame.size.width;
isOver = YES;
}if (frame.origin.y < 0) {
frame.origin.y = 0;
isOver = YES;
} else if (frame.origin.y+frame.size.height > height) {
frame.origin.y = height - frame.size.height;
isOver = YES;
}if (isOver) {
[UIView animateWithDuration:0.3 animations:^{
_button.frame = frame;
}];
}
_button.enabled = YES;
}
}
- (NSInteger)tableView:(UITableView *)tableView numberOfRowsInSection:(NSInteger)section {
return 100;
}
- (UITableViewCell *)tableView:(UITableView *)tableView cellForRowAtIndexPath:(NSIndexPath *)indexPath {
return [[UITableViewCell alloc] init];
}
- (void)didReceiveMemoryWarning {
[super didReceiveMemoryWarning];
// Dispose of any resources that can be recreated.
}
@end
好了,试了以后是不是超级简单呢, 如果对你有点帮助呢,小不点会灰常的高兴呢, 欢迎高手指正呦!!


