建立lamp服务
一、生成多个访问域名的窗口
1.yum install httpd -y
http和https现已加入防火墙,但是还要设置selinux,这样才能远程访问,或者说改变文件的标签(安全上下文)
firewalld-cmd --permanent --add-service=http
firewalld-cmd --permanent --add-service=https
firewalld-cmd --reload
2.yum install mod_ssl -y
yum install crypto-utils -y
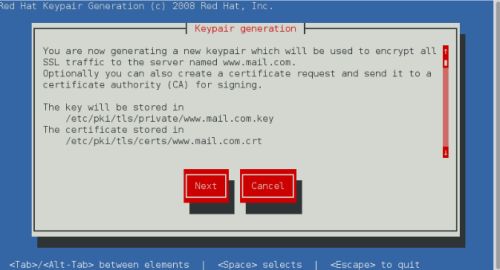
genkey www.mail.com /*生成https的认证证书
生成证书和私钥的目录位置,这个需要记住在生成证书和私钥以后需要修改ssl.conf的配置文件
选择生成私钥的长度,我们一般选择1024位,生成比较快,不过这时候需要你动动鼠标和键盘才能快速加密完成
这个选择no,不需要公布,因为这只是我们自己的实验
不设置私钥下载的密码,直接next
填写好证书信息
3.vim /etc/httpd/conf.d/ssl.conf
100 SSLCertificateFile /etc/pki/tls/certs/www.mail.com.crt /*证书*/
107 SSLCertificateKeyFile /etc/pki/tls/private/www.mail.com.key /*密码*/
进入/etc/httpd/conf.d目录下建立三个文件进入/etc/httpd/conf.d目录下建立三个文件
news.conf,default.conf,music.conf
vim news.conf /*可以通过一个ip访问多个网站,通过域名的方式,需要修改hosts文件
1
2 Servername news.mail.com
3 Documentroot /var/www/virtual/news.mail.com/html
4 Customlog "logs/news.log" combined
5
6
7 Require all granted
8
9
10 Servername news.mail.com
11 Documentroot /var/www/virtual/news.mail.com/html
12 Customlog "logs/news-443.log" combined
13 SSLEngine on
14 SSLCertificateFile /etc/pki/tls/certs/www.mail.com.crt
15 SSLCertificateKeyFile /etc/pki/tls/private/www.mail.com.key
16
vim music.conf
1
2 Servername music.mail.com
3 RewriteEngine on
4 RewriteRule ^(/.*)$ https://%{HTTP_HOST}$1 [redirect=301]
5
6
7 Require all granted
8
9
10 Servername music.mail.com
11 Documentroot /var/www/virtual/music.mail.com/html
12 Customlog "logs/music-443.log" combined
13 SSLEngine on
14 SSLCertificateFile /etc/pki/tls/certs/www.mail.com.crt
15 SSLCertificateKeyFile /etc/pki/tls/private/www.mail.com.key
16
vim default.conf /*默认目录下文件的配置
1
2 Documentroot /var/www/html
3 Customlog "logs/default.log" combined
4
5
6 Options +ExecCGI
7 AddHandler cgi-script .cgi
8
通过域名的方式可以访问这三个文件/etc/hosts
ip www.mail.com music.mail.com news.mail.com
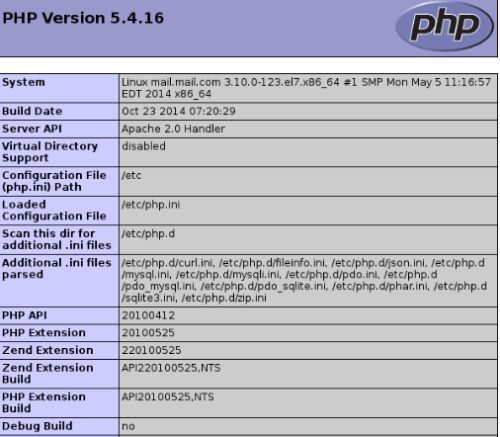
在/var/www/html/建立一个index.php,yum install php -y 写入以下代码就可以在firefox中测试http了
1
2 phpinfo ();
3 ?>
二、在http中进行网页的测试和程序的运行
1)在/var/www/html/建立一个cgi目录。touch index.cgi yum install httpd-manual -y
重启httpd服务在firefox中登陆manual
点击CGI: Dynamic Content
2)复制程序到index.cgi
#!/usr/bin/perl
print "Content-type: text/html\n\n";
print `date`;
测试执行命令:perl index.cgi得到如下显示
[root@mail cgi]# perl index.cgi
Content-type: text/html
Mon Dec 12 09:57:13 EST 2016
chmod +x index.cgi
然后在default.conf添加CGI: Dynamic Content中的程序
Options +ExecCGI
AddHandler cgi-script .cgi
setenforce 0
测试:在firefox中看看运行index.cgi程序
怎么查看http的/var/www中的安全上下文,
ls -Zd cgi-bin/
semanage fcontext -a -t httpd_sys_script_exec_t '/var/www/html/cgi(/.*)?' /*改变文件的安全上下文
restorecon -FvvR /var/www/html/cgi /*刷新安全上下文
三、建立网页论坛
1).集 mariadb,php,php-mysql,httpd 服务
yum install mariadb-server -y
yum install php-mysql -y
2)vim /etc/my.cnf spik-networking /*关闭 mariadb 的 3306 端口
mysql_secure_installation /*建立数据库密码
Discuz_X3.2_SC_UTF8.zip /*论坛安装包
unzip Discuz_X3.2_SC_UTF8.zip /*解压
less readme/readme.txt /*读取安装细节
3)chmod 777 upload/data upload/config -R /*给 data 和 config 的执行权限
setenforce 0 /*关闭 selinux 防火墙
在浏览器中进行运行和安装
172.25.254.150/upload /*在 firefox 按照步骤安装
四、×××工具 squid,缓存其他服务器可以访问的资源(正向代理)
1)yum install squid -y
vim /etc/squid/squid.conf
56|http_access allow all /*允许访问
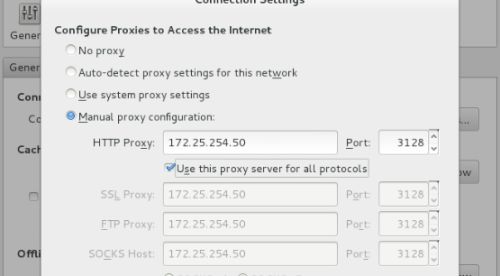
59|http_port 3128 /*打开 3128 端口
62|cache_dir ufs /var/spool/squid 100 16 256 /*打开缓存目录
systemctl start squid
在 /var/spool/squid 查看是否已经建立子目录
2)在客服端的设置访问服务器端的 3128 端口两个主机作为 squid 的服务端(反向代理)两台主机作为客服端,一台是两个 ip 地址
一个公网 ip,一个内网 ip,并安装 squid。
在/etc/squid/squid.conf
56 http_access allow all
59 http_port 80 vhost vport /*改变原来的端口3128为http的80端口
60 cache_peer 172.25.254.4 parent 80 0 no-query originserver round-robin name=web1/*缓存172.25.254.4
61 cache_peer 172.25.254.3 parent 80 0 no-query originserver round-robin name=web2/*缓存172.25.254.3
62 cache_peer_domain web1 web2 www.taobao.com /*建立web1和web2的访问域名
64 cache_dir ufs /var/spool/squid 100 16 256
67 coredump_dir /var/spool/squid
less /usr/share/doc/squid-3.3.8/squid.conf.documented /*可以查找怎么建立反向代理的服务端口(上面的60和61)


