本地化的重要性
当你的App上架AppStore之后,便可以在全球范围内销售了。
如果想App在世界各地更畅销,那么本地化一定是不可少的。
本文将简明的从Info.list、Storyboard、Code String和XML四种方式来讲解本地化。
Info.list即将一些基本设置本地化,例如App在主屏幕显示的名称;Storyboard即界面显示内容的本地化;Code String则是你在代码中设置的一些语句的本地化,比如通知提醒等;最后一种XML方式则更为通用,直接将需要本地化的内容导出,修改之后再导入。
当然,本文只涉及本地化的技术层面,而不涉及具体如何翻译。
如何本地化?
1. Info.list
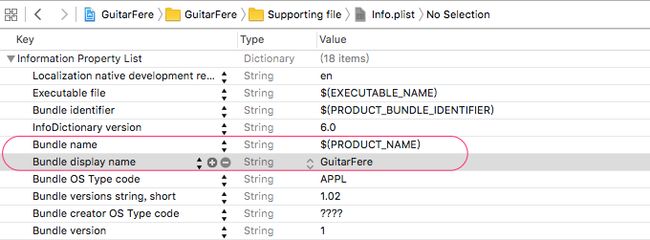
本地化App名,选中Info.plist,如图点击添加:
添加Bundle display name,Value为App名。
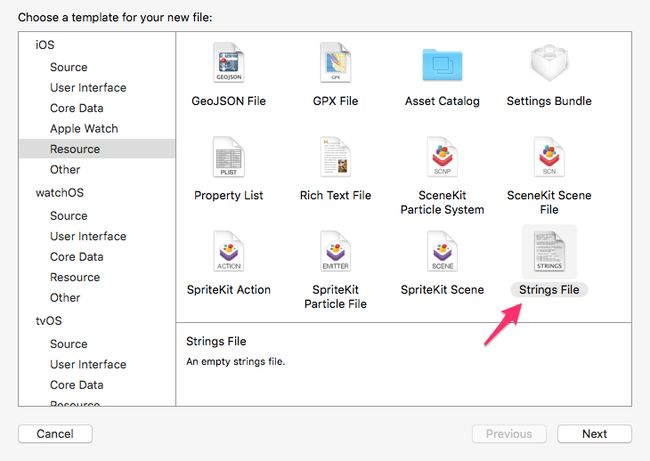
新建String File类文件,命名为InfoPlist,注意命名的大小写。
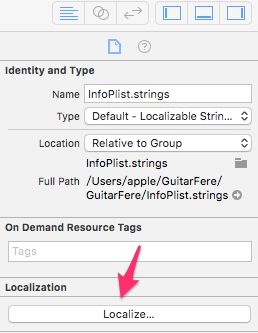
选中新建的文件,InfoPlist.strings,在Xcode的File inspection中点击Localize。
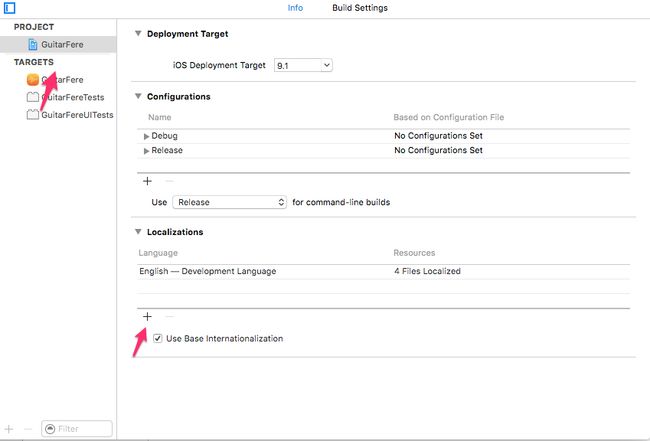
当然,本地化内容之前,需要添加将本地化的语言。
编辑Project,在Info下,如图点击添加:
即可添加你想本地化的语言。
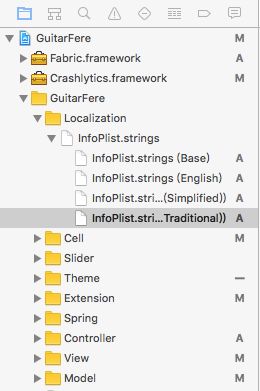
然后在目录中你会看到:
编辑InfoPlist.strings即可设置。格式为:
"Key" = "Value";
因为是C语言风格,记得加分号。
举个例子,本地化我们的App名,首先需要知道Key。
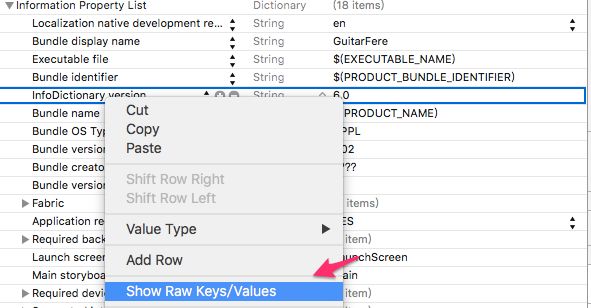
选中info.plist,在任意条目中右击,如图进行选择:
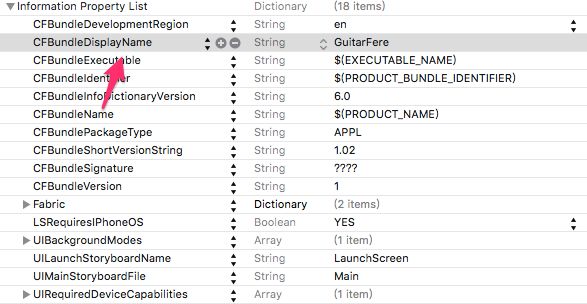
你将看见:
复制粘贴到InfoPlist.strings
"CFBundleDisplayName" = "GuitarFere";
对于不同语言,在对于的InfoPlist.strings中修改对应Value即可。
比如:
"CFBundleDisplayName" = "吉他伴侣";
"CFBundleDisplayName" = "吉他伴侶";
"CFBundleDisplayName" = "ギターコンパニオン";
2. Storyboard/Xib
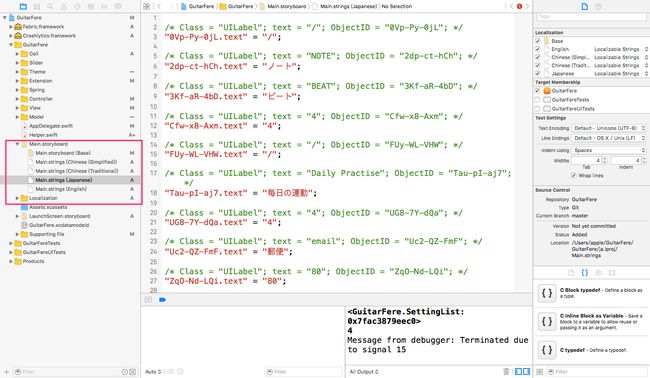
同理,首先选择要本地化的Storyboard,在File inspection中点击Localize,如果你在前一步中已经将Storyboard本地化,则可以跳过此步。
Xcode会自动为你生成对应的Key-Value,对应修改即可:
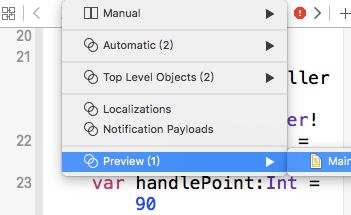
option+Command+return快捷键,选择preview:
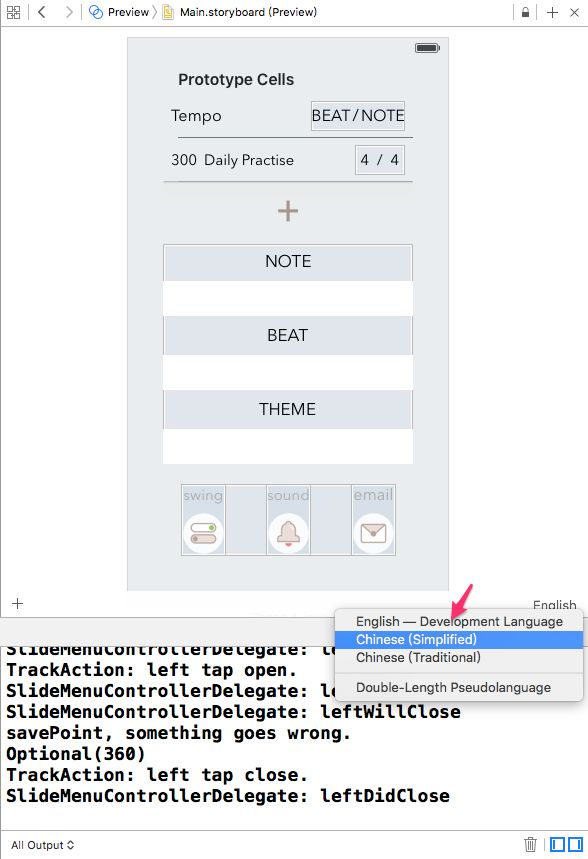
点击右下角语言,预览效果:
3. Code String
有时候,你想要本地化的内容是在代码中指定的。
首先,在代码中将你要本地化的字符串,使用如下进行定义
NSLocalizedString("Key", comment: "comment")
比如:
 fun loadSampleSettingList()  {
    let help_1 = NSLocalizedString("help_1", comment: "Saved settings")
    let help_2 = NSLocalizedString("help_2", comment: "Press + to add")
    let help_3 = NSLocalizedString("help_3", comment: "Swipe left to delete")

    let setting_1 = SettingList(tempo: 80, beat: 4, note: 4,
                                handlePoint: 144, name: help_1)!
    let setting_2 = SettingList(tempo: 100, beat: 8, note: 4,
                                handlePoint: 181,name: help_2)!
    let setting_3 = SettingList(tempo: 120, beat: 3, note: 4,
                                handlePoint: 216, name: help_3)!

    settingList += [setting_1,setting_2,setting_3]
}
再比如:
 @IBAction fund mailBtnDidTouched(sender: AnyObject) {
    let sendTitle = NSLocalizedString("sendFeedback", comment: "send feedback to me")
    let sendMessage = NSLocalizedString("sendMessage", comment: "send feedback message")
    let okTitle = NSLocalizedString("Send_Ok", comment: "accept to send")
    let cancel = NSLocalizedString("Cancel", comment: "cancel send")

    let alert = UIAlertController(title: sendTitle, message: sendMessage, preferredStyle: UIAlertControllerStyle.Alert)
    self.presentViewController(alert, animated: true, completion: nil)
    let defaultAction = UIAlertAction(title: okTitle, style: UIAlertActionStyle.Default) { (UIAlertAction) -> Void in

        let email = "[email protected]"
        let url = NSURL(string: "mailto:\(email)")
        UIApplication.sharedApplication().openURL(url!)
    }
    let cancelAction = UIAlertAction(title: cancel, style: UIAlertActionStyle.Cancel, handler: nil)

    alert.addAction(defaultAction)
    alert.addAction(cancelAction)
}
然后,同理,新建一个String File类文件,命名为Localizable,注意命名的大小写。
现在你需要写对应的Key-Value,有没有想过,如果你有很多需要本地化的字符串,纯手写Key-Value是一件很麻烦的事情?所以我们可以使用自动生成的方式。
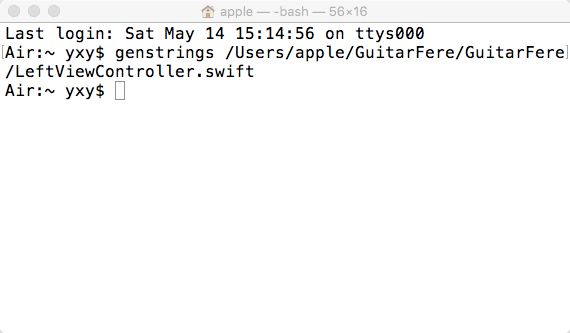
打开终端,输入:
gensstrings
空格之后,在Finder中将你含有本地化字符串的文件拖入终端(当然,你也可以手写自动遍历)
回车执行,在对应的Finder目录中,会生成Localizable.strings文件:
该文件内容即自动生成的Key-Value。
就是这样了,看完之后,是不是觉得Xcode本地化很方便呢~
4. XML
最后一种方式,不需要你手动的去选择和添加文件,可以直接导出所有需要本地化的内容为XML,进行更改,最后再导入即可。
选中项目之后(不要忘记这一点),在Editor中选中Export For Localization:
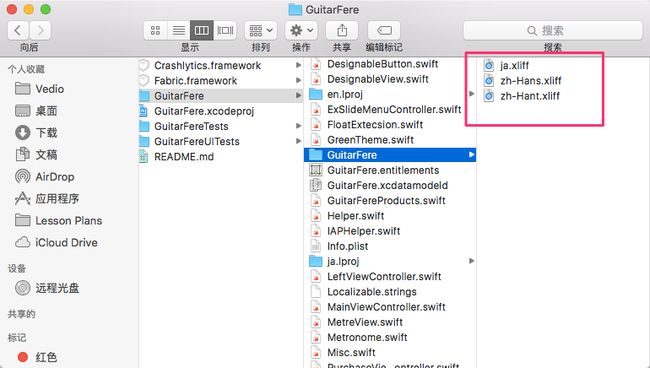
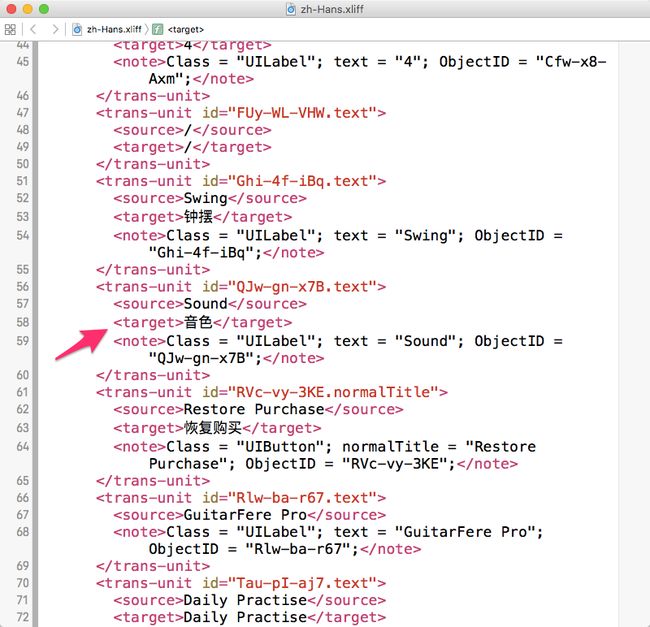
导出之后的文件:
编辑对应的文件:
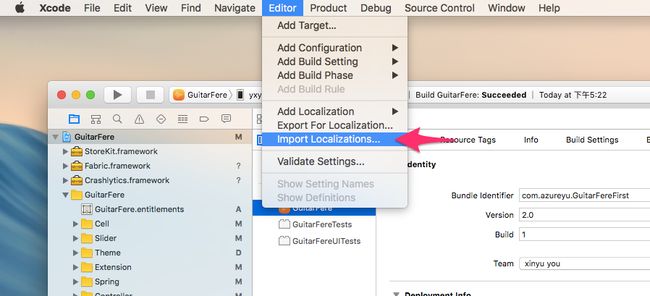
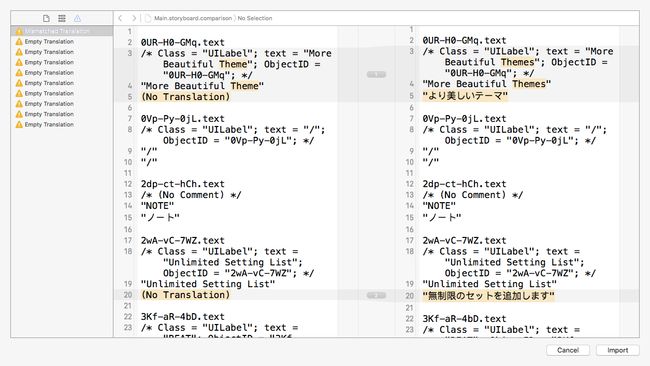
完成之后,再进行导入:
最后,以上四种方式,什么时候使用哪一种,按自己的需求选择就可以了。
参考:
- WWDC 2014 412
- iOS 8 Programming Foundation with Swift Chapter 9
作者「AzureYu」
文章声明:自由转载-非商用-非衍生-保持署名 | BY-NC-SA

