Android ZXing(二维码)库的全面使用解析
Android ZXing(二维码)库解析
本文原创,转载请注明出处。
欢迎关注我的 简书 ,关注我的专题 Android Class 我会长期坚持为大家收录简书上高质量的 Android 相关博文。
写在前面:
春天到了,天气转暖,风吹走了北京的雾霾也带来了困倦。每天感觉就是睡不醒、起不来。前一阵研究了 View 的体系,还差滑动冲突和 View 的绘制没有落笔成文,还看了很多关于 MVP 这种代码模式的文章,未来争取把它们都整理分享出来,便于记忆和交流。
不知不觉二维码已经深刻影响了我们的生活,为我们提供了极大的便利。线下付账、租一辆单车、或者去要一个妹子的微信号等等。张小龙把它称为从线下到线上的入口。正因为二维码如此的重要,并且出现的频率越来越高,所以 Android 应用中扫面二维码、条形码的需求也很常见了。本文就是来接入使用一个不错的二维码库 ZXing
二维码是什么
在研究 ZXing 之前,我一直好奇二维码是根据什么生成的,并且最大能保存多少的信息,去查阅了一下资料,正好解决了我的疑问,在此介绍一下。
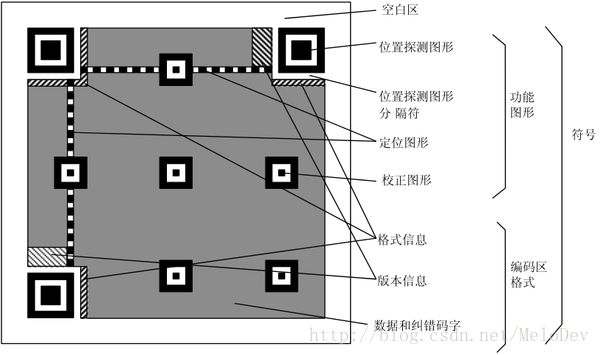
二维条码是指在一维条码(条形码)的基础上扩展出另一维具有可读性的条码,使用黑白矩形图案表示二进制数据,被设备扫描后可获取其中所包含的信息。一维条码的宽度记载着数据,而其长度没有记载数据。二维条码的长度、宽度均记载着数据。二维条码有一维条码没有的“定位点”和“容错机制”。容错机制在即使没有辨识到全部的条码、或是说条码有污损时,也可以正确地还原条码上的信息。二维条码的种类很多,不同的机构开发出的二维条码具有不同的结构以及编写、读取方法。
总结起来就是二维码是将有限的信息转成二进制,并且表现为黑白矩阵图,与一维的条形码相比,二维码拥有更好的容错能力。
ZXing
现在我们大概知道了二维码是怎么生成的,有关 Android 上扫码的库有很多,这次来介绍的是 ZXing,一个出色的开源扫码库。
来看看它在 github 上的仓库:
GitHub ZXing
上面 ReadMe 文件传递的信息大概就是 ZXing 是个很厉害的库,支持各种平台等等…然后又找了它一些相关的连接,我发现有关 Android 的信息少之又少,仅仅说了怎么引入,具体使用上没说,并且源码中给出的 Android Module 代码量有点多,掌握的成本太高,总之当时我觉得这个学习的姿势不太对。
回到 google 重新搜索了一下 Android ZXing,终于找到了一个正确的仓库来引入并使用它:
zxing-android-embedded
这个库是一个基于 ZXing 的 Android 二维码解码库,使用起来还是非常简单的。
我把它 fork 回之后,做了一些优化和更新,具体请查看下文。
中文版 ZXing Android Embedded
快速使用:
new IntentIntegrator(this).initiateScan(); // `this` is the current Activity


// Get the results:
@Override
protected void onActivityResult(int requestCode, int resultCode, Intent data) {
    IntentResult result = IntentIntegrator.parseActivityResult(requestCode, resultCode, data);
    if(result != null) {
        if(result.getContents() == null) {
            Toast.makeText(this, "Cancelled", Toast.LENGTH_LONG).show();
        } else {
            Toast.makeText(this, "Scanned: " + result.getContents(), Toast.LENGTH_LONG).show();
        }
    } else {
        super.onActivityResult(requestCode, resultCode, data);
    }
}可以看到使用起来非常便捷,onActivityResult带回扫码出来的结果,然后进行处理就OK了。下文中就不再介绍 ReadMe 中的内容,转而介绍一下这个库一些其他的配置。
    protected Class getDefaultCaptureActivity() {
        return CaptureActivity.class;
    }
一步步跟进 IntentIntegrator(this).initiateScan() 方法可以发现,当我不设置 CaptureActivity 时,调用默认的 Activity 就是 CaptureActivity
所以对于吊起的扫码 Activity 来说,他的方向可以在 manifest 文件中的 android:screenOrientation 属性直接指定:
        <activity
            android:name="com.journeyapps.barcodescanner.CaptureActivity"
            android:screenOrientation="landscape"
            tools:replace="screenOrientation" />
除了最基本的扫码使用,再来看看他 IntentIntegrator 中其它的 setXXX 属性吧。
integrator.setPrompt 在扫描页面添加一个文字描述,空字符串时,可以取消显示它。
integrator.setOrientationLocked 设置是否锁定扫码 Activity 的方向。默认为 true
integrator.setCameraId 设置使用摄像头的 id,0 为后置摄像头,1 为前置摄像头。这是系统 CameraInfo 的属性。
        /**
         * The facing of the camera is opposite to that of the screen.
         */
        public static final int CAMERA_FACING_BACK = 0;

        /**
         * The facing of the camera is the same as that of the screen.
         */
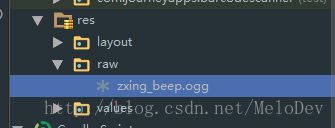
public static final int CAMERA_FACING_FRONT = 1;- integrator.setBeepEnabled 设置扫描完成时是否允许“嘟嘟”的声音。默认为 true。源码中的这个设置位于 BeepManager,通过 MediaPlayer 播放了一段 .ogg 文件。
- integrator.setBarcodeImageEnabled 保存扫描完成后二维码的图像。源码在这里:
    /**
     * Save the barcode image to a temporary file stored in the application's cache, and return its path.
     * Only does so if returnBarcodeImagePath is enabled.
     *
     * @param rawResult the BarcodeResult, must not be null
     * @return the path or null
     */
    private String getBarcodeImagePath(BarcodeResult rawResult) {
        String barcodeImagePath = null;
        if (returnBarcodeImagePath) {
            Bitmap bmp = rawResult.getBitmap();
            try {
                File bitmapFile = File.createTempFile("barcodeimage", ".jpg", activity.getCacheDir());
                FileOutputStream outputStream = new FileOutputStream(bitmapFile);
                bmp.compress(Bitmap.CompressFormat.JPEG, 100, outputStream);
                outputStream.close();
                barcodeImagePath = bitmapFile.getAbsolutePath();
            } catch (IOException e) {
                Log.w(TAG, "Unable to create temporary file and store bitmap! " + e);
            }
        }
        return barcodeImagePath;
    }
integrator.setDesiredBarcodeFormats 设置扫描的二维码格式
integrator.setTimeout 设置一个超时时间,超过这个时间之后,扫描的 Activity 将会被 finish 。
自定义
通过昨天半天的时间,算是把这个库看明白了,写得很好值得推荐,有心的朋友可以好好看看源码,有的可学。
项目中的需求各有不同,所以在 UI 上可定制就成了很重要的一点,这个库虽然没开放出很多方法,但是自定义起来依然自由方便,一起来看看姿势吧。
- integrator.setCaptureActivity 我们可以通过这个方法,指定要传入的自定义的扫描 Activity,那这个 Activity 应该怎么去定制呢?
    <com.journeyapps.barcodescanner.DecoratedBarcodeView
        android:id="@+id/zxing_barcode_scanner"
        android:layout_width="match_parent"
        android:layout_height="match_parent"
        app:zxing_scanner_layout="@layout/custom_barcode_scanner">
    com.journeyapps.barcodescanner.DecoratedBarcodeView>
DecoratedBarcodeView 是扫描 View 的一个封装类,具体的 UI 属性,在 app:zxing_scanner_layout="@layout/custom_barcode_scanner" 引入的 custom_barcode_scanner 布局文件中进行定制修改。来看看这个布局:
"http://schemas.android.com/apk/res/android"
       xmlns:tools="http://schemas.android.com/tools"
       xmlns:app="http://schemas.android.com/apk/res-auto">

    <com.journeyapps.barcodescanner.BarcodeView
        android:layout_width="match_parent"
        android:layout_height="match_parent"
        android:id="@+id/zxing_barcode_surface"
        app:zxing_framing_rect_width="250dp"
        app:zxing_framing_rect_height="50dp"/>

    <com.journeyapps.barcodescanner.ViewfinderView
        android:layout_width="match_parent"
        android:layout_height="match_parent"
        android:id="@+id/zxing_viewfinder_view"
        app:zxing_possible_result_points="@color/zxing_custom_possible_result_points"
        app:zxing_result_view="@color/zxing_custom_result_view"
        app:zxing_viewfinder_laser="@color/zxing_custom_viewfinder_laser"
        app:zxing_viewfinder_mask="@color/zxing_custom_viewfinder_mask"/>

    "@+id/zxing_status_view"
        android:layout_width="wrap_content"
        android:layout_height="wrap_content"
        android:layout_gravity="bottom|center_horizontal"
        android:background="@color/zxing_transparent"
        android:text="@string/zxing_msg_default_status"
        android:textColor="@color/zxing_status_text"/>
这个图很直观了吧,要是定制扫描线的颜色啊,或者扫描框的大小啊,都没有问题了~
当然我把它 fork 回来之后,做了一些改动,比如修了两个 bug,然后开放了两个我认为比较合适的新的设置项:
setBeepResource 让扫描之后发出的嘟嘟声可定制,需要传入本地的一个 raw 文件。
setVibrateEnable 设置扫描完成之后,是否让手机震动。
我做了修改之后的仓库连接:
ZXing Android Embedded
一直会持续更新它,需要的朋友保持关注吧~


