SpringBoot+Thymeleaf+JPA的基本使用
GitHub源码 https://github.com/zehuawong/SpringBoot-JPA-Thymeleaf-Demo
项目属性配置
application.yml文件
#cupSize: CD
#age: 18
#content: "cupSize: ${cupSize},age: ${age}"  #在当前配置里面再使用配置
#
#girl:
#  cupSize: C
#  age: 20

  spring:
    profiles:
      active: dev   #使用dev这个配置,区分生产环境和开发环境
resources目录下新建application-dev.yml文件代表开发环境
server:
  port: 8081
  servlet:
    #context-path: "/url"

cupSize: CD
age: 18
content: "cupSize: ${cupSize},age: ${age}"  #在当前配置里面再使用配置

girl:
  cupSize: C
  age: 20
resources目录下新建application-prod.yml文件代表生产环境,可以使用和开发环境不一样的配置
server:
  port: 8081
  servlet:
    #context-path: "/url"

cupSize: CD
age: 18
content: "cupSize: ${cupSize},age: ${age}"  #在当前配置里面再使用配置

girl:
  cupSize: C
  age: 20
GirlProperties类
@Component //如果使用@Autowired还需要使用@Component
@ConfigurationProperties(prefix = "girl")   //前缀属性是girl的映射到这个类
public class GirlProperties {
    private String cupSize;

    private Integer age;

    public String getCupSize() {
        return cupSize;
    }

    public void setCupSize(String cupSize) {
        this.cupSize = cupSize;
    }

    public Integer getAge() {
        return age;
    }

    public void setAge(Integer age) {
        this.age = age;
    }
}
注入属性到类GirlProperties中
   @Value("${cupSize}")
    private String cupSize; //通过注解将配置文件里面的属性注入到此

    @Value("${age}")
    private Integer age;

    @Value("${content}")
    private String content;

    @Autowired
    private GirlProperties girlProperties;

    @RequestMapping(value = "/hello",method = RequestMethod.GET)
    public String sayHi() {
        return girlProperties.getCupSize();
    }
@RestController
spring4之后新加的注解,原来返回json需要@ResponseBody配合@Controller
Controller和Thymeleaf模板的使用
1、第一步首先需要在pom.xml中配置Thymeleaf依赖
		<dependency>
			<groupId>org.springframework.bootgroupId>
			<artifactId>spring-boot-starter-thymeleafartifactId>
		dependency>
2、在application.yml文件中增加thymeleaf配置
#thymelea模板配置
    thymeleaf:
      prefix: classpath:/templates/
      suffix: .html
      mode: HTML5
      encoding: UTF-8
      servlet:
        content-type: text/html
      cache: false    #开发阶段务必关闭缓存

    resources:
      chain:
        strategy:
          content:
            enabled: true
            paths: /**
3、Controller的配置
/**
 * Created by wzh-zhua on 2018/9/30.
 */
//@RestController //spring4之后新加的注解,原来返回json需要@ResponseBody配合@Controller
 @Controller    //配合模板使用
public class HelloController {


    public String hello() {
        return "/index";
    }

      @RequestMapping(value = "hello",method = RequestMethod.GET)
      public ModelAndView index(ModelAndView mv) {
          mv.setViewName("/index");
          mv.addObject("title","欢迎使用Thymeleaf");
          return mv;
      }

}
4、在templates目录下新建index.html文件
<html xmlns="http://www.w3.org/1999/xhtml" xmlns:th="http://www.thymeleaf.org">
<head>
    <meta charset="UTF-8">
    <title>Hello Springtitle>
head>
<body>
<h1>hello wangh1>
    <p th:text="'Hello, ' + ${title}" /><br/>

body>
html>
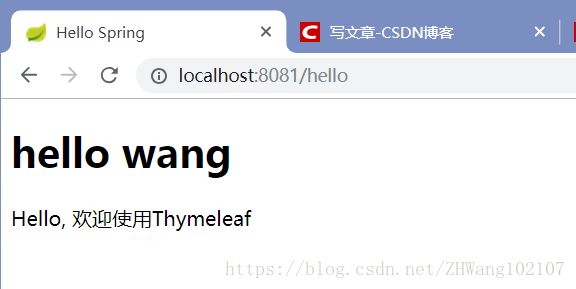
最后在浏览器中访问http://localhost:8081/hello即可看到以下结果
Thymeleaf列表的使用
User.java
public class User {
    private int id;
    private String username;

    public int getId() {
        return id;
    }

    public void setId(int id) {
        this.id = id;
    }

    public String getUsername() {
        return username;
    }

    public void setUsername(String username) {
        this.username = username;
    }
}
UserController.java
 @Controller
@RequestMapping("user")
public class UserController {

    //@RequestMapping(value = "/list", method = RequestMethod.GET)或者
    @GetMapping("list")
    public String listUser(Model model, @RequestParam(value = "id", required = false, defaultValue = "0") Integer id) {
        List<User> userList = new ArrayList<User>();

        for (int i = 0; i < 10; i++) {
            User user = new User();
            user.setId(i);
            user.setUsername("username" + i + i);
            userList.add(user);
        }

        model.addAttribute("users", userList);
        model.addAttribute("id", id);

        return "user/list";
    }

    //    @RequestMapping(value = "/list/{id}", method = RequestMethod.GET)
//    public String getUserID(@PathVariable("id") Integer id) {
//        return "id"+ id;
//    }


}
user/list.html文件
<html xmlns="http://www.w3.org/1999/xhtml" xmlns:th="http://www.thymeleaf.org">
<head>
    <meta charset="UTF-8">
    <title>Hello Springtitle>
head>
<body>

<span th:text="'参数中的用户id为'+${id}">span>

<h2>用户列表h2>
<div>
    <ul>
        <li th:each="user:${users}">
            <p>ID:<span th:text="${user.id}">span>p>
            <p>名字:<span th:text="${user.username}">span>p>

        li>
    ul>
div>


body>
html>
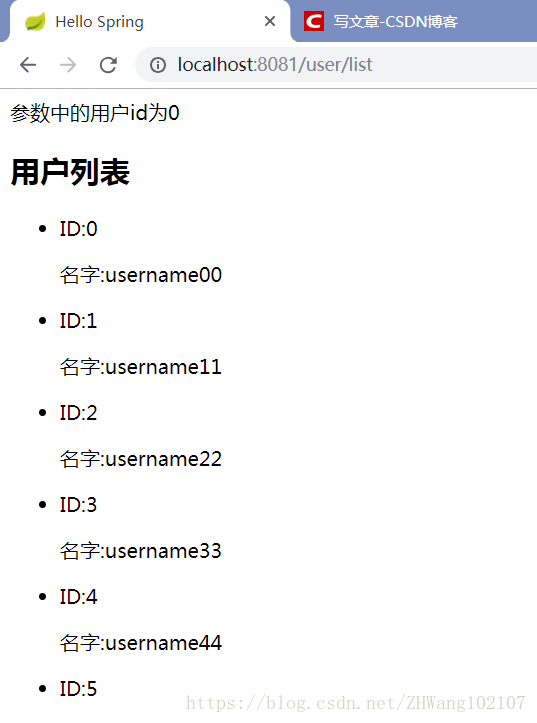
结果
JPA数据库操作
JPA定义
JPA顾名思义就是Java Persistence API的意思,是JDK 5.0注解或XML描述对象-关系表的映射关系,并将运行期的实体对象持久化到数据库中。
详细可参考 https://blog.csdn.net/wujiaqi0921/article/details/78789087
1、pom.xml中配置JPA
<dependency>
		<groupId>org.springframework.bootgroupId>
		<artifactId>spring-boot-starter-data-jpaartifactId>
dependency>
<dependency>
		<groupId>mysqlgroupId>
		<artifactId>mysql-connector-javaartifactId>
dependency>
2、在application.yml中配置数据库
 #数据库配置
    datasource:
      driver-class-name: com.mysql.jdbc.Driver
      url: jdbc:mysql://127.0.0.1:3306/dbgirl?useSSL=true&useUnicode=true&characterEncoding=UTF-8&allowMultiQueries=true
      username: root
      password: 123456

    #jpa配置
    jpa:
      hibernate:
        ddl-auto: update	#注意,如果是create,每一次运行程序都会删除表再重新创建
      show-sql: true
3、Girl.java bean类
@Entity     //表示对应数据库中的表,没有则会创建一个表
@Table(name = "girl")
public class Girl {
    @Id
    @GeneratedValue
    private Long id;

    @Column(name = "name", nullable = true, length = 20)
    private String name;

    @Column(name = "age", nullable = true, length = 4)
    private Integer age;
	//getter and setter方法
}
2、JpaRepository接口
public interface GirlRepository extends JpaRepository<Girl,Long> {
    List<Girl> findGirlByAge(Integer id);
}
3、 GirlController
@RestController
@RequestMapping("girl")
public class GirlController {

    @Autowired
    private GirlRepository girlRepository;

    @Autowired
    private GirlService girlService;

    @GetMapping(path = "getgirlbyname/{age}")
    public List<Girl> getGirlByAge(@PathVariable("age") Integer age){
        return girlRepository.findGirlByAge(age);
    }

    @GetMapping(path = "findgirl/{id}")
    public Girl findOneGirl(@PathVariable("id") Long id){

        return girlRepository.findById(id).orElse(null);
    }

    @GetMapping(path = "girllist")
    public List<Girl> getGirl( ) {

        return girlRepository.findAll();
    }


    @PostMapping(path = "addgirl")
    public Girl addGirl(@RequestParam("name") String name, @RequestParam("age") Integer age) {
        Girl girl = new Girl();
        girl.setAge(age);
        girl.setName(name);
        girlRepository.save(girl);

        return girl;
    }

    @DeleteMapping(path = "deletegirl")
    public void deleteGirl(Long id) {
        girlRepository.deleteById(id);
    }

    @RequestMapping(value = "inserttwo")
    public void insertTwo() {
        girlService.insertTwo();
    }

}
4、用postman请求后的结果
事务管理
1、 @Transactional 数据库事务注解
@Service
public class GirlService {

    @Autowired
    private GirlRepository girlRepository;

    @Transactional  //数据库事务注解
    public void insertTwo() {
        Girl girlA=new Girl();
        girlA.setName("A");
        girlA.setAge(18);
        girlRepository.save(girlA);

        Girl girlB=new Girl();
        girlB.setName("B");
        girlB.setAge(19);

        girlRepository.save(girlB); //如果没有开启事务注解,可能出现A已经插入,而B失败的情况,这是不合理的

    }

}
2、Controller中url配置
  @RequestMapping(value = "inserttwo")
    public void insertTwo() {
        girlService.insertTwo();
    }


