玩转Linux(1)——安装Windows亲儿子Linux系统之WSL之最全攻略之最佳体验之究极无敌舒服
前言
大家好,我是衡与墨,今天给大家带来的是:安装Windows亲儿子Linux系统之WSL之最全攻略之最佳体验之究极无敌舒服…
Windows Subsystem for Linux(简称WSL)是一个在Windows 10上能够运行原生Linux二进制可执行文件(ELF格式)的兼容层。它是由微软与Canonical公司合作开发,其目标是使纯正的Ubuntu 14.04 "Trusty Tahr"映像能下载和解压到用户的本地计算机,并且映像内的工具和实用工具能在此子系统上原生运行。
使用了WSL,你可轻松的打开一个Linux系统,就像打开CMD一样,再也不用等虚拟机启动等待半天了;
使用了WSL,你可以随心所欲把在linux下操作windows的目录,再也不用忍受虚拟机复杂的操作了;
使用了WSL,你可以左手一个cmd,右手一个WSL,想切换就切换,想咋么玩就怎么玩;
WSL相比虚拟机是windows亲儿子,安装更简单,使用更方便。和虚拟机比,缺点是没有自带图形界面。不过没有图形界面用来学习linux命令不是更合适不过?
下面一起来看下怎么装吧:
正文
1、预先配置系统设置
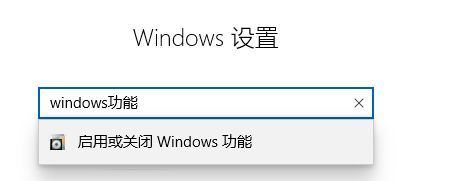
(1)设置打开window功能,设置->搜索->Windows功能
![]()
(2)设置开发者权限

(3)下载WSL,打开window商店,搜索ubuntu

选择一个下载,第一个好像好一些
(3)windwos商店会自动安装,安装好之后点击打开

稍等一会儿,如果报错检查是否正确设置了(1)
自带sudo权限:

添加sudo,这样就不用输密码了:


#修改
%sudo ALL=(ALL:ALL) ALL为%sudo ALL=(ALL:ALL) NOPASSWD:ALL
(6*)设置中文,sudo dpkg-reconfigure locales,选择zh-CN.UTF-8
并不是很推荐设置中文,大部分服务器系统都是用英文的。

(7)到了这里,大部分小伙伴都可以开始愉快的玩耍起WSL了,那这篇文章就到这了哈,觉得博主的文章对你有用顺手点个赞,关个注,不花一分钱,谢谢谢谢。
.
.
.
.
.
.
.
.
.
.
.
.
.
.
.
.
.
.
.
.
.
.
.
.
.
.
.
.
.
.
.
.
.
.
.
.
.
.
.
.
.
.
.
.
.
.
.
.
.
.
.
.
.
.
.
.
.
.
.
.
.
.
.
.
.
.
.
.
.
.
.
.
.
.
.
.
.
.
.
.
.
.
.
.
.
.
.
.
.
.
.
.
.
.
.
.
.
.
.
.
.
.
.
.
.
.
.
.
.
.
.
.
.
.
.
.
.
.
.
.
.
.
.
.
.
.
.
.
.
.
.
.
.
.
.
.
.
.
.
.
.
.
.
.
.
.
.
小伙伴真机智,博主的文章岂是会仅仅教你安装wsl吗?接下来传授你我的秘笈:
秘籍
1、配置源
没有配置源,你会发现使用apt-get命令安装软件时总是失败

#vim /etc/apt/sources.list
在文件最前面添加以下条目:
# 阿里源
deb http://mirrors.aliyun.com/ubuntu/ bionic main restricted universe multiverse
deb http://mirrors.aliyun.com/ubuntu/ bionic-security main restricted universe multiverse
deb http://mirrors.aliyun.com/ubuntu/ bionic-updates main restricted universe multiverse
deb http://mirrors.aliyun.com/ubuntu/ bionic-proposed main restricted universe multiverse
deb http://mirrors.aliyun.com/ubuntu/ bionic-backports main restricted universe multiverse
deb-src http://mirrors.aliyun.com/ubuntu/ bionic main restricted universe multiverse
deb-src http://mirrors.aliyun.com/ubuntu/ bionic-security main restricted universe multiverse
deb-src http://mirrors.aliyun.com/ubuntu/ bionic-updates main restricted universe multiverse
deb-src http://mirrors.aliyun.com/ubuntu/ bionic-proposed main restricted universe multiverse
deb-src http://mirrors.aliyun.com/ubuntu/ bionic-backports main restricted universe multiverse
保存退出之后,更新源:
#apt-get update
#apt-get upgrade
需要一些些时间,耐心等一下
2、更好的命令行体验
现在小伙伴能下载软件了,也玩的很愉快了,但是你发现你还是没有达到左手一个cmd,右手一个wsl这种体验,切换界面太烦了,尤其还要开五六七八九个服务器shell界面时:
(1)打开控制台,win + r cmd,输入wsl 回车:

好了,wsl打开了,只见你啪啪啪输入一堆指令,然后想要回到cmd:
什么?这还不能满足你?切换wsl还是不够方便?

下面隆重向你推荐win10最新版命令行:
进入github release页面,找到最新版的,下载:

安装很快,安装好后:
是不是比原来靓多了
通过同时创建多个标签页的功能,你可以舒舒服服的同时开启多个终端命令行,同时包括wsl,还记得怎么打开wsl吧,输入命令wsl就行了。
怎么快速打开 windows terminal?cmd输入 wt即可。
说实话这蓝蓝的颜色不太舒服,我们需要按照自己的喜好配置一下,我便按照自己的喜好配置了一下:

具体的配置如下:需要的小伙伴自己拿去(需要修改文件路径为你电脑上的路径)
// To view the default settings, hold "alt" while clicking on the "Settings" button.
// For documentation on these settings, see: https://aka.ms/terminal-documentation

{
    "$schema": "https://aka.ms/terminal-profiles-schema",

    // 设置默认shell 指定guid
    "defaultProfile": "{0caa0dad-35be-5f56-a8ff-afceeeaa6101}",

    // 行列数
    "initialCols": 110,
    "initialRows": 28,

    // 快捷键
    "keybindings": [
        {
            "command": "closeTab",
            "keys": [
                "ctrl+alt+c"
            ]
        }
    ],

    "profiles":
    [
        {
            // Make changes here to the powershell.exe profile
            "name": "hengyumo's power shell",
            // 	终端配置标识
            "guid": "{61c54bbd-c2c6-5271-96e7-009a87ff44bf}",
            "startingDirectory": "C:\\Users\\le\\Desktop",
            "acrylicOpacity" : 0.9,
            // 不透明度
            "useAcrylic": true,
            "closeOnExit" : true,
            // 色彩风格
            "colorScheme" : "myScheme",
            "cursorColor" : "#fefefe",
            "cursorShape" : "bar",
            "fontSize" : 12,
            "historySize" : 10000,
            // 背景
            "backgroundImage": "C:\\Users\\le\\Pictures\\humor\\humor.jpg",
            "backgroundImageOpacity": 0.75,
            "backgroundImageStretchMode": "fill",
            "commandline": "powershell.exe",
            "hidden": false
        },
        {
            "name": "hengyumo's cmd",
            "startingDirectory": "C:\\Users\\le\\Desktop",
            "acrylicOpacity" : 0.9,
            // 不透明度
            "useAcrylic": true,
            "closeOnExit" : true,
            // 色彩风格
            "colorScheme" : "myScheme",
            "cursorColor" : "#fefefe",
            "cursorShape" : "bar",
            "fontSize" : 12,
            "historySize" : 10000,
            // 背景
            "backgroundImage": "C:\\Users\\le\\Pictures\\humor\\humor.jpg",
            "backgroundImageOpacity": 0.75,
            "backgroundImageStretchMode": "fill",
            // Make changes here to the cmd.exe profile
            "guid": "{0caa0dad-35be-5f56-a8ff-afceeeaa6101}",
            "commandline": "cmd.exe",
            "hidden": false
        },
        {
            "name": "hengyumo's wsl",
            "acrylicOpacity" : 0.9,
            // 不透明度
            "useAcrylic": true,
            "closeOnExit" : true,
            // 色彩风格
            "colorScheme" : "myScheme",
            "cursorColor" : "#fefefe",
            "cursorShape" : "bar",
            "fontSize" : 12,
            "historySize" : 10000,
            // 背景
            "backgroundImage": "C:\\Users\\le\\Pictures\\humor\\humor.jpg",
            "backgroundImageOpacity": 0.75,
            "backgroundImageStretchMode": "fill",
            "guid": "{2c4de342-38b7-51cf-b940-2309a097f518}",
            "hidden": false,
            "source": "Windows.Terminal.Wsl"
        },
        {
            "guid": "{b453ae62-4e3d-5e58-b989-0a998ec441b8}",
            "hidden": false,
            "name": "Azure Cloud Shell",
            "source": "Windows.Terminal.Azure"
        }
    ],

    // Add custom color schemes to this array
    "schemes": [
        {
            "name": "myScheme",
            // 前景色,既字体色
            "foreground": "#c0c0c0",
            "background": "#0C0C0C",
            "colors": [
                "#0C0C0C",
                "#C50F1F",
                "#13A10E",
                "#C19C00",
                "#0037DA",
                "#881798",
                "#3A96DD",
                "#CCCCCC",
                "#767676",
                "#E74856",
                "#16C60C",
                "#F9F1A5",
                "#3B78FF",
                "#B4009E",
                "#61D6D6",
                "#F2F2F2"
            ]
        },
        {
            "name": "Solarized Dark",
            "foreground": "#FDF6E3",
            "background": "#073642",
            "colors": [
                "#073642",
                "#D30102",
                "#859900",
                "#B58900",
                "#268BD2",
                "#D33682",
                "#2AA198",
                "#EEE8D5",
                "#002B36",
                "#CB4B16",
                "#586E75",
                "#657B83",
                "#839496",
                "#6C71C4",
                "#93A1A1",
                "#FDF6E3"
            ]
        },
        {
            "name": "Solarized Light",
            "foreground": "#073642",
            "background": "#FDF6E3",
            "colors": [
                "#073642",
                "#D30102",
                "#859900",
                "#B58900",
                "#268BD2",
                "#D33682",
                "#2AA198",
                "#EEE8D5",
                "#002B36",
                "#CB4B16",
                "#586E75",
                "#657B83",
                "#839496",
                "#6C71C4",
                "#93A1A1",
                "#FDF6E3"
            ]
        },
        {
            "name": "Ubuntu",
            "foreground": "#EEEEEC",
            "background": "#2C001E",
            "colors": [
                "#EEEEEC",
                "#16C60C",
                "#729FCF",
                "#B58900",
                "#268BD2",
                "#D33682",
                "#2AA198",
                "#EEE8D5",
                "#002B36",
                "#CB4B16",
                "#586E75",
                "#657B83",
                "#839496",
                "#6C71C4",
                "#93A1A1",
                "#FDF6E3"
            ]
        },
        {
            "name": "UbuntuLegit",
            "foreground": "#EEEEEE",
            "background": "#2C001E",
            "colors": [
                "#4E9A06",
                "#CC0000",
                "#300A24",
                "#C4A000",
                "#3465A4",
                "#75507B",
                "#06989A",
                "#D3D7CF",
                "#555753",
                "#EF2929",
                "#8AE234",
                "#FCE94F",
                "#729FCF",
                "#AD7FA8",
                "#34E2E2",
                "#EEEEEE"
            ]
        }
    ]
}
3、更优的体验
什么到了现在你还不满意,还说什么我是新手,命令行使用太不友好了,有没有图形界面,啊呸,啥图形界面,没有没有,快走快走,别说我认识你。
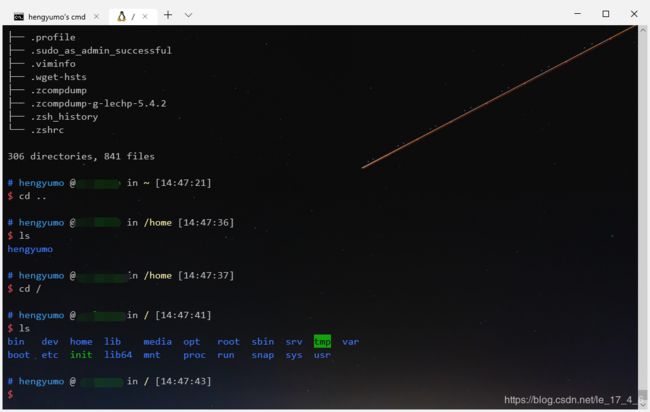
算了,看你默默给我点了个赞的份上,我就教你用一个很友好的终端工具吧,快放弃图形界面吧,真正的hacker是不需要图形界面的:
或者:

或者:
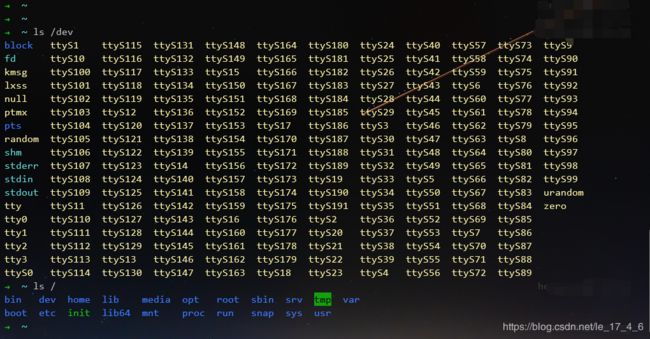
(1)安装zsh
sudo apt-get install zsh
(2)安装ohmyzsh
wget https://github.com/robbyrussell/oh-my-zsh/raw/master/tools/install.sh -O - | sh
(3)默认样式是,可以编辑~/.zshrc修改,可选样式有onmyzsh样式

我比较喜好af-magic,也就是第二张图。其余配置就不详细介绍了。
(4)输入zsh切换shell为zsh
(5*)设置zsh为默认shell,修改~/.bashrc,增加
f [ -t 1 ]; then
exec zsh
fi
生效 source ~/.bashrc,切换回来chsh -s /bin/bash
(6.1)下载插件
wget https://mimosa-pudica.net/src/incr-0.2.zsh
(6.2)安装插件
移动插件到ohmyzsh插件目录下
mv incr-0.2.zsh ~/.oh-my-zsh/plugins/
在.zshrc文件末尾添加
source ~/.oh-my-zsh/plugins/incr-0.2.zsh
应用更改
source .zshrc
(6.3)如果遇到与vim提示功能冲突
$ vim t
_arguments:451: _vim_files: function definition file not found
解决方法:将~/.zcompdump*删除即可
$ rm -rf ~/.zcompdump*
$ exec zsh
4、各位观众,请全体起立!图形界面来了!
其实图形界面安装并不麻烦,之所以不推荐是因为,只有对于新手,图形界面才会显得重要,对于大部分人来说,命令行的效率更高。
(1)Xming下载
Ximg是一个免费的windows下的linux图形界面支持软件
(2)安装好之后,运行XLaunch

注意display number 选1,multiple是多个窗口分离的,onewindow是单个窗口的…,选一个喜欢的,然后下一步直到完成。
(3)配置权限,xhost +的目的
sudo apt-get install x11-xserver-utils dconf-editor dbus-x11 -y
xhost +
(4)给linux系统安装命令行图形界面应用之 xfce4-terminal
sudo apt-get install xfce4-terminal
配置
echo "export DISPLAY=:1.0">> ~/.bashrc
之后关闭wsl,重新打开
输入sudo xfce4-terminal,xming会自动打开xfe4图形界面,

(4)给linux系统安装包管理图形界面应用之 新立得—— synaptic
安装sudo apt-get install synaptic
启动sudo synaptic


(5)给linux系统安装轻量级桌面之 lxde(除了lxde还有xfce,lxqt等其他桌面可以选择),选择lxde因为它是国人(台湾)开发的,而且比较轻量级。
sudo apt install lubuntu-core lxde fcitx fcitx-googlepinyin
sudo apt install language-pack-gnome-zh-hans
sudo apt install fonts-wqy-zenhei
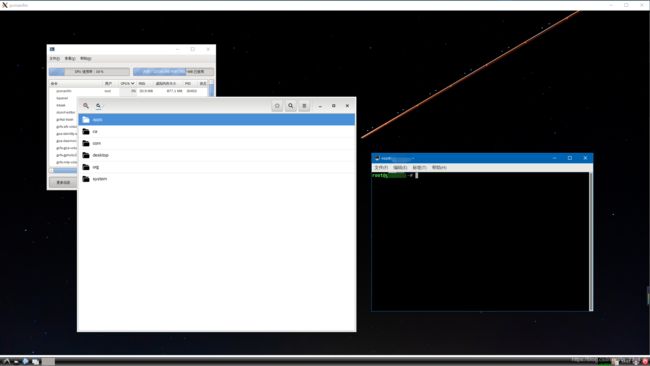
安装完毕之后运行 sudo startlxde即可启动,这时候ximg会监听到端口信号,自动启动:
本篇完
如果你觉得舒服了~ 请给博主点赞~
关注我可及时查看最新内容~
