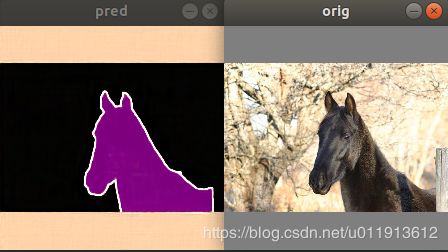
全卷积的图片语义分割(基于darknet实现)
darknet已经实现了图片的语义分割,有一个segmenter.c的文件,但是没有对应的cfg文件,我大概看了下实现的源码,重新改了一班名为mseg.c的文件,使用的数据集依然是Voc2007,所有代码、权重文件、cfg文件都已上传github,感兴趣可以直接跑跑感受下darknet:
编译后,执行:
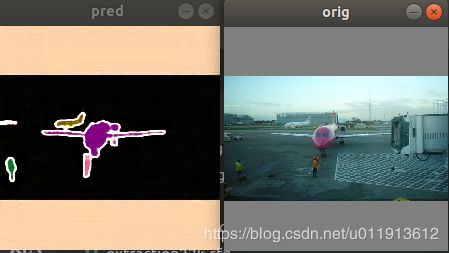
./darknet mseg test cfg/mseg.cfg model/mseg.weights data/mseg.jpg 然后你将会看到:
我要申明下,本来,规范的项目,应该是有个测试集,有个训练集。在训练集上训练,在测试集上测试,但是,这个项目只是我花了半天做出来玩玩的项目,我训练了几个小时(笔记本训练,是在伤不起)后,在训练集上看了下效果,发现效果很好,所以就没有继续训练了。其实我也随便下了一些网络的图片,看了下效果,发现效果非常差,我理解,首先,这个模型是很小的,因为我的笔记本算力有限,搭不了大模型。其次,受算力的影响,训练肯定是不充分的。但是,通过简单的训练在训练集上能取得如此效果,我觉得这种方法肯定是没问题的,是值得分享的,如果想取得更好的效果,将网络加深,充分训练,应该是能取得不错的效果的。
请高抬贵手,这不是论文,也不是什么正式的文章,只是记录了下自己的尝试,如果因此您觉得浪费了您的时间,非常抱歉。
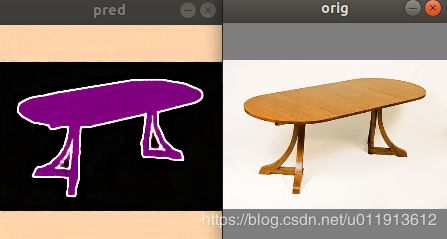
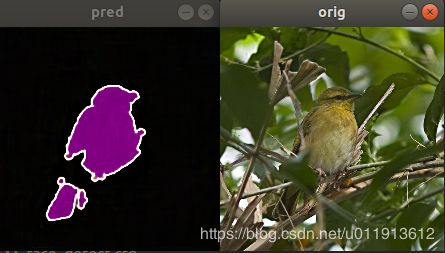
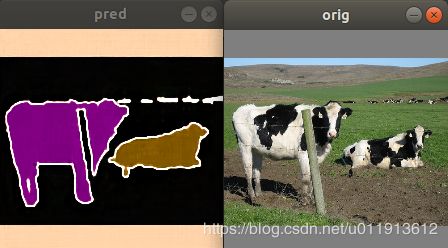
更多示例:
训练模型
卷积+池化+上采样就可以:
layer     filters    size              input                output
    0 conv     16  3 x 3 / 1   224 x 224 x   3   ->   224 x 224 x  16  0.043 BFLOPs
    1 max          2 x 2 / 2   224 x 224 x  16   ->   112 x 112 x  16
    2 conv     32  3 x 3 / 1   112 x 112 x  16   ->   112 x 112 x  32  0.116 BFLOPs
    3 max          2 x 2 / 2   112 x 112 x  32   ->    56 x  56 x  32
    4 conv     64  3 x 3 / 1    56 x  56 x  32   ->    56 x  56 x  64  0.116 BFLOPs
    5 max          2 x 2 / 2    56 x  56 x  64   ->    28 x  28 x  64
    6 conv    128  3 x 3 / 1    28 x  28 x  64   ->    28 x  28 x 128  0.116 BFLOPs
    7 max          2 x 2 / 2    28 x  28 x 128   ->    14 x  14 x 128
    8 conv    256  3 x 3 / 1    14 x  14 x 128   ->    14 x  14 x 256  0.116 BFLOPs
    9 max          2 x 2 / 2    14 x  14 x 256   ->     7 x   7 x 256
   10 conv    512  3 x 3 / 1     7 x   7 x 256   ->     7 x   7 x 512  0.116 BFLOPs
   11 conv    512  3 x 3 / 1     7 x   7 x 512   ->     7 x   7 x 512  0.231 BFLOPs
   12 upsample            2x     7 x   7 x 512   ->    14 x  14 x 512
   13 conv    256  3 x 3 / 1    14 x  14 x 512   ->    14 x  14 x 256  0.462 BFLOPs
   14 upsample            2x    14 x  14 x 256   ->    28 x  28 x 256
   15 conv    128  3 x 3 / 1    28 x  28 x 256   ->    28 x  28 x 128  0.462 BFLOPs
   16 upsample            2x    28 x  28 x 128   ->    56 x  56 x 128
   17 conv     64  3 x 3 / 1    56 x  56 x 128   ->    56 x  56 x  64  0.462 BFLOPs
   18 upsample            2x    56 x  56 x  64   ->   112 x 112 x  64
   19 conv     32  3 x 3 / 1   112 x 112 x  64   ->   112 x 112 x  32  0.462 BFLOPs
   20 upsample            2x   112 x 112 x  32   ->   224 x 224 x  32
   21 conv     16  3 x 3 / 1   224 x 224 x  32   ->   224 x 224 x  16  0.462 BFLOPs
   22 conv      3  3 x 3 / 1   224 x 224 x  16   ->   224 x 224 x   3  0.043 BFLOPs
   23 cost                                           150528
要训练的话,修改下图片的路径:
data.c下的load_data_mseg函数中的label_images和train_images:
data load_data_mseg(int n, char **paths, int m, int w, int h, int classes, int min, int max, float angle, float aspect, float hue, float saturation, float exposure, int div)
{
    static char *label_images = "/home/javer/Downloads/VOCtrainval_06-Nov-2007/VOCdevkit/VOC2007/SegmentationObject/";
    static char *train_images = "/home/javer/Downloads/VOCtrainval_06-Nov-2007/VOCdevkit/VOC2007/JPEGImages/";
    char train_img[256];
    char label_img[256];
    char **random_paths = get_random_paths(paths, n, m);
    int i;
    data d = {0};
    d.shallow = 0;

    d.X.rows = n;
    d.X.vals = calloc(d.X.rows, sizeof(float*));
    d.X.cols = h*w*3;


    d.y.rows = n;
    d.y.cols = h*w*3;
    d.y.vals = calloc(d.X.rows, sizeof(float*));

    for(i = 0; i < n; ++i){
        sprintf(train_img,"%s%s%s",train_images,random_paths[i],".jpg");
        sprintf(label_img,"%s%s%s",label_images,random_paths[i],".png");
        image orig = load_image_color(train_img, 0, 0);
        image label = load_image_color(label_img, 0, 0);

        image sized_img = letterbox_image(orig, w, h);
        image sized_label = letterbox_image(label, w, h);

        d.X.vals[i] = sized_img.data;
        d.y.vals[i] = sized_label.data;

        free_image(orig);
        free_image(label);

        // image rgb = mask_to_rgb(sized_label);
        // show_image(rgb, "part",0);
        // show_image(sized_img, "orig",1);
        // cvWaitKey(0);
        // free_image(rgb);
    }
    free(random_paths);
    return d;
}
另外,mseg.c中train_mseg.c中的连个路径也要修改:
void train_mseg(char *cfgfile, char *weightfile, int *gpus, int ngpus, int clear, int display)
{
    int i;
    char *train_images = "/home/javer/Downloads/VOCtrainval_06-Nov-2007/VOCdevkit/VOC2007/ImageSets/Segmentation/train.txt";
    char *backup_directory = "/home/javer/Downloads/VOCtrainval_06-Nov-2007/VOCdevkit";
然后执行如下命令开始训练:
./darknet mseg train cfg mseg.cfg如果对你有帮助,请点个星星支持下^-^

