h5ai - 私有云
之前一直在使用 ssh 来做文件存储与分享,因为 SSH 的特殊性,使用非常不便。便想建一个轻便的私人网盘。经过对开源私有云(ownCloud/nextCloud/kodExplorer/…)的查找、安装、卸载流程,最终留下了德国人 larsjung 开发的 h5ai。
简介
h5ai 相对于其它私有云来说功能简单、体积轻便(1MB左右)、页面排版自动适应 PC 和移动端、支持包括中文在内的多语言显示,采用 NodeJs 框架开发,编译完成后为 PHP 程序。
h5ai 通过不同的视图来对服务器端的目录和文件进行查看。可以在线预览 PDF、文档、脚本(语言高亮)、图片、视频、下载(二维码)等等。
因为它重在文件索引与分享,所以不支持文件上传。

它有许多设置,可以对页面排版进行修改,如皮肤、侧边栏、搜索、下载,生成视频和图片缩略图等等。
作者提供的一个 Demo:H5ai - Demo
h5ai可以部署在 Apache / lighttpd / nginx / caddy 等等 Web 服务器上。
第一、WEB 环境和 H5ai 的准备
1、Web 环境
我们需要准备一个 WEB 环境,可以使用 Nginx、Lighttpd,Caddy, Apache 等等都可以。在这里,我们使用 Web 服务器界的新起之秀 Caddy。
- 安装 Caddy
详见 Web server - Caddy
- 安装 PHP
:~$ apt-get install php7.3-fpm php7.3-cgi php7.3-gd php7.3-json
2、h5ai 程序下载
h5ai 下载目录
v0.29.2,截止2019-09-22最新的正式版本。
v0.29.2+025~a1bb755,截止2019-09-22最新的开发版。
在这里,我们下载最新的开发版「v0.29.2+025~a1bb755」并解压至网站目录/var/www/下。
:~$ 7z x h5ai-0.29.2+025~a1bb755.zip -o/var/www
第二、h5ai 的安装与部署
1、网站目录示意图
网站根目录
  ├──── _h5ai
  ├──── _h5ai ─── private
  ├──── _h5ai ─── public
  ├──── 分享的文件
  ├──── 分享的文件夹 ─── 分享的文件
  └──── 分享的文件夹
将需要分享的文件放在网站根目录下即可,而 h5ai 程序全部在_h5ai文件夹里。
程序默认 _h5ai 和 . 开头的文件不显示,可以修改配置options.json文件来自定义不想分享的文件。
2、运行网站
h5ai 的index.php不在根目录下,所以需要在服务器上指定它的路径。
- lighttptd,使用
index-file.names来指定首页的路径。
index-file.names += ("/_h5ai/public/index.php")
- Caddy,使用
index来指定首页的路径。
index "/_h5ai/public/index.php"
因为 h5ai 所有的 URI 都会在服务端重定向至 /_h5a/public/index.php 并由它来生成页面,所以在 Caddy 里使用 index 指定网站首页后,浏览我们的网站时会出现很多 404 错误。
这点在 lighttpd / nginx / apache 下默认自动修正了,所以不需要其它设置。
而 Caddy 与 PHP 存在一些兼容性问题,无法自动处理这个问题。所以这里需要而使用rewrite 指令来将所有的 URI 重写至 /_h5ai/public/index.php。
假设我的网站域名为 www.shixuen.com
:~$ cat >> /etc/caddy/Caddyfile <此时,在浏览器中输入网址 http://www.shixuen.com 即可浏览网站。
/run/php/php7.3-fpm.sock即 php7.3-fpm 所绑定的网络端口,如果查找它?
:~$ netstat -anpl | grep php | grep LISTENING
unix  2      [ ACC ]     STREAM     LISTENING     816733   7346/php-fpm: pool   /run/php/php7.3-fpm.sock
3、h5ai 环境与功能的自检
- 打开网址
http://www.shixuen.com/_h5ai/public/index.php。
查看 h5ai 当前运行信息,即对当前运行环境与功能模块的自检结果。
默认密码为空,直接点击登录。

- 查看自我检测结果
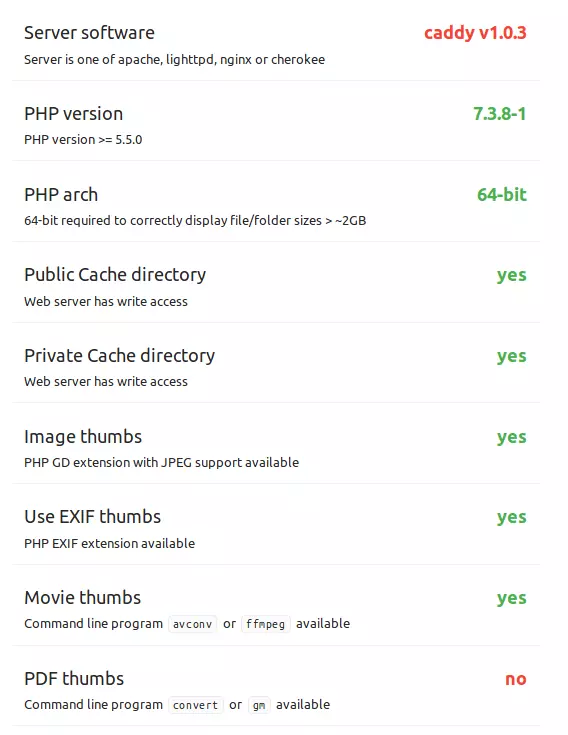
- 绿色,即代表检测通过
- 红色,存在兼容性问题。如此处的
server software(服务器)一栏 - 红色的no,即此功能缺失,需要安装依赖环境。
如此处的PDF thumbs(PDF缩略图),提示缺少convert(imagemagick)程序,此功能为 PDF文档生成缩略图。
解决此问题只需在服务器安装imagemagick:
:~$ apt-get install imagemagick
至此,我们私有云就布置完成了,可以为我们提供服务了。
第三、h5ai 的配置文件
h5ai 的配置文件为_h5ai/private/conf/options.json,修改它对 h5ai 的功能进行增减。
1、功能自检页面的密码设置
    /*
    Password hash.
    SHA512 hash of the info page password, the preset password is the empty string.
    Online hash generator: https://md5hashing.net/hash/sha512
    */
    "passhash": "cf83e1357eefb8bdf1542850d66d8007d620e4050b5715dc83f4a921d36ce9ce47d0d13c5d85f2b0ff8318d2877eec2f63b931bd47417a81a538327af927da3e",
passhash 即 password hash 的缩写,它的值为密码经过 SHA512 hash 计算后的结果。
cf83e1357....da3e 这串字符为空字符的 SHA512 哈希值。
所以我们在上面 3、h5ai 环境与功能的自检 步骤里不用输入密码即可登录。
如何修改默认密码?
- 生成密码的 SHA512 hash 值。
- 将
cf83e1357....da3e换成我们刚刚生成的 SHA512 值即可。
配置文件里给出的密码在线生成网址 md5hashing.net 不安全,它默认保存我们的密码与对应的 Hash 值,这不就是在人为增加地下黑产的密码数据库么!
所以在这里推荐使用 emn178 开源的静态网页版的密码生成工具 online-tools。

- 方法一: emn178 提供的在线版,emn178.github.io/online-tools。
- 方法二:将 online-tools 源码下载下来离线使用。(使用浏览器打开
sha512.html)
2、文件列表的设置
    "view": {
        "binaryPrefix": false,
        "disableSidebar": true,
        "fallbackMode": false,
        "fastBrowsing": true,
        "fonts": ["Ubuntu", "Roboto", "Helvetica", "Arial", "sans-serif"],
        "fontsMono": ["Ubuntu Mono", "Monaco", "Lucida Sans Typewriter", "monospace"],
        "hidden": ["^\\.", "^_h5ai"],
        "hideFolders": false,
        "hideIf403": true,
        "hideParentFolder": false,
        "maxIconSize": 40,
        "modes": ["details", "grid", "icons"],
        "modeToggle": false,
        "setParentFolderLabels": true,
        "sizes": [20, 40, 60, 80, 100, 140, 180, 220, 260, 300],
        "theme": "default",
        "unmanaged": ["index.html", "index.htm", "index.php"],
        "unmanagedInNewWindow": false
    },
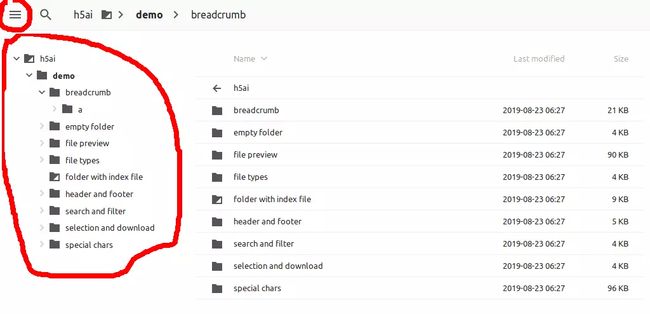
- disableSidebar:是否显示左侧边栏(功能栏)
- hidden:此参数可以指定文件夹列表里隐藏哪些文件,可以使用正则来匹配文件名称。
- ^\\.:隐藏名称以
.开头的文件,如.htaccess,.gitignor等等。 - ^_h5ai:隐藏名称以
_h5ai开头的文件或文件夹,如_h5ai,_h5ai.header.html等等。 - ^__:隐藏名称以
__开头的文件或文件夹,如__tmp,__aaa__等等。 - \\.sh$:隐藏名称以
.sh结尾的文件或文件夹,如bash.sh,scripts.sh等等。 - ^robots.txt:隐藏名称以
robots.txt开头的文件或文件夹,如robots.txt,robots.txt.bak等等。 - hideFolders:是否在文件列表中只显示文件而隐藏文件夹。
- theme:默认的文件类型图标,
_h5ai/public/images/theme里的每个文件夹都是一种图标,默认带了 2 套,另一套图标名为comity。 - default 图标
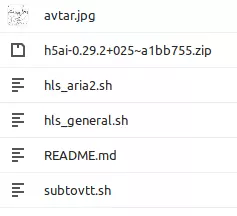
- comity 图标
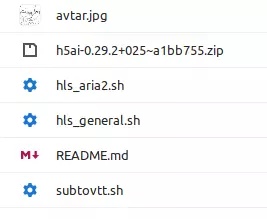
- unmanaged:如果某个文件夹里包含数组里的文件,则将拒绝显示此文件夹里的所有内容。

3、右侧边栏
    "info": {
        "enabled": false,
        "show": false,
        "qrcode": true,
        "qrFill": "#999",
        "qrBack": "#fff"
    },
- enabled:是否显示右侧边栏(详情栏)。
- show:是否一直显示右侧边栏。
- qrcode:是否在右侧边栏生成下载链接的二维码以方便移动端下载。
4、文件的选择与下载设置
    "download": {
        "enabled": false,
        "type": "php-tar",
        "packageName": null,
        "alwaysVisible": false
    },
    "select": {
        "enabled": true,
        "clickndrag": true,
        "checkboxes": false
    },
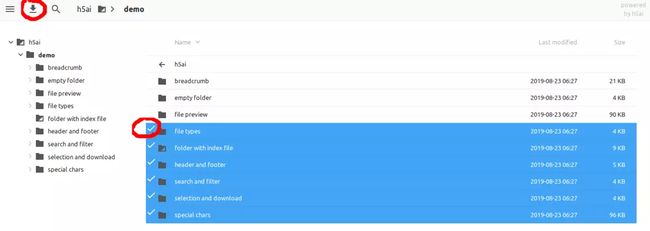
选择的设置
- enabled:是否允许文件选择,如果禁止文件选择,那么文件就无法下载。
- clickndrag:是否允许左键拖动来进行文件多选。
- checkboxes:当鼠标悬浮在文件名上时是否显示选择框。
下载的设置
- enabled:是否允许下载文件。
- type:选择压缩方式。
- php-tar:使用 php 内置功能来下载文件,多线程,可以同时下载多个文件。
- shell-tar:使用外部
tar程序来下载文件,单线程,同一时间只能下载一个文件。 - shell-zip:使用外部
zip程序来下载文件,单线程,同一时间只能下载一个文件。 - packageName:默认压缩包名称,为
null时压缩包名称当前文件夹的名称, - alwaysVisible:下载按钮是否动态显示(只能选中文件后显示)。
5、语言设置
    "l10n": {
        "enabled": true,
        "lang": "en",
        "useBrowserLang": true
    },
- enabled:是否允许更改界面语言
- lang:默认界面语言,
en为英文,zh-cn为中文简体,zh-tw为中文繁体。 - useBrowserLang:是否根据浏览器的语言来自动调整界面语言。
6、Google字体本地化
    "resources": {
        "scripts": [],
        "styles": [
            "//fonts.googleapis.com/css?family=Ubuntu:300,400,700%7CUbuntu+Mono:400,700"
        ]
    },
在这里添加的第三方脚本与 CSS 会自动生成 标签插入所有页面的 中。
默认从 _h5ai/public/ext/ 里加载不以「 http://、https://、/ 」开头的脚本与 CSS 文件。
因为 h5ai 需要从 fonts.googleapis.com 下载所需的字体,所以国内的用户加载网页非常缓慢。
解决此问题有三种方法:
- 将页面字体更改为常见的字体,如宋体、微软雅黑等等。
- 将
fonts.googleapis.com更换为国内的镜像网站。如中科大。
    "resources": {
        "scripts": [],
        "styles": [
            "//fonts.lug.ustc.edu.cn/css?family=Ubuntu:300,400,700%7CUbuntu+Mono:400,700"
        ]
    },
| 中科大 | 对应 | 谷歌字体 |
|---|---|---|
| fonts.lug.ustc.edu.cn | --> | fonts.googleapis.com |
| ajax.lug.ustc.edu.cn | --> | ajax.googleapis.com |
| google-themes.lug.ustc.edu.cn | --> | themes.googleusercontent.com |
| fonts-gstatic.lug.ustc.edu.cn | --> | fonts.gstatic.com |
- 将谷歌字体下载到本地。
- 将谷歌字体的 CSS 文件与字体下载到本地
#!/bin/bash

ext_dir="/var/www/_h5ai/public/ext"

# 将谷歌字体的 css 下载到 _h5ai/public/ext 下
curl -sL -H "User-Agent:Mozilla/5.0 (X11; Linux x86_64; rv:69.1) Gecko/20100101 Firefox/69.1" \
         -o "$ext_dir/fonts.google.css" \
         "https://fonts.googleapis.com/css?family=Ubuntu:300,400,700%7CUbuntu+Mono:400,700"

# 将 css 文件里的所需的字体下载至 _h5ai/public/ext/fonts 下
# 并将 css 文件里字体的路径更改为 _h5ai/public/ext/fonts
mkdir -p "$ext_dir/fonts"
if [ -d "$ext_dir/fonts" ]; then
    cd "$ext_dir/fonts"
    wget $(grep "https" "$ext_dir/fonts.google.css" | awk -F '[()]' '{print $6}')
    sed -i 's|https://.*/|/_h5ai/public/ext/fonts/|' "$ext_dir/fonts.google.css"
fi
- 在
options.json将谷歌字体换成本地字体
    "resources": {
        "scripts": [],
        "styles": [
            "fonts.google.css"
        ]
    },
第四、功能扩展
1、页眉与页脚
当分享的文件夹太多时,为了方便区分,可以在文件夹下创建指定名称的文件来提供简介。
这些信息显示在页面文件夹列表的上面或下面。如下面两副图:
- 文件列表的页眉
页眉
- 在文件夹下新建
_h5ai.header.html或_h5ai.header.md,以提供此文件夹简介。 - 在浏览器中刷新此文件夹的页面即可。
_h5ai.header的内容被添加在里。所以页面里不能包含等标签。
_h5ai.header.html:
<h1 style="text-align:center">This is a header messageh1>
<p style="text-align:center">
The header is read from file <code>_h5ai.header.htmlcode>. The content of this file will be enclosed by div tags.
p>
_h5ai.header.md:
# This is a header message

The header is read from file `_h5ai.header.html`.The content of this file will be enclosed by div tags.
页脚
- 在文件夹下新建
_h5ai.footer.html或_h5ai.footer.md,以提供此文件夹简介。 - 在浏览器中刷新此文件夹的页面即可。
_h5ai.footer的内容被添加在里。所以页面里不能包含等标签。
_h5ai.footer.html:
<p style="text-align:center">
The footer is read from file _h5ai.footer.html.The content of this file will be enclosed by div tags.
p>
<p style="text-align:center">
<strong>Notestrong>: all files and directories of name _h5ai* are hidden from the index by default.
p>
_h5ai.footer.md:
The footer is read from file `_h5ai.footer.html`. The content of this file will be enclosed by div tags.
**Note**: all files and directories of name `_h5ai*` are hidden from the index by default.
2、视频插件
HTML5 视频简介
因为 h5ai 采用原生的 HTML5 标签来播放,所以它只能播放浏览器原生支持的视频格式。
HTML5 原生支持的视频格式
| Format | Media Type |
|---|---|
| MP4 | video/mp4 |
| WebM | video/webm |
| Ogg | video/ogg |
各个浏览器支持的视频格式
| Browser | MP4 | WebM | Ogg |
|---|---|---|---|
| Internet Explorer | YES | NO | NO |
| Chrome | YES | YES | YES |
| Firefox | YES | YES | YES |
| Safari | YES | NO | NO |
| Opera | YES (from Opera 25) | YES | YES |
因为 HTML5 功能简陋,开发者们就发明了各种视频插件。
- 添加弹幕、播放速度调整(快速或慢速播放)的 DPlayer。
- 改善视频的传输方式 hls.js、dash.js 等等。
- HLS.js:HTTP Live Streaming, 苹果公司开发的流媒体网络传输协议,也就是我们经常使用的 m3u8 方式,工作原理是把整个视频根据时间 (如 8s) 来进行分割成多个小视频,然后每次只下载一些即可播放。且 HLS 传输基于 HTTP 报文,所以它可以穿过任何允许 HTTP 数据通过的防火墙或者代理服务器。
- dash.js:Dynamic Adaptive Streaming over HTTP,缩写 DASH,也称 MPEG-DASH,是一种自适应比特率串流技术,即网络通畅时自动切换至高分辨率的视频,网络卡顿时自动切换至低分辨率的视频。
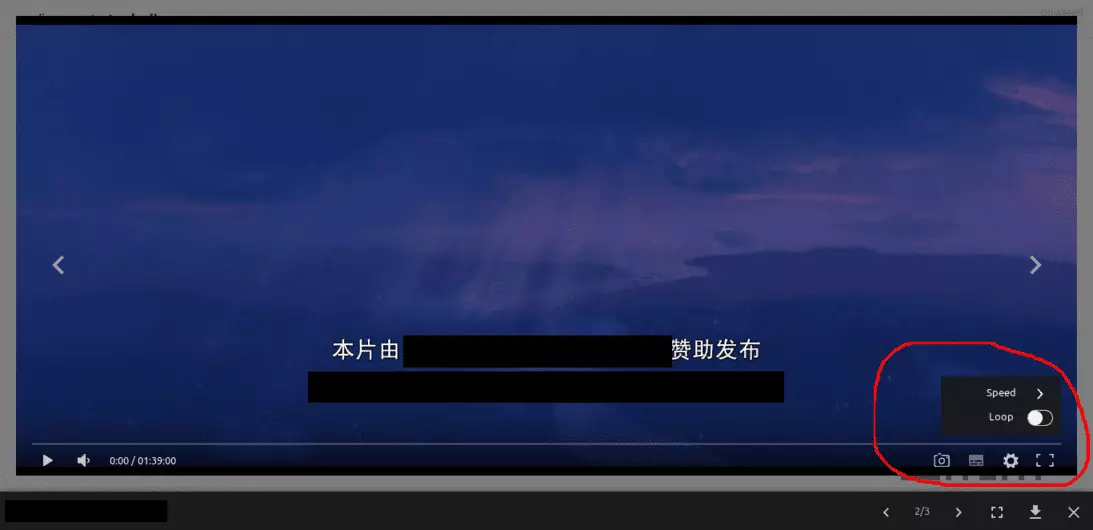
h5ai 默认的视频播放器
DPlayer的播放器
h5ai-v0.29.2 添加 DPlayer 插件
国人 Pearlulu 已经为 h5ai 的 v0.29.2 版本添加了 DPlayer 插件,并写了个 shell script 以将视频文件转换成 hls 格式。我们可以直接下载使用。
下载地址: h5ai_dplayer_hls_0.29.2
h5ai-0.29.2+025~a1bb755 添加 DPlayer 插件
这个版本因为作者 larsjung 更新了许多 JS 基础模块,所以最终由 Node.Js 生成的代码变动比较大。
我们将 Pearlulu 为 DPlayer 添加的代码微调并添加到 h5ai-0.29.2+025~a1bb755 版本里。
添加完成后,使用方法同 Pearlulu-h5ai_dplayer_hls。
- options.json
/* 添加 hls.js / DPlayer.min.js / DPlayer.min.css */
    "resources": {
        "scripts": [
            "//cdn.jsdelivr.net/npm/hls.js@latest",
            "//github.com/MoePlayer/DPlayer/raw/master/dist/DPlayer.min.js"
        ],
        "styles": [
            "fonts.google.css",
            "//github.com/MoePlayer/DPlayer/raw/master/dist/DPlayer.min.css"
        ]
    },
    ...
    "view":
        ...
        "hidden":
- 修改
_h5ai/public/js/scripts.js文件
因为scripts.js被压缩了,所以我们需要先将它解压还原。
这里我们选择 在线解压。解压完成后,运行下面的脚本:
#!/bin/bash

_scripts_js="/var/www/_h5ai/public/js/scripts.js"

if [ $(cat $_scripts_js | wc -l) -lt 3000 ]; then
    echo "请先将 scripts.js 解压"
    echo "解压后的文件行数超过3500行"
    exit 1
fi


if [ $(grep "v0.29.2+025\~a1bb755" "$_scripts_js" | wc -l) -eq 0 ]; then
    echo "h5ai的版本不正确"
    exit 1
fi

sed -i '/^\s\+e\.stopPropagation(),\s\+e\.preventDefault()$/,/^\s\+var\s*t\s*=\s*e.keyCode;/{
/^\s\+var\s*\w\s*=\s*e.keyCode;/i\
                if (document.querySelector("#dplayer")) {\
                    return;\
                }
}' "$_scripts_js"

sed -i '/^\s\+.*
修改完成的 h5ai 下载地址:h5ai_dplayer_hls-0.29.2+025~a1bb755.7z
访问密码:8888
第六、php 安全设置
网上关于 php.ini 的安全设置里,一般为这几项:
- allow_url_include:Off(不允许包含远程资源文件)
- allow_url_fopen:Off(不允许打开远程文件)
- open_basedir:
/var/www/(网站根目录) - disable_functions:
# 禁止命令执行函数
disable_functions = system,passthru,exec,shell_exec,popen,pcntl_exec,proc_open
# 禁止文件操作函数
isable_functions=chdir,chroot,dir,getcwd,opendir,readdir,scandir,fopen,unlink,delete,copy,mkdir,rmdir,rename,file,file_get_contents,fputs,fwrite,chgrp,chmod,chow
- expose_php:Off(不显示PHP版本信息)
- display_errors:Off(出错脚本错误时不显示错误信息)
- log_errors:On(出错脚本错误时记录日志)
- error_log:
/usr/local/apache2/logs/php_error.log(日志文件路径)
因为 h5ai 需要使用 opendir / readdir / scandir / fopen / file_get_contents / exec / passthru 这几个函数,以实现页面功能,所以我们要在 disable functions 里删除它们。
- file_get_contents:使用此函数读取
options.json,如果不允许使用此函数,页面无法显示。 - fopen:在进行文件下载时使用此函数,但在线查看文件不使用此函数。
- opendir / readdir / scandir:用来获取多国语言文件,如果禁止此函数,则只能显示默认语言,而无法在线更改。
- exec / passthru:扩展功能模块需要使用 shell commands,如生成 视频 / PDF 的缩略图。
Reference:
- Caddy
- Lighttpd
- h5ai-Web,h5ai-Download,h5ai-github
- h5ai-Third Edition-DPlayer-hls
- DPlayer-Web,DPlayer-github
- hls-wikiPedia
- dash-wikiPedia
- sha512-online-tools


