安全框架Spring Security(三)——自定义登录页面
安全框架Spring Security(三)——自定义登录页面
简介
上一篇文章中,我们已经可以自定义用户验证逻辑了。有个性的我们,登陆页面肯定也是要个性化的,怎么修改默认的登录页面呢?
自定义登录页面
(1)制作自定义登录页面
由于需要渲染页面,这里才有thymeleaf模板渲染方式,需要新增maven依赖。
<dependency>
    <groupId>org.springframework.bootgroupId>
    <artifactId>spring-boot-starter-thymeleafartifactId>
dependency>
接着,需要写Controller跳转到l登录页面,相信大家都很熟悉。
import org.springframework.stereotype.Controller;
import org.springframework.web.bind.annotation.PathVariable;
import org.springframework.web.bind.annotation.RequestMapping;

/**
 * @ClassName: PageController
 * @Description: 页面跳转
 * @Author Marvin
 * @Date 2019/6/4 22:20
 */
@Controller
public class PageController {

    @RequestMapping("/{url}.html")
    public String loginIndex(@PathVariable("url") String url){
        return url;
    }
}
然后,当然是自定义的登录的html,放到 resources/templates/login.html
<html lang="en">
<head>
    <meta http-equiv="Content-Type" content="text/html; charset=utf-8"/>
    <title>登录页面title>
    <link rel="stylesheet" href="https://cdn.bootcss.com/bootstrap/4.1.0/css/bootstrap.min.css">
head>

<body>

    <div class="container">
        <form class="form-signin" action="/login/form" method="post">
            <h2 class="form-signin-heading">自定义登录页面h2><br>
            <input type="text" name="username" class="form-control mb-input" placeholder="请输入账号">
            <input type="password" name="password" class="form-control mb-input" placeholder="请输入密码" >
            <button class="btn btn-lg btn-success btn-block" id="check" type="submit">登录button>
        form>
    div>
body>
<style>
    body {
        padding-top: 40px;
        padding-bottom: 40px;
        background-color: #b0eee3;
    }

    .form-signin {
        max-width: 330px;
        padding: 15px;
        margin: 100px auto;
    }

    .mb-input{
        margin-bottom: 20px;
    }
style>

html>
这时候我们访问 http://localhost:9999/login.html ,直接被Spring Security拦截了,还是跳转到默认的登录页面。因为Spring Security 把login.html也保护起来了,所以我们需要设置security不拦截这个请求。
配置不需要拦截的路径,在之前的CloudSecurityConfig文件中修改配置。
import com.marvin.demo.spring.cloud.auth.service.CloudUserDetailsService;
import org.springframework.beans.factory.annotation.Autowired;
import org.springframework.context.annotation.Bean;
import org.springframework.context.annotation.Configuration;
import org.springframework.security.authentication.AuthenticationManager;
import org.springframework.security.config.annotation.authentication.builders.AuthenticationManagerBuilder;
import org.springframework.security.config.annotation.web.builders.HttpSecurity;
import org.springframework.security.config.annotation.web.configuration.EnableWebSecurity;
import org.springframework.security.config.annotation.web.configuration.WebSecurityConfigurerAdapter;
import org.springframework.security.crypto.password.PasswordEncoder;

/**
 * @Author Marvin
 * @Description 身份认证配置
 * @Date 17:14 2019-06-04
 * @Param
 * @return
 **/
@Configuration
@EnableWebSecurity
public class CloudSecurityConfig extends WebSecurityConfigurerAdapter {

    @Autowired
    private CloudUserDetailsService userDetailsService;

    @Autowired
    private PasswordEncoder passwordEncoder;

    /**
     * 需要配置这个支持password模式
     * support password grant type
     * @return
     * @throws Exception
     */
    @Override
    @Bean
    public AuthenticationManager authenticationManagerBean() throws Exception {
        return super.authenticationManagerBean();
    }

    @Override
    protected void configure(AuthenticationManagerBuilder auth) throws Exception {
        auth.userDetailsService(userDetailsService).passwordEncoder(passwordEncoder);
    }

    @Override
    protected void configure(HttpSecurity http) throws Exception {
       http.formLogin() //使用formLogin的方式登陆
               .and()
               .authorizeRequests()
               .antMatchers("/login.html").permitAll() //配置不需要校验的路径
               .anyRequest().authenticated()  //任何请求都需要身份认证
               .and().csrf().disable();    //禁用CSRF
    }

}
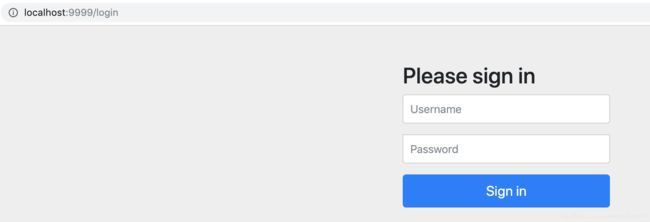
重启项目后,访问 http://localhost:9999/login.html 终于可以看到自定义的登录页面了。

(2)在Spring Security中使用自定义登录页面
上面已经可以访问自定义的登录页面了,但是点击登录后还是会跳转到默认的登录页面(除非把上面的html中的action改成“/login”,因为Spring Security默认是“/login”验证登录请求的)。那么怎么把自定义的页面配置到Spring Security中呢?
首先,配置自定义登录页面路径,在CloudSecurityConfig中配置,这里只提供修改后的方法:
 @Override
    protected void configure(HttpSecurity http) throws Exception {
       http.formLogin() //使用formLogin的方式登陆
               .loginPage("/login.html") // 配置自定义登录页面地址
               .and()
               .authorizeRequests()
               .antMatchers("/login.html").permitAll() //配置不需要校验的路径
               .anyRequest().authenticated()  //任何请求都需要身份认证
               .and().csrf().disable();    //禁用CSRF
    }
然后,我们还需要配置登录form提交的地址(即action地址):
前提: 我们html页面上提交的用户名字段必须是username,密码字段必须是password,这是Spring Security规定的。
 @Override
    protected void configure(HttpSecurity http) throws Exception {
       http.formLogin() //使用formLogin的方式登陆
               .loginPage("/login.html") // 配置自定义登录页面地址
               .loginProcessingUrl("/login/form") // 配置提交登录的地址
               .and()
               .authorizeRequests()
               .antMatchers("/login.html", "/login/form").permitAll() //配置不需要校验的路径
               .anyRequest().authenticated()  //任何请求都需要身份认证
               .and().csrf().disable();    //禁用CSRF
    }
到此为止,我们已经完成了Spring Security配置自定义登录页面了!我们访问根目录资源 http://localhost:9999/ 自动会跳转到登录页面 http://localhost:9999/login.html 。输入账号密码验证成功后,就可以访问资源了。