Android极光推送(二)jcenter 自动集成
【注:有问题请忽略此文】
看了官网和相关博客,试了试,步骤很多、问题也很多!
此种方式有时间再试试吧,待更新。。。。。。
- 4、jcenter 自动集成
- 4.1、配置jcenter支持
- 4.2、gradle中添加依赖
- 4.3、配置混淆文件
- 4.4、极光推送权限配置
- 4.5、初始化极光推送
- 4.6、创建自定义的广播接收器
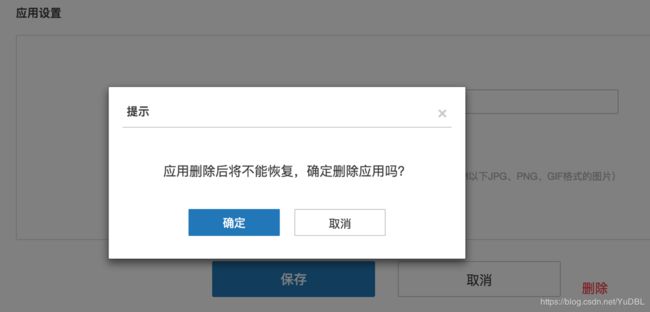
- 6、删除应用
4、jcenter 自动集成
使用 jcenter 自动集成的开发者,不需要在项目中添加 jar 和 so,jcenter 会自动完成依赖;在 AndroidManifest.xml 中不需要添加任何 JPush SDK 相关的配置,jcenter 会自动导入。 相对于之前的手动集成方式,这种方法真的是简单快捷,可以省去很多操作,让你分分钟搞定极光推送,再也不用为以前那种大规模复制粘贴而烦恼了。参考官方说明:
https://docs.jiguang.cn/jpush/client/Android/android_guide/#jcenter
参考链接:
https://www.jianshu.com/p/8072e85bafaa
https://blog.csdn.net/lijueqing/article/details/80824040
参考下载的demo:
JPushExample(1143290) 【 “2、创建应用,下载极光Demo” 时下载 】
4.1、配置jcenter支持
在Project 根目录的主 gradle 中配置了jcenter支持(新建project默认配置就支持)buildscript {
repositories {
jcenter()
}
}
allprojets {
repositories {
jcenter()
}
}
4.2、gradle中添加依赖
在Moudle的gradle中添加依赖和AndroidManifest的替换变量android {
defaultConfig {
applicationId "com.xxx.xxx" //JPush上注册的包名.
ndk {
//选择要添加的对应cpu类型的.so库。
abiFilters 'armeabi', 'armeabi-v7a', 'arm64-v8a'
// 还可以添加 'x86', 'x86_64', 'mips', 'mips64'
}
manifestPlaceholders = [
JPUSH_PKGNAME : applicationId, //JPush上注册的包名.
JPUSH_APPKEY : "你的appkey", //JPush上注册的包名对应的appkey.
JPUSH_CHANNEL : "developer-default", //暂时填写默认值即可.
]
}
}
dependencies {
......
compile 'cn.jiguang.sdk:jpush:3.1.3' // 此处以JPush 3.1.3 版本为例。
compile 'cn.jiguang.sdk:jcore:1.2.1' // 此处以JCore 1.2.1 版本为例。
......
}
版本信息,如可以参考下载的 “JPushExample(1143290)” demo文件

注 :
如果在添加以上 abiFilter 配置之后android Studio出现以下提示:
NDK integration is deprecated in the current plugin. Consider trying the new experimental plugin
则在 Project 根目录的gradle.properties文件中添加:
android.useDeprecatedNdk=true
这种情况基本上不会出现,只有用到NDK时才有可能遇到
4.3、配置混淆文件
在 proguard-rules.pro 文件中加入混淆代码-dontoptimize
-dontpreverify
-dontwarn cn.jpush.**
-keep class cn.jpush.** { *; }
-keep class * extends cn.jpush.android.helpers.JPushMessageReceiver { *; }
-dontwarn cn.jiguang.**
-keep class cn.jiguang.** { *; }
4.4、极光推送权限配置
根据需求添加权限
4.5、初始化极光推送
在自定义的Application中onCreate中调用极光推送的初始化方法public class MyApplication extends Application {
@Override
public void onCreate() {
super.onCreate();
JPushInterface.setDebugMode(true); //正式环境时去掉此行代码
JPushInterface.init(this);
}
}
然后在 AndroidManifest.xml 文件中关联MyApplication
4.6、创建自定义的广播接收器
自定义广播接收器,官方Demo已给出(这里已简化)/**
* 自定义JPush接收器
*
* 如果不定义这个 Receiver,则:
* 1) 默认用户会打开主界面
* 2) 接收不到自定义消息
*/
public class JPushReceiver extends BroadcastReceiver {
private static final String TAG = "JIGUANG-Example";
@Override
public void onReceive(Context context, Intent intent) {
try {
Bundle bundle = intent.getExtras();
if (JPushInterface.ACTION_REGISTRATION_ID.equals(intent.getAction())) {
//极光服务器分配的Registration Id,
String regId = bundle.getString(JPushInterface.EXTRA_REGISTRATION_ID);
} else if (JPushInterface.ACTION_MESSAGE_RECEIVED.equals(intent.getAction())) {
//自定义消息
} else if (JPushInterface.ACTION_NOTIFICATION_RECEIVED.equals(intent.getAction())) {
//推送通知
} else if (JPushInterface.ACTION_NOTIFICATION_OPENED.equals(intent.getAction())) {
//当用户点击通知时的操作,打开自定义的Activity
Intent i = new Intent(context, TestActivity.class);
i.putExtras(bundle);
i.setFlags(Intent.FLAG_ACTIVITY_NEW_TASK | Intent.FLAG_ACTIVITY_CLEAR_TOP);
context.startActivity(i);
}
} catch (Exception e) {
}
}
}
然后在 AndroidManifest.xml 文件中声明JPushReceiver
到这里关于极光推送的集成就已经完成了,可以在极光推送后台发生条推送测试一下了。


