Android使用Face++架构包实现人脸识别
欢迎转载,转载时请标明出处:http://blog.csdn.net/android_for_james/article/details/51016170
今天给大家带来一个通过使用Face++来实现人脸识别的功能
我们先去这个Face++官网看看:http://www.faceplusplus.com.cn
我们点开案例可以看到众多我们熟知的软件都是使用的这个公司所提供的SDK
然后我们点击开发者中心中的开发工具与sdk下载我们所需要的sdk
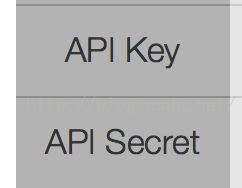
之后再点击我的应用中的创建应用之后他会给我们两个密钥
要保存这两个值我们在程序中要用到它们
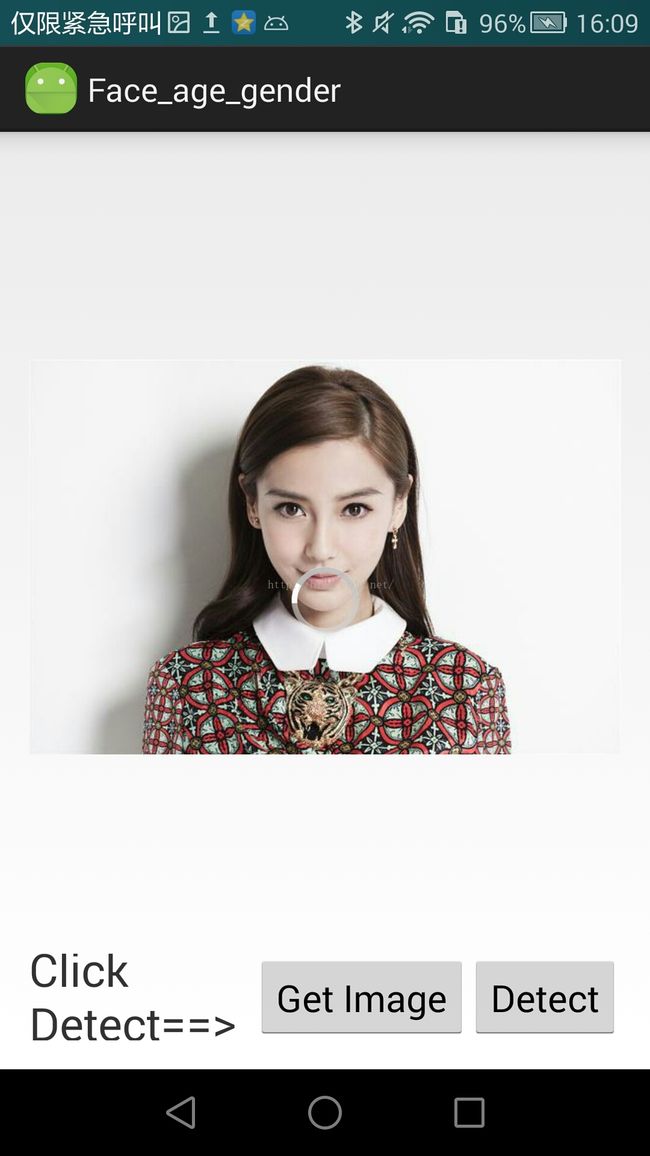
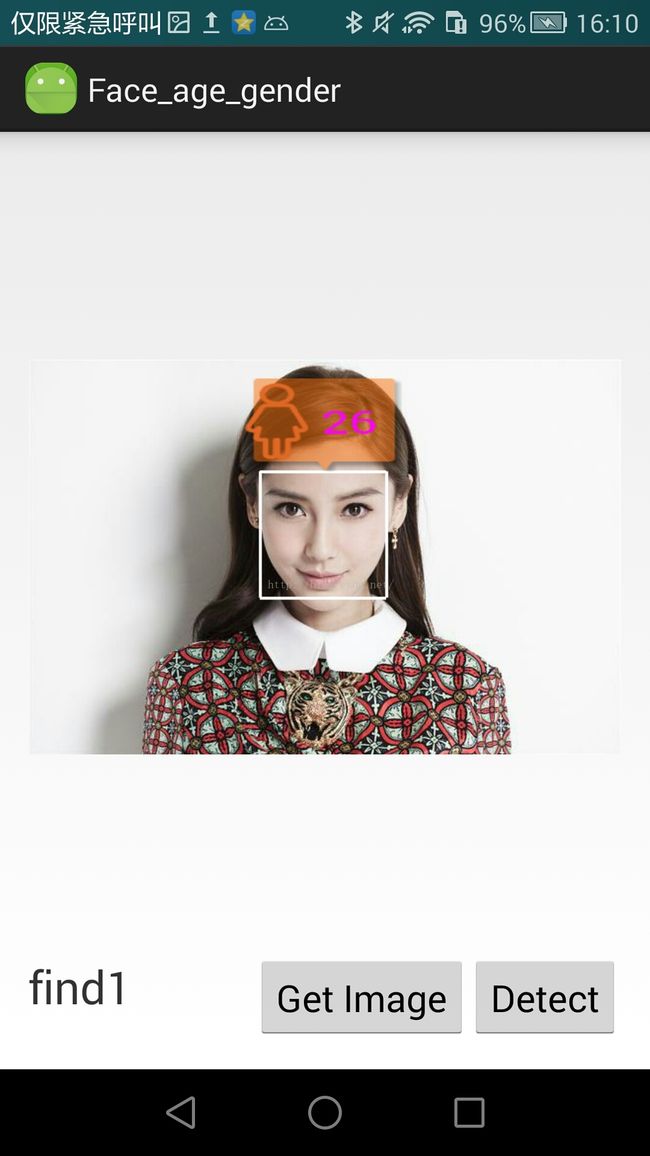
我今天实现的是实现面部捕捉并且识别性别和年龄来看一下效果图
闲话不多说我们来看看实现
1.工具类Constant用来存放密钥
public class Constant {
     //设置两个之前获取的两个常量
     public static final String Key="你的key";
     public static final String Secret="你的secret";
}
2.工具类InternetDetect
import android.graphics.Bitmap;

import com.facepp.error.FaceppParseException;
import com.facepp.http.HttpRequests;
import com.facepp.http.PostParameters;

import org.json.JSONObject;

import java.io.ByteArrayOutputStream;

public class InternetDetect {
    public interface CallBack
    {
        void success(JSONObject jsonObject);

        void error(FaceppParseException exception);

    }
    public static void dectect(final Bitmap bitmap, final CallBack callBack)
    {
        //因为这里要向网络发送数据是耗时操作所以要在新线程中执行
        new Thread(new Runnable() {
            @Override
            public void run() {
                /*1.设置请求
                * 2.创建一个Bitmap
                * 3.创建字符数组流
                * 4.将bitmap转换为字符并传入流中
                * 5.新建字符数组接受流
                * 6.创建发送数据包
                * 7.创建接受数据包
                *
                * */
                try {

                    HttpRequests httpRequests=new HttpRequests(Constant.Key,Constant.Secret,true,true);
                    //从0,0点挖取整个视图,后两个参数是目标大小
                    Bitmap bitmapsmall = Bitmap.createBitmap(bitmap, 0, 0, bitmap.getWidth(), bitmap.getHeight());
                    //这里api要求传入一个字节数组数据,因此要用字节数组输出流
                    ByteArrayOutputStream stream=new ByteArrayOutputStream();
                    /*Bitmap.compress()方法可以用于将Bitmap-->byte[]
                      既将位图的压缩到指定的OutputStream。如果返回true,
                      位图可以通过传递一个相应的InputStream BitmapFactory.decodeStream(重建)
                      第一个参数可设置JPEG或PNG格式,第二个参数是图片质量,第三个参数是一个流信息*/
                    bitmapsmall.compress(Bitmap.CompressFormat.JPEG, 100, stream);
                    byte[] arrays=stream.toByteArray();
                    //实现发送参数功能
                    PostParameters parameters=new PostParameters();
                    //发送数据
                    parameters.setImg(arrays);
                    //服务器返回一个JSONObject的数据
                    JSONObject jsonObject=httpRequests.detectionDetect(parameters);
                    System.out.println("jsonObject:"+jsonObject.toString());
                    if(callBack!=null)
                    {
                        //设置回调
                        callBack.success(jsonObject);
                    }
                } catch (FaceppParseException e) {

                    System.out.println("error");
                    e.printStackTrace();
                    if(callBack!=null)
                    {
                        callBack.error(e);
                    }
                }


            }
        }).start();
    }

}
3.MainActivity
import android.content.Intent;
import android.database.Cursor;
import android.graphics.Bitmap;
import android.graphics.BitmapFactory;
import android.graphics.Canvas;
import android.graphics.Paint;
import android.net.Uri;
import android.os.Bundle;
import android.os.Handler;
import android.os.Message;
import android.provider.MediaStore;
import android.support.v7.app.ActionBarActivity;
import android.text.method.ScrollingMovementMethod;
import android.view.View;
import android.widget.Button;
import android.widget.ImageView;
import android.widget.TextView;

import com.facepp.error.FaceppParseException;

import org.json.JSONArray;
import org.json.JSONException;
import org.json.JSONObject;

public class MainActivity extends ActionBarActivity implements View.OnClickListener {
    private static final int PICK_CODE =1;
    private ImageView myPhoto;
    private Button getImage;
    private Button detect;
    private TextView tip;
    private View mWaitting;
    private String ImagePath=null;
    private Paint mypaint;
    private Bitmap myBitmapImage;

    @Override
    protected void onCreate(Bundle savedInstanceState) {
        super.onCreate(savedInstanceState);
        setContentView(R.layout.activity_main);
        mypaint=new Paint();
        initViews();
        initEvent();
    }
    private void initViews()
    {
        myPhoto=(ImageView)findViewById(R.id.id_photo);
        getImage=(Button)findViewById(R.id.get_image);
        detect=(Button)findViewById(R.id.detect);
        tip=(TextView)findViewById(R.id.id_Tip);
        mWaitting=findViewById(R.id.id_waitting);
        tip.setMovementMethod(ScrollingMovementMethod.getInstance());

    }
    private void initEvent()
    {
        getImage.setOnClickListener(this);
        detect.setOnClickListener(this);
    }
    @Override
    public void onClick(View v) {

        switch (v.getId())
        {
            case R.id.get_image:
                //获取系统选择图片intent
                Intent intent=new Intent(Intent.ACTION_PICK);
                intent.setType("image/*");
                //开启选择图片功能响应码为PICK_CODE
                startActivityForResult(intent,PICK_CODE);
                break;
            case R.id.detect:
                //显示进度条圆形
                mWaitting.setVisibility(View.VISIBLE);
                //这里需要注意判断用户是否没有选择图片直接点击了detect按钮
                //否则会报一个空指针异常而造成程序崩溃
                if(ImagePath!=null&&!ImagePath.trim().equals(""))
                {
                    //如果不是直接点击的图片则压缩当前选中的图片
                    resizePhoto();
                }else
                {
                    //否则将默认的背景图作为bitmap传入
                    myBitmapImage=BitmapFactory.decodeResource(getResources(),R.drawable.test1);
                }
                //设置回调
                InternetDetect.dectect(myBitmapImage, new InternetDetect.CallBack() {
                    @Override
                    public void success(JSONObject jsonObject) {
                        Message message=Message.obtain();
                        message.what=MSG_SUCESS;
                        message.obj=jsonObject;
                        myhandler.sendMessage(message);
                    }
                    @Override
                    public void error(FaceppParseException exception) {
                        Message message=Message.obtain();
                        message.what=MSG_ERROR;
                        message.obj=exception;
                        myhandler.sendMessage(message);
                    }
                });
                break;
        }

    }
    //设置响应intent请求
    @Override
    protected void onActivityResult(int requestCode, int resultCode, Intent intent) {
        super.onActivityResult(requestCode, resultCode, intent);
        if(requestCode==PICK_CODE)
        {
            if(intent!=null)
            {
                //获取图片路径
                //获取所有图片资源
                Uri uri=intent.getData();
                //设置指针获得一个ContentResolver的实例
                Cursor cursor=getContentResolver().query(uri,null,null,null,null);
                cursor.moveToFirst();
                //返回索引项位置
                int index=cursor.getColumnIndex(MediaStore.Images.ImageColumns.DATA);
                //返回索引项路径
                ImagePath=cursor.getString(index);
                cursor.close();
                //这个jar包要求请求的图片大小不得超过3m所以要进行一个压缩图片操作
                resizePhoto();
                myPhoto.setImageBitmap(myBitmapImage);
                tip.setText("Click Detect==>");
            }
        }
    }

    private void resizePhoto() {
        //得到BitmapFactory的操作权
        BitmapFactory.Options options = new BitmapFactory.Options();
        // 如果设置为 true ,不获取图片,不分配内存,但会返回图片的高宽度信息。
        options.inJustDecodeBounds = true;
        BitmapFactory.decodeFile(ImagePath,options);
        //计算宽高要尽可能小于1024
        double ratio=Math.max(options.outWidth*1.0d/1024f,options.outHeight*1.0d/1024f);
        //设置图片缩放的倍数。假如设为 4 ,则宽和高都为原来的 1/4 ,则图是原来的 1/16 。
        options.inSampleSize=(int)Math.ceil(ratio);
        //我们这里并想让他显示图片所以这里要置为false
        options.inJustDecodeBounds=false;
        //利用Options的这些值就可以高效的得到一幅缩略图。
        myBitmapImage=BitmapFactory.decodeFile(ImagePath,options);
    }

    private static final int MSG_SUCESS=11;
    private static final int MSG_ERROR=22;
    private Handler myhandler=new Handler()
    {
        @Override
        public void handleMessage(Message msg) {
            super.handleMessage(msg);
            switch (msg.what)
            {
                case MSG_SUCESS:
                    //关闭缓冲条
                    mWaitting.setVisibility(View.GONE);
                    //拿到新线程中返回的JSONObject数据
                    JSONObject rsobj= (JSONObject) msg.obj;
                    //准备Bitmap,这里会解析JSONObject传回的数据
                    prepareBitmap(rsobj);
                    //让主线程的相框刷新
                    myPhoto.setImageBitmap(myBitmapImage);
                    break;
                case MSG_ERROR:
                    mWaitting.setVisibility(View.GONE);
                    String errormsg= (String) msg.obj;
                    break;
            }
        }


    };

    private void prepareBitmap(JSONObject JS) {
        //新建一个Bitmap使用它作为Canvas操作的对象
        Bitmap bitmap=Bitmap.createBitmap(myBitmapImage.getWidth(),myBitmapImage.getHeight(),myBitmapImage.getConfig());
        //实例化一块画布
        Canvas canvas=new Canvas(bitmap);
        //把原图先画到画布上面
        canvas.drawBitmap(myBitmapImage, 0, 0, null);
        //解析传回的JSONObject数据
        try {
                //JSONObject中包含着众多JSONArray,但是我们这里需要关键字为face的数组中的信息
                JSONArray faces=JS.getJSONArray("face");
                //获取得到几个人脸
                int faceCount=faces.length();
                //让提示文本显示人脸数
                tip.setText("find"+faceCount);
               //下面对每一张人脸都进行单独的信息绘制
for(int i=0;i这里我用红色字体标出我在实现的过程中遇到的问题希望大家可以避免:
1.在写按键响应的时候要注意判断用户是否没有选择图片而直接点击了detect按钮,这样的话避免了获取图片时存在空指针异常的问题
2.上传图片时要保证图片小于3M因此注意图片的压缩
3.气泡处理有技巧,把它当作Textview更方便
4.在绘制气泡的时候也要注意缩放不然的话当人脸很小的时候气泡会占据整个图片导致用户体验降低
希望对大家有所帮助,欢迎转载但要标明出处,谢谢!
有什么不足的地方可以留言给我我会尽快回复并改正!
欢迎关注我的博客:http://blog.csdn.net/android_for_james
源码下载网址(点开后面链接后在文章末尾有点击下载按钮):点击打开链接


