Linux下搭建操作系统实验平台(Virtualbox和Bochs)
原文地址:http://blog.csdn.net/ariesjzj/article/details/8604335
Bochs是模拟器,提供调试功能,因为所有指令都是模拟的,所以比较慢。Virtualbox是虚拟机(提供硬件,软件虚拟,不过启动部分是跑在基于Qemu的模拟器上),Virtualbox也提供了简单的调试功能。
本文基于Ubuntu12.04 LTS(64 bits),但所有的功能在Windows下都有对应的版本。这里以《自己动手写操作系统》中的例子为例,介绍如何通过Virtualbox和Bochs运行img和com文件。
Virtualbox:
1. 安装virtualbox
# apt-get install virtualbox
2. 下载MS-DOS安装盘(如http://download.csdn.net/detail/ariesjzj/5082584),接着创建虚拟机,安装DOS。
如果要运行img文件,在Virtualbox中的Floppy中插入虚拟盘即可。如放入《自己动手写操作系统》的例子TINIX.IMG后,启动后显示:
如果可执行文件编译成com文件,需要先搞定Host和Guest的通信,才能把com文件拷进去。有几种方法,一种是网络或Share folder(见https://www.virtualbox.org/wiki/Sharing_files_with_DOS),不过这种方法得装一坨软件,比较麻烦。
另一种方法是将文件做成iso,在Virtualbox中插入虚拟光盘,然后DOS访问光盘。比如要让DOS访问Host中/home/jzj/cdrom下的内容,先制作iso镜像:
$ mkisofs -r -o myiso.iso /home/jzj/cdrom
然后在Virtualbox的Storage中加入虚拟盘myiso.iso,上面的DOS安装盘是含cd-rom驱动的,所以不需要额外操作就可以访问光驱(自动挂载到D盘)。但如果下载的DOS默认没有光盘支持,可以参考http://mylinuxramblings.wordpress.com/2010/12/05/linux-mint-debian-edition-lmde-first-impressions/。
为了运行实模式程序,还要关掉EMM386,在C盘里的config.sys中把有EMM386.EXE的行注掉,如:REM DEVICE=C:\DOS71\EMM386.EXE NOEMS
否则运行例子中的com文件会出错。现在就可以运行书中的例子了,如:
Bochs:
1. 安装Bochs
# apt-get install bochs bochs-sdl vgabios bochsbios
###############################################################
# bochsrc.bxrc file for Tinix.
###############################################################

# how much memory the emulated machine will have
megs: 32

# filename of ROM images
romimage: file=$BXSHARE/BIOS-bochs-latest
vgaromimage: file=$BXSHARE/VGABIOS-lgpl-latest

# what disk images will be used
floppya: 1_44=TINIX.IMG, status=inserted

# choose the boot disk.
boot: a

# where do we send log messages?
log: bochsout.txt

display_library:sdl

# disable the mouse, since Tinix is text only
mouse: enabled=0

# enable key mapping, using US layout as default.
keyboard_mapping: enabled=1, map=$BXSHARE/keymaps/sdl-pc-us.map
Bochs支持多种前端,这里用的是SDL前端。
3. 启动bochs
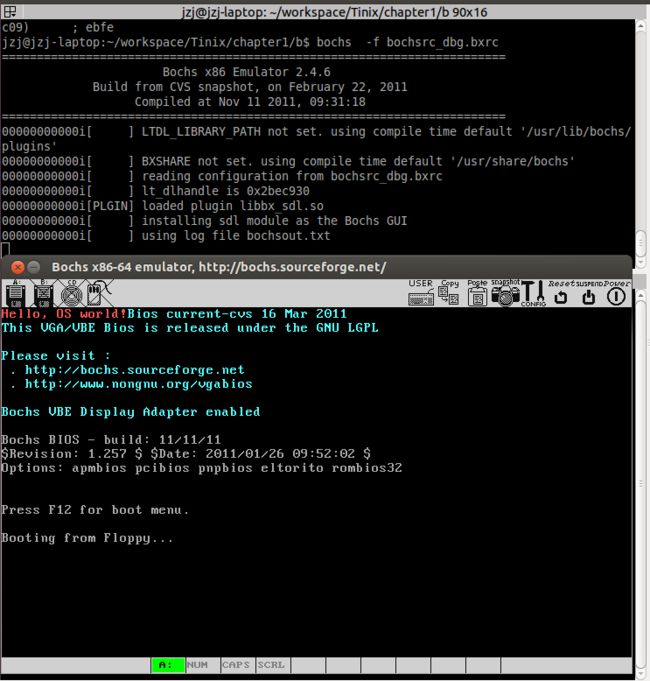
$ bochs -f bochsrc.bxrc
正如前面提到的,Bochs带有调试功能,Windows下有bochsdbg.exe,Ubuntu没有现成的binary,不过可以通过源码编译生成。
# apt-get source bochs
# apt-get install libsdl1.2-dev
# apt-get build-dep bochs
$ cd bochs-2.4.6
$./configure --with-sdl --enable-debugger --enable-disasm --enable-all-optimizations --enable-readline --enable-long-phy-address --enable-debugger-gui --enable-long-phy-address --enable-smp --enable-x86-64 --enable-pci --enable-vmx --enable-logging --enable-fpu --enable-cdrom --enable-iodebug --enable-3dnow
$ make
$ sudo cp bochs /usr/bin/bochsdbg
然后就可以用
$ bochsdbg -f bochsrc.bxrc
进行调试了。
完全安装Bochs2.3.7: http://blog.csdn.net/lating/article/details/5465221
Bochs启动问题解: http://www.cnblogs.com/soli/archive/2009/09/21/1571466.html
Virtual PC 5.2 下 DOS7.1 中 运行.com文件相关问题: http://blog.csdn.net/terryhml/article/details/5469538
Java写的GUI bochs debugger: http://code.google.com/p/peter-bochs/
FreeDOS Networking with VirtualBox 4.x(这个freedos版本是已经配好网络的了,可以用于guest和host的通信。): http://lazybrowndog.net/freedos/virtualbox/
bochsdbg调试保护模式程序的方法: http://blog.csdn.net/aliec/article/details/6982095


