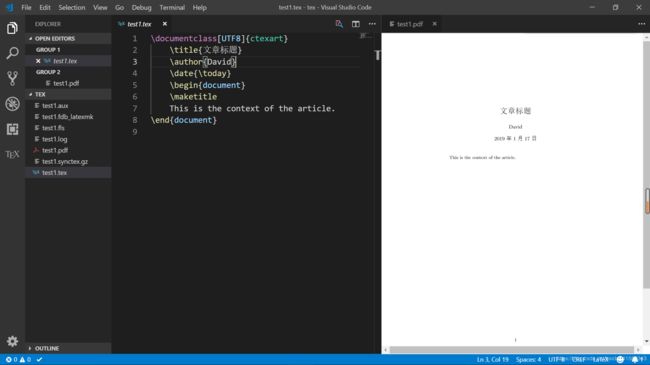
Latex Learning——1 配置Latex + vscode
latex 配置
本文采用TEX Live (软件包,编译器)+ vscode (编辑器)
强调:
为什么不用Ctex,不解释,真是令人头疼,,
所有的配置名称,路径名称都用英文,
TEX Live安装
TEX Live是一个编译器,将Latex代码转换为对应格式的pdf
TEX Live有两种安装方式
- 光盘安装
- 网络在线安装
为了简单,本文采用网络在线安装(就是比较耗时间,博主当时是开了一个晚上,,,)网络在线安装采用和vs studio同样的方式边安装边下载。
首先到官网下载安装包:官网地址
此处我们选择.zip文件
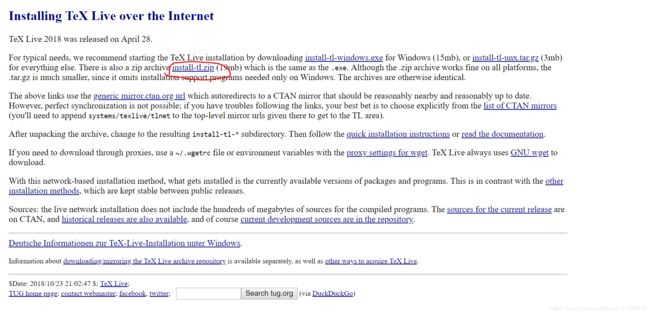
将文件解压之后,双击install-tl-windows.bat即可

然后进行安装即可,会自动选择最近的镜像进行下载。
安装完成之后一定要进行环境变量的配置,否则下面vscode会找不到TEX Live
vscode配置
打开vscode,在扩展中搜索latex workshop安装即可。
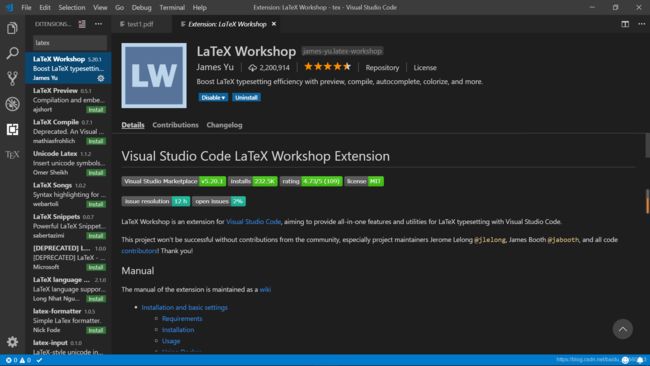
如果TEX Live路径(环境变量)没错错误,建立文件即可直接使用。
在vscode中打开一个文件夹,建立一个test.tex文件
输入以下内容
\documentclass[UTF8]{ctexart}
    \title{文章标题}
    \author{David}
    \date{\today}
    \begin{document}
    \maketitle
    This is the context of the article.
\end{document}
编译:Ctrl+Alt+b
如果成功的话会出现很多文件,其中有一个pdf。
美赛latex包
美赛必备: mcmthesis
补充:
Latex默认是pdflatex进行编译。
而目前使用xelatex居多,并且支持中文。
xelatex编译命令的设置:
首先进入setting
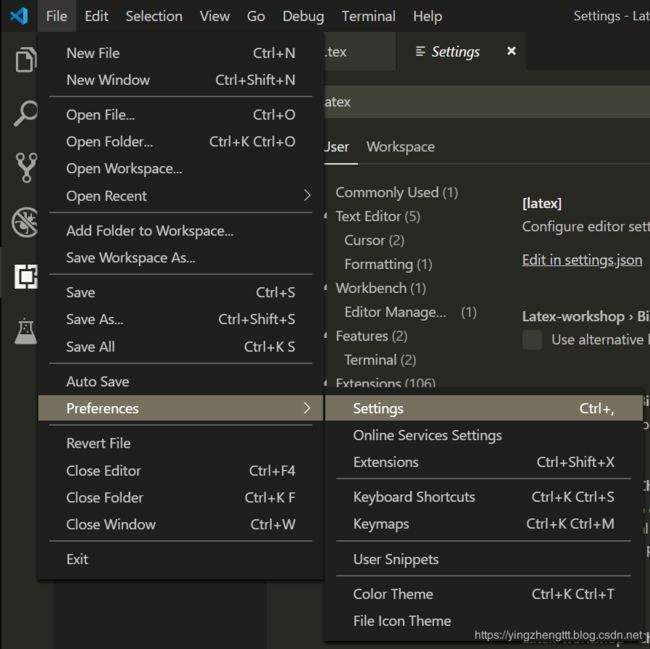
在搜索框中搜索Latex。

进入setting.json
以下是我都setting.json
解释:
“latex-workshop.latex.recipes”: 中是编译命令选择
其中有
- xelatex
- pdflatex
- latexmk
- xelatex -> bibtex -> xelatex*2 (加入参考文献用的)
具体的命令功能实现在 "latex-workshop.latex.tools"中,直接复制即可。(其实就是一些命令行参数)
{
    "editor.fontSize": 16,
    "latex-workshop.view.pdf.viewer": "tab",
    "python.pythonPath": "D:\\Environment_conf\\Anaconda\\python.exe",
    "terminal.integrated.shell.windows": "C:\\Windows\\System32\\cmd.exe",
    "workbench.activityBar.visible": true,
    "editor.renderControlCharacters": true,
    "workbench.colorTheme": "Monokai",
    "workbench.statusBar.visible": true,
    "workbench.sideBar.location": "left",
    "window.menuBarVisibility": "default",
    "C_Cpp.clang_format_fallbackStyle": "Google",
    "editor.minimap.enabled": false,
    "C_Cpp.updateChannel": "Insiders",
    "editor.largeFileOptimizations": false,
    "background.enabled": false,


    "latex-workshop.latex.recipes": [
        {
            "name": "xelatex",
            "tools": [
                "xelatex"
            ]
        },
        {
            "name": "pdflatex",
            "tools":[
                "pdflatex"
            ]
        },
        {
            "name": "latexmk",
            "tools": [
                "latexmk"
            ]
        },
        {
            "name": "xelatex -> bibtex -> xelatex*2",
            "tools": [
                "xelatex",
                "bibtex",
                "xelatex",
                "xelatex"
            ]
        }
      ],
      "latex-workshop.latex.tools": [{
            "name": "latexmk",
            "command": "latexmk",
            "args": [
                "-synctex=1",
                "-interaction=nonstopmode",
                "-file-line-error",
                "-pdf",
                "%DOC%"
                ]
            },
            {
            "name": "xelatex",
            "command": "xelatex",
            "args": [
                "-synctex=1",
                "-interaction=nonstopmode",
                "-file-line-error",
                "-shell-escape",
                "%DOC%"
                ]
            },
            {
            "name": "pdflatex",
            "command": "pdflatex",
            "args": [
                "-synctex=1",
                "-interaction=nonstopmode",
                "-file-line-error",
                "%DOC%"
                ]
            },
            {
            "name": "bibtex",
            "command": "bibtex",
            "args": [
                "%DOCFILE%"
                ]
            }],
      "latex-workshop.latex.clean.fileTypes": [
      "*.aux",
      "*.bbl",
      "*.blg",
      "*.idx",
      "*.ind",
      "*.lof",
      "*.lot",
      "*.out",
      "*.toc",
      "*.acn",
      "*.acr",
      "*.alg",
      "*.glg",
      "*.glo",
      "*.gls",
      "*.ist",
      "*.fls",
      "*.log",
      "*.fdb_latexmk"
    ],
    "editor.suggestSelection": "first",
    "vsintellicode.modify.editor.suggestSelection": "automaticallyOverrodeDefaultValue",
    "files.exclude": {
        "**/.classpath": true,
        "**/.project": true,
        "**/.settings": true,
        "**/.factorypath": true
    },
    "python.jediEnabled": false,
    "window.zoomLevel": 0,


}
之后在latex编译命令中就可以看到相应的选项:
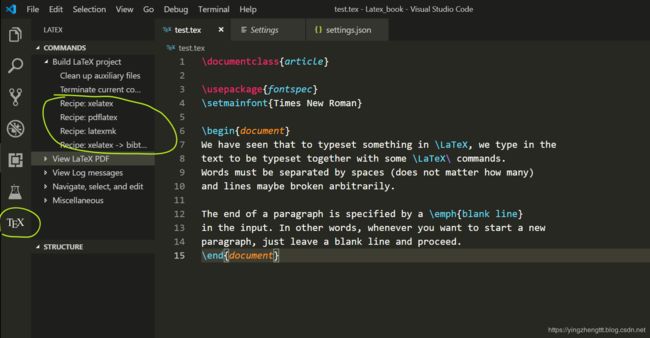
主要使用的就是xelatex,pdflatex和xelatex -> bibtex -> xelatex*2。

