Linux虚拟机安装MySQL数据库
MySQL下载
由于Linux虚拟机是CentOS的,所以选择的是Linux通用版本的MySQL,如下图。
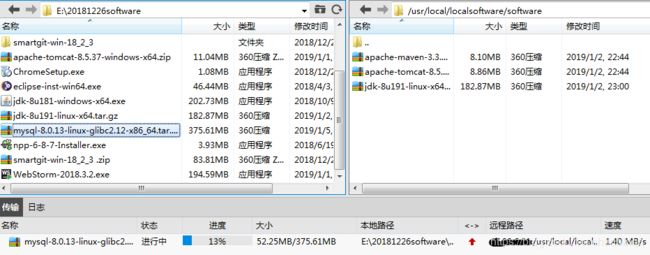
将下载的mysql-8.0.13-linux-glibc2.12-x86_64.tar.xz上传到Linux虚拟机中
MySQL安装
可以根据实际情况,安排mysql的安装位置和数据库文件的位置。本文中mysql的位置如下:
安装位置 /usr/local/localsoftware/mysql/mysql-install-location
数据库文件数据位置 /usr/local/localsoftware/mysql/mysql-data-location
执行如下指令,解包mysql到指定目录
tar -xvf mysql-8.0.13-linux-glibc2.12-x86_64.tar.xz -C /usr/local/localsoftware/mysql/mysql-install-location
MySQL安装后的配置
配置环境变量
将MySQL配置到环境变量中,这样就可以在任何地方用mysql命令了
vi /etc/profile
执行如下指令,使上述配置立即生效
source /etc/profile
创建mysql用户组和mysql用户
groupadd mysql
useradd -r -g mysql mysql
设置MySQL的安装目录、MySQL的数据文件目录的所有者
chown -R mysql:mysql /usr/local/localsoftware/mysql/mysql-install-location/mysql-8.0.13-linux-glibc2.12-x86_64/
chown -R mysql:mysql /usr/local/localsoftware/mysql/mysql-data-location/
chown -R mysql /usr/local/localsoftware/mysql/mysql-install-location/mysql-8.0.13-linux-glibc2.12-x86_64/
chown -R mysql /usr/local/localsoftware/mysql/mysql-data-location/
执行如下指令,更改MySQL安装目录的权限
chmod -R 755 /usr/local/localsoftware/mysql/mysql-install-location/mysql-8.0.13-linux-glibc2.12-x86_64/
执行ls -l XX目录,可以显示当前目录内容的下图中各项信息。
![]()
安装依赖包libaio
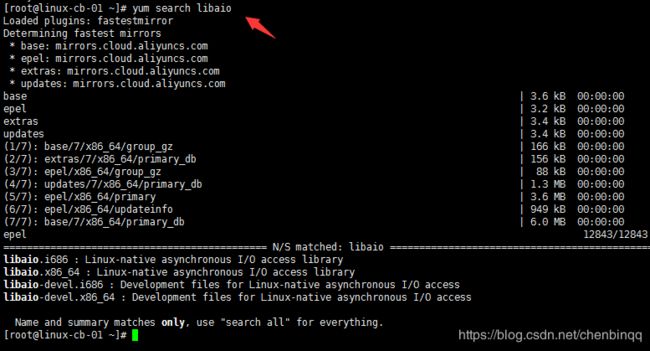
yum search libaio 查找软件包
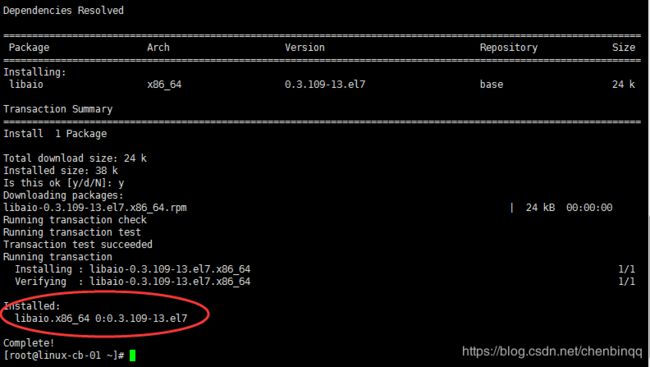
yum install libaio 安装软件包
初始化mysql命令
cd /usr/local/localsoftware/mysql/mysql-install-location/mysql-8.0.13-linux-glibc2.12-x86_64/bin
mysqld --user=mysql --basedir=/usr/local/localsoftware/mysql/mysql-install-location/mysql-8.0.13-linux-glibc2.12-x86_64 --datadir=/usr/local/localsoftware/mysql/mysql-data-location --initialize
root@localhost: 后面跟的是mysql数据库登录的临时密码
修改mysql.server
sh /usr/local/localsoftware/mysql/mysql-install-location/mysql-8.0.13-linux-glibc2.12-x86_64/support-files/mysql.server start
mysql启动失败,原因是不存在/usr/local/mysql
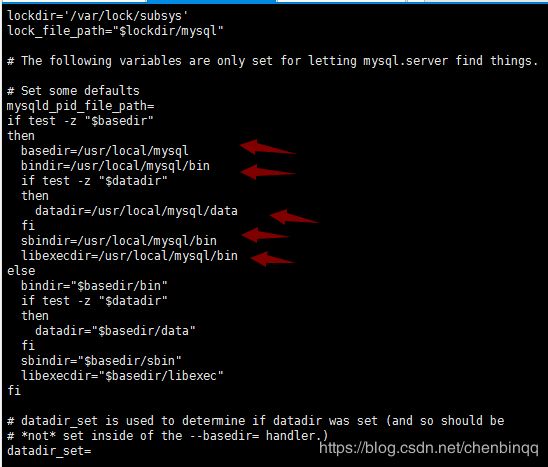
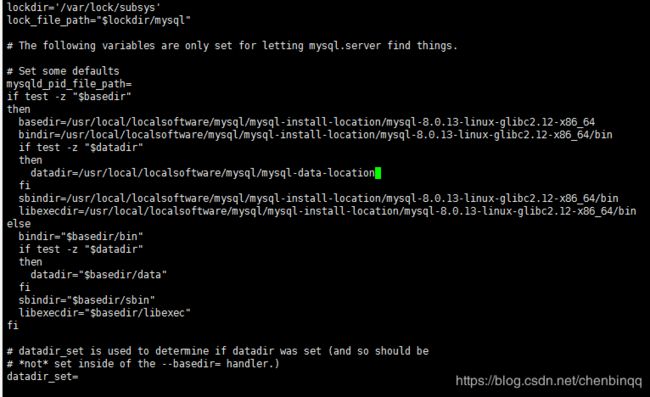
打开mysql.server,查看其具体内容。
下图中箭头所指内容需要修改,因为本文中使用的安装路径和数据文件路径位置,均不存在于/usr/local/mysql。
修改之后
向init.d中添加mysql的启动服务
init.d目录包含许多系统各种服务的启动和停止脚本。
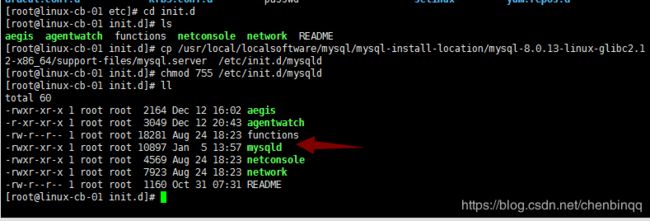
向init.d中添加mysql的启动服务
cp /usr/local/localsoftware/mysql/mysql-install-location/mysql-8.0.13-linux-glibc2.12-x86_64/support-files/mysql.server /etc/init.d/mysqld
chmod 755 /etc/init.d/mysqld
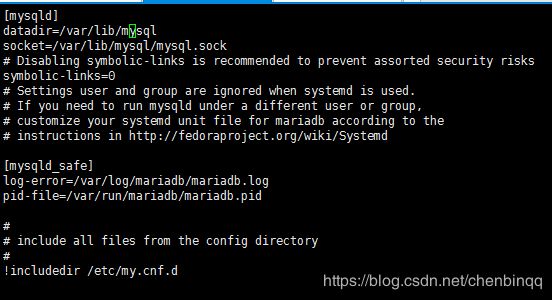
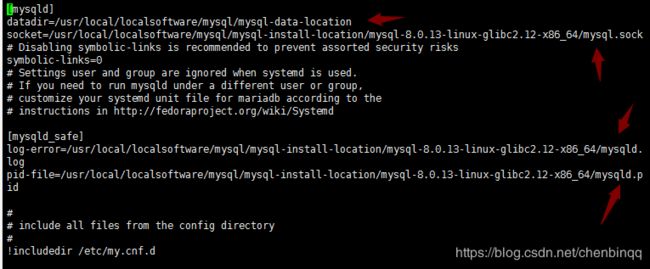
修改/etc/my.cnf
需要根据实际情况,修改其中的路径,修改后如下图所示。
执行下面的指令
cd /usr/local/localsoftware/mysql/mysql-install-location/mysql-8.0.13-linux-glibc2.12-6_64
touch mysqld.log
建立mysqld软连接
新版本的mysql安全启动安装包只认/usr/local/mysql这个路径
执行下面的指令
ln -s /usr/local/localsoftware/mysql/mysql-install-location/mysql-8.0.13-linux-glibc2.12-x86_64/bin/mysqld mysqld
启动mysql服务
sh /usr/local/localsoftware/mysql/mysql-install-location/mysql-8.0.13-linux-glibc2.12-x86_64/support-files/mysql.server start
登录MySQL
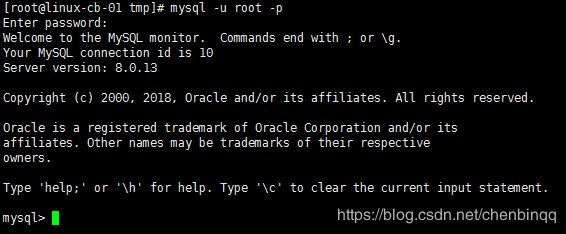
mysql -u root -p
需要将mysql安装目录下的mysql.sock做一个软连接
ln -s /usr/local/localsoftware/mysql/mysql-install-location/mysql-8.0.13-linux-glibc2.12-x86_64/mysql.sock /tmp/mysql.sock
再次尝试登录,输入上面初始化mysql时提供的临时密码,登录成功。
修改MySQL的登录密码
如需修改mysql的密码,可以使用下面指令
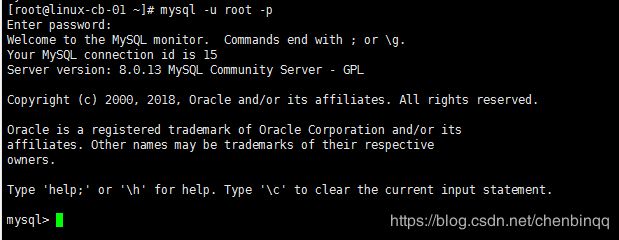
mysqladmin -u root -p password "test123"
使用新密码成功登录,如下图
远程访问赋权
mysql默认是不可以通过远程机器访问的,通过下面的配置可以开启远程访问。
sql>grant all privileges on *.* to 'root'@'%' identified by 'test123' with grant option;
sql>flush privileges;
执行语句,一直报错,最终没有找到解决的方案。因此,转换思路,直接修改默认安装的mysql数据库中的user表,该表包含数据库用户的一些信息。
use mysql;
select host,user,authentication_string,plugin from user;
上图中root用户的访问host只能为localhost,即本机。为了使root用户访问权限设置为可以远程连接,可以通过update将root用户对应的host修改为通配符%
update user set host = "%" where user = "root";
开放3306端口
cd /etc/sysconfig
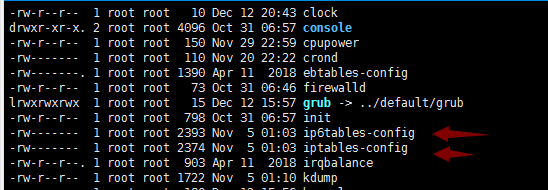
ls -l
没有查看到iptables文件,但存在ip6tables-config和iptables-config,本文中的linux为CentOS 7.2 ,CentOS 7默认没有了iptables文件。
安装iptables-services
yum install iptables-services;
启动iptables
systemctl enable iptables
systemctl start iptables
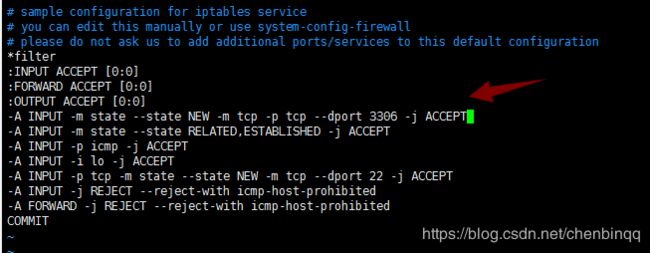
vim /etc/sysconfig/iptables
-A INPUT -m state --state NEW -m tcp -p tcp --dport 3306 -j ACCEPT
重启防火墙
service iptables restart
进入云服务器ECS的安全组
点击“配置规则”按钮
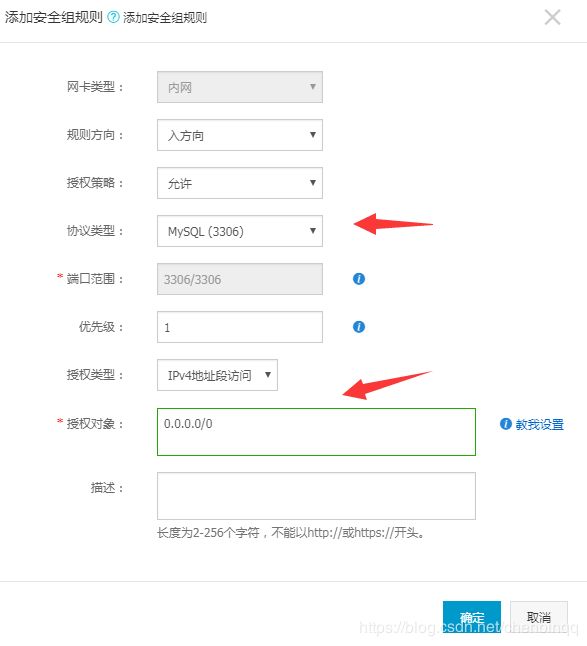
点击右上角的“添加安全组规则”按钮
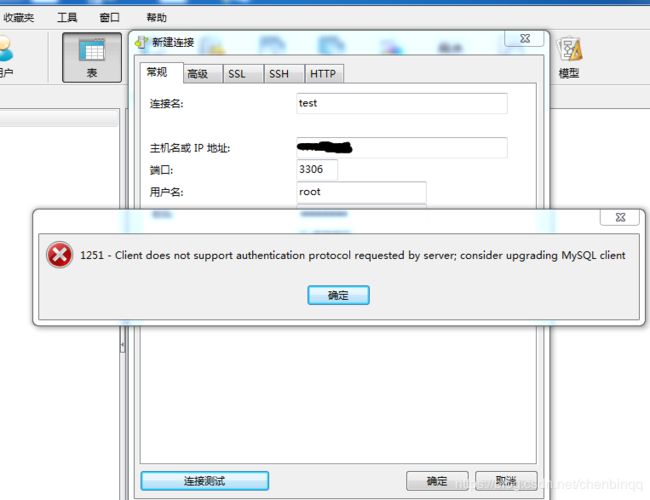
使用Navicat远程连接MySQL
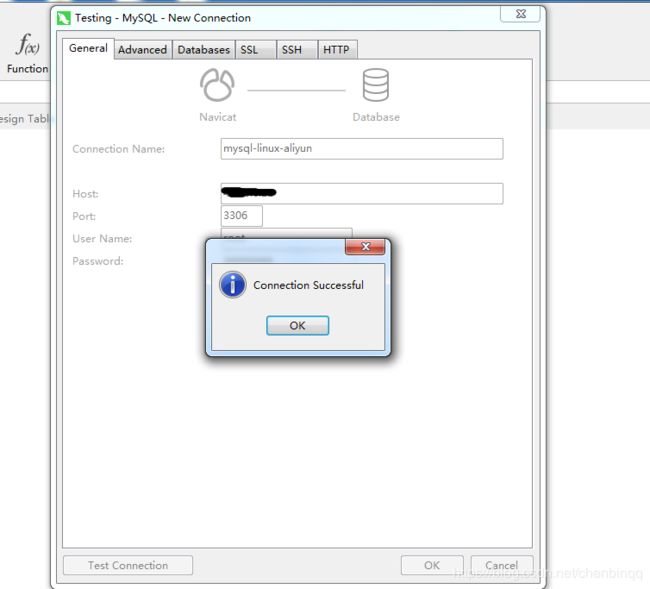
上图中,提示Navicat的版本太低。安装Navicat最新版,再次尝试连接,连接成功。


