安卓逆向入门之使用frida框架简单Hook native层的函数
声明:本文只做技术交流,如有侵权,请告知删除,谢谢。
请读者先完成第一篇中的例子再来学习这一篇,传送门:
https://mp.weixin.qq.com/s/2kykNy-Dyp8c983LPwkZIQ都是比较简单的东西,像我这种初学者先找找逆向的自信吧。
这篇是我的学习笔记,所以文章比较水,大佬还请轻喷。
这篇需要用到 IDA,所以请先安装IDA。
今天的案例主要会用到这里面教程的apk:
https://www.52pojie.cn/thread-313869-1-1.html帖子比较早,但是用来学习还是有帮助的。
我们来破解他的第二个例子和第三个例子,分别修改入参和返回值,理解frida框该怎么对native层的函数进行简单的Hook。如果想了解更高深的知识,可以参考尼古拉斯_赵四的这篇文章:
https://blog.csdn.net/jiangwei0910410003/article/details/80372118好了,言归正传,下载他的例在电脑上,并在手机端进行安装,例子链接:
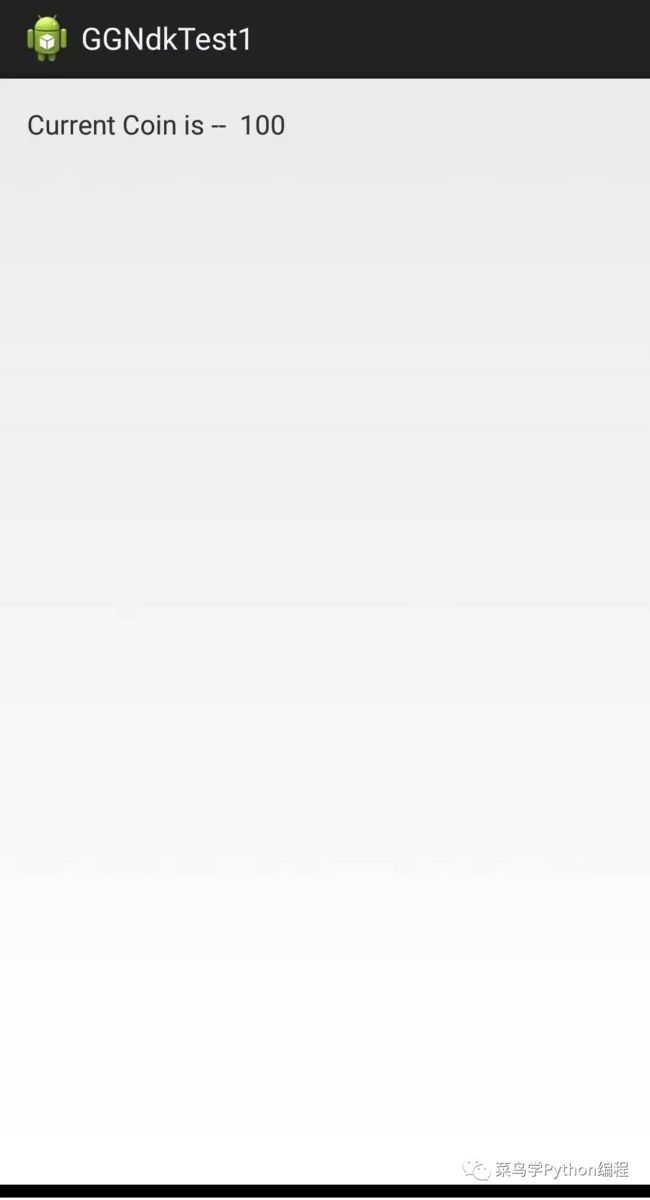
http://pan.baidu.com/s/1i3wzetf打开软件,按照他的要求,将100显示成其他的值:
既然知道是函数在native层定义的直接,将 so文件拖入 IDA进行分析吧。
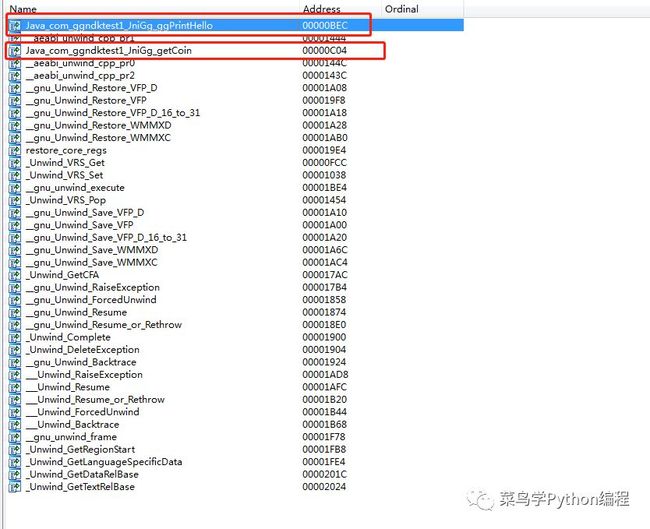
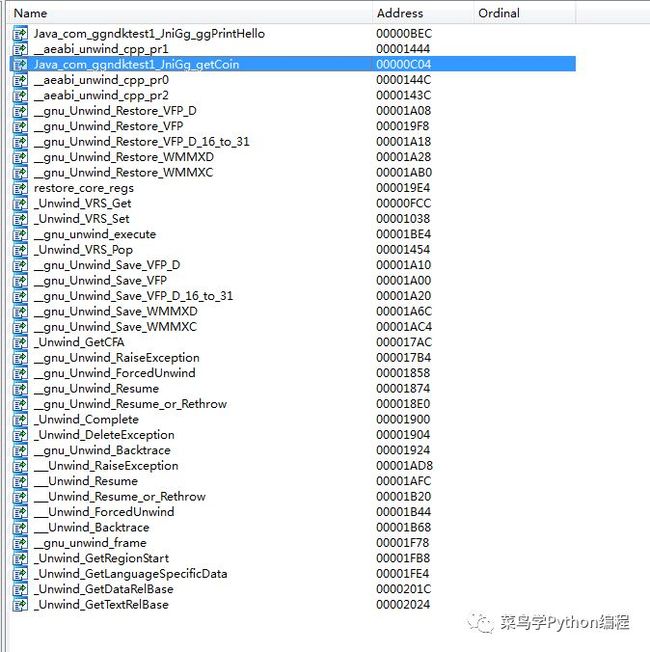
切换到 Exports面板,看看有哪些JNI函数:
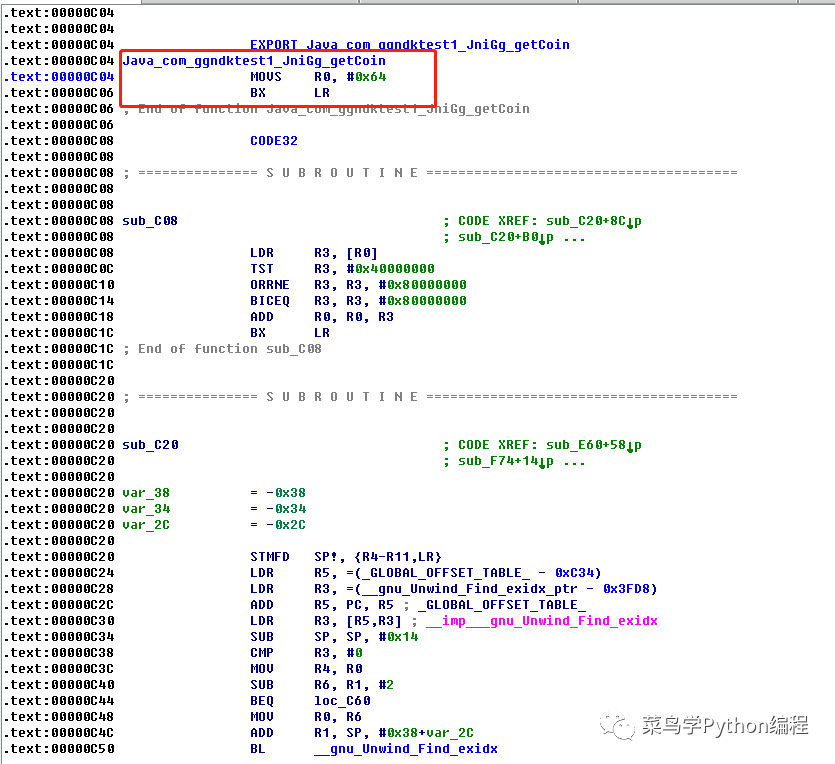
选择 第二个红色方框内的函数,双击跟进去:
如果我没有猜错的话,这里的 #0x64就是它返回的数字 100吧,继续按F5,看看它的伪C代码:
原来就是一个固定的返回值,那就好办了,按照官方的教程,写下frida脚本:
import frida,sys


def on_message(message, data):
    if message['type'] == 'send':
        print("[*] {0}".format(message['payload']))
    else:
        print(message)


jscode = """
    var nativePointer = Module.findExportByName("libgg-jni.so","Java_com_ggndktest1_JniGg_getCoin");
    send("native pointers:" + nativePointer);
    Interceptor.attach(nativePointer,{
        onEnter:function(args){
            send(args);
          },
        onLeave:function(retval){
            send(retval.toInt32());
            retval.replace(1000000);
            send(retval.toInt32());
          }

    });
"""
process = frida.get_usb_device().attach('com.ggndktest1')
script = process.create_script(jscode)
script.on('message', on_message)
print('[*] Running CTF')
script.load()
sys.stdin.read()
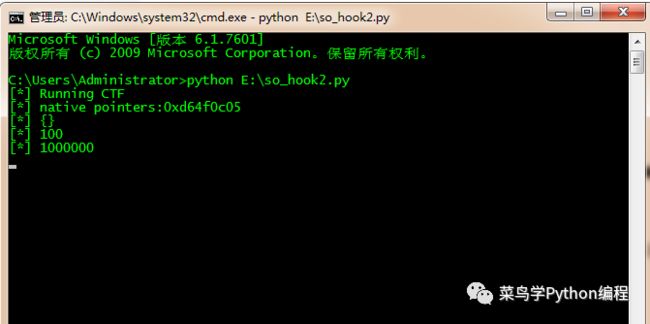
这段代码的作用将 100 改为了 1000000,先看看效果,再做说明。
手机连接电脑,开启frida服务,然后运行脚本,先点击手机上的返回键,然后再打开软件,结果如下:
可以看到,已经修改成功了,再看看电脑端:
下面对代码进行一些说明:
怎么查看包名及修改,上篇已经说过了。以后不再赘述,主要关注jscode代码段就好:
var nativePointer = Module.findExportByName("libgg-jni.so","Java_com_ggndktest1_JniGg_getCoin");看看官方教程对 Module.findExportByName的解释:
Module.findExportByName(moduleName|null, exportName),Module.getExportByName(moduleName|null, exportName):
returns the absolute address of the export named exportName in moduleName. If the module isn’t known you may pass null instead of its name, but this can be a costly search and should be avoided. In the event that no such module or export could be found, the find-prefixed function returns null whilst the get-prefixed function throws an exception.
这样就比较好理解,第一个参数是so的文件名,第二个参数导出的函数名,可以在IDA中直接复制:
再来看看怎么修改返回值:
Interceptor.attach(target, callbacks): intercept calls to function attarget. This is a NativePointer specifying the address of the function you would like to intercept calls to. Note that on 32-bit ARM this address must have its least significant bit set to 0 for ARM functions, and 1 for Thumb functions. Frida takes care of this detail for you if you get the address from a Frida API (for example Module.getExportByName()).
The callbacks argument is an object containing one or more of:
onEnter: function (args): callback function given one argumentargsthat can be used to read or write arguments as an array ofNativePointerobjects.onLeave: function (retval): callback function given one argumentretvalthat is aNativePointer-derived object containing the raw return value. You may callretval.replace(1337)to replace the return value with the integer1337, orretval.replace(ptr("0x1234"))to replace with a pointer. Note that this object is recycled across onLeave calls, so do not store and use it outside your callback. Make a deep copy if you need to store the contained value, e.g.:ptr(retval.toString()).
onEnter 这里函数传入的是一个数组,保存这传递进来的参数,可读可写。可以理解为 在Hook的那个函数调用之前执行的代码。
onLeave 这里是一个返回值,并可以将其进行修改,修改的方式又两种:
retval.replace(1337) integer
retval.replace(ptr("0x1234")) pointer
有了官方的说明,我这里直接将100改为100000:
retval.replace(1000000);所以能修改成功。这是修改返回值,那怎么修改传入的参数呢?
不急,我们来看他的第三个案例,下载地址:
http://pan.baidu.com/s/1jG22HMY他的要求:将当前用户类型修改为Gold Vip 用户。
即将 Normal User 改为 Gold Vip。
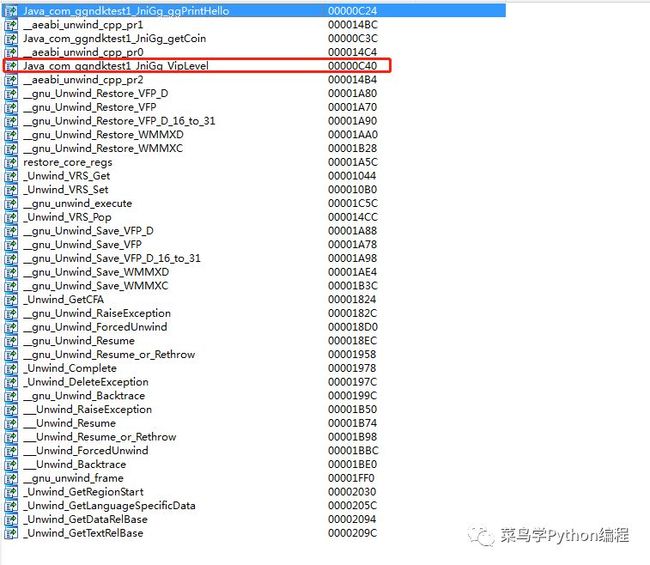
那我们依然对so文件拖入到 IDA中,按照教程,我们需要了解这个函数的逻辑:
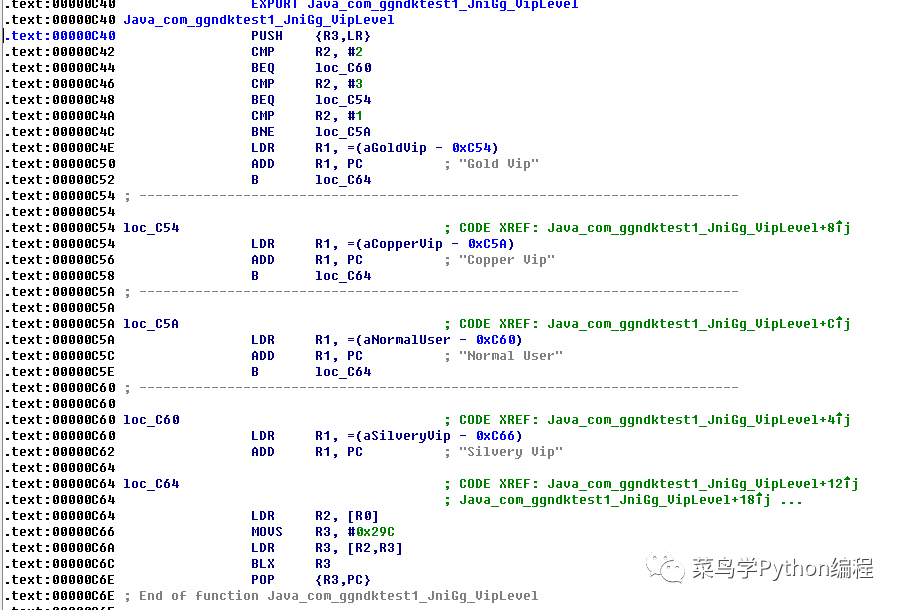
双击跟进去看看:
看汇编代码也能看懂,比较简单,不过是几个比较的指令,分别对 2,3,1进行比较,然后跳转不同的地方。我们还是看看它的伪C代码吧:
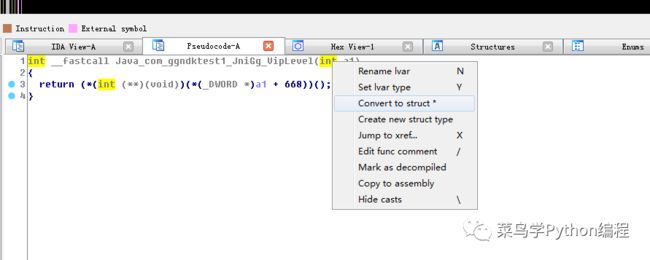
这什么鬼????请教了 Lilac 大佬后,告诉我需要导入 jni.h头文件,按CTRL + F9进行头文件导入:
然后在函数的第一个参数位置单击右键,选择 Convert to struct*:
然后再选择_JNIEnv,
代码变成了这样:
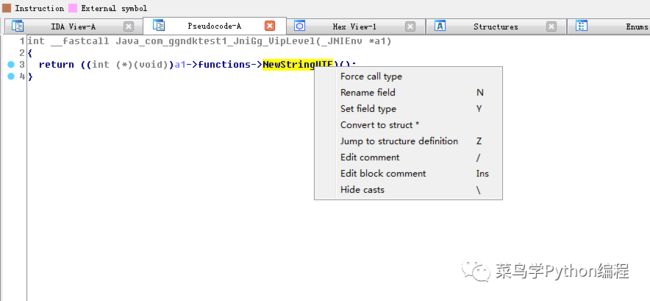
然后我们在NewStringUTF右键,选择Force call type:
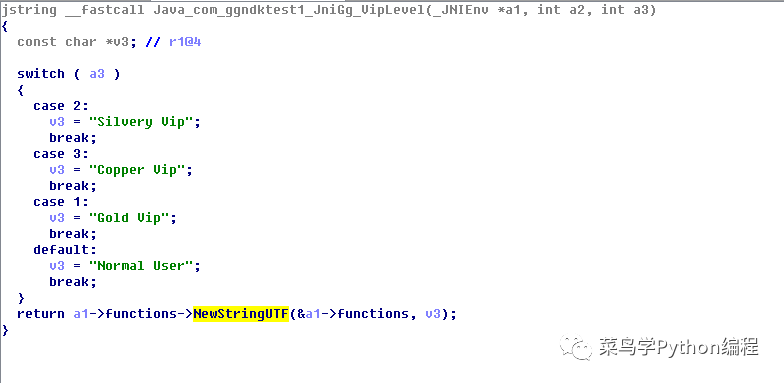
然后点击确定,就看到了伪C代码:
这里,它传递了3个参数,我们看逻辑,得知修改第三个参数就可以改变其逻辑,写下如下frida脚本,并运行:
import frida,sys


def on_message(message, data):
    if message['type'] == 'send':
        print("[*] {0}".format(message['payload']))
    else:
        print(message)


jscode = """
    var nativePointer = Module.findExportByName("libgg-jni.so","Java_com_ggndktest1_JniGg_VipLevel");
    send("native pointers:" + nativePointer);
    Interceptor.attach(nativePointer,{
        onEnter:function(args){
            send(args[2]);
            args[2]=ptr(1);
          },

        onLeave:function(retval){
            send(retval)
          }

    });
"""
process = frida.get_usb_device().attach('com.ggndktest1')
script = process.create_script(jscode)
script.on('message', on_message)
print('[*] Running CTF')
script.load()
sys.stdin.read()
代码和案例2的代码差不多,这里就不过多讲解了。看看效果:
可以看到,已经变成了 Gold Vip,说明修改已经成功了。
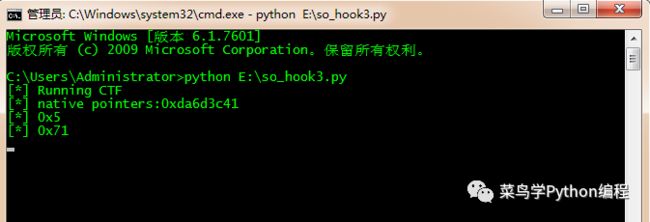
电脑端显示:
这里的 0x5就是它原来传递的参数,被我改为了 1,也就将逻辑改变了。
比较简单,这只是一篇学习笔记,大佬们请轻喷。
再次感谢 Lilac 大佬提供的IDA相关的知识,省去了很多时间,果然有个大佬带要少走很多弯路呀。
