springboot入门
最近在学习springboot,因此记录下学习过程中一些小例子,防止以后忘记可以,可以随时复习一下。由于工作中使用的开发工具是eclipse,因此使用eclipse开发。
1.创建pom文件
	4.0.0
	com.huan.springboot
	springboot_01_start
	0.0.1-SNAPSHOT
	jar
	springboot_01_start
	Spring Boote入门示例

		org.springframework.boot
		spring-boot-starter-parent
		1.4.3.RELEASE


		UTF-8
		UTF-8
		1.8


			org.springframework.boot
			spring-boot-starter-web


			org.springframework.boot
			spring-boot-starter-test
			test


				org.springframework.boot
				spring-boot-maven-plugin
2.创建一个实体类
public class User {

	private String username;
	private String password;
	private int age;
	private Date birth;

	public String getUsername() {
		return username;
	}

	public void setUsername(String username) {
		this.username = username;
	}

	public String getPassword() {
		return password;
	}

	public void setPassword(String password) {
		this.password = password;
	}

	public int getAge() {
		return age;
	}

	public void setAge(int age) {
		this.age = age;
	}

	public Date getBirth() {
		return birth;
	}

	public void setBirth(Date birth) {
		this.birth = birth;
	}

}
3.创建一个控制层
@RestController
@RequestMapping("user")
public class UserController {
	@RequestMapping(value = "get/{id}", method = RequestMethod.GET)
	public User getUser(@PathVariable("id") int age) {
		User user = new User();
		user.setAge(age);
		user.setUsername("测试");
		user.setBirth(new Date());
		user.setPassword("123456");
		return user;
	}

	@RequestMapping(value = "/del/{id}", method = RequestMethod.DELETE)
	public String delete(@PathVariable("id") int age) {
		return "delete" + age;
	}

	@RequestMapping(value = "/add", method = RequestMethod.POST)
	public User add(User user) {
		return user;
	}
}
4.启动springboot应用程序
@SpringBootApplication
@ComponentScan("com.springboot")
public class Application {

	public static void main(String[] args) {
		SpringApplication.run(Application.class, args);
	}
}
public class Application {

	public static void main(String[] args) {
		SpringApplication.run(Application.class, args);
	}
}
5.启动应用程序
/**
 * springboot 程序的启动入口
 *
 * @描述
 * @作者 huan
 */
@SpringBootApplication
@ComponentScan(basePackages = { "com.huan.springboot" })
public class Application {

	public static void main(String[] args) {
		SpringApplication.run(Application.class, args);
	}
}
6.测试: 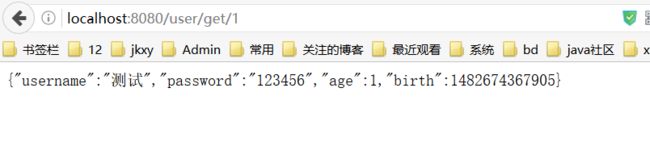
注意:
1、@SpringBootApplication是一个组合注解,默认会扫描它所在的包以及子包,而我的controller不在它默认的子包下,因此需要加载@ComponentScan注解配置
2、@RestController也是一个组合注解,在此注解修饰的类下,它下方所有的方法都是以json的格式返回。
3、默认情况下不需要自己进行配置,springboot会帮我们进行自动配置,若有不符合的地方也是可以进行修改的。
4、程序启动的默认端口是8080,上下文路径是 /
5、开发工具可以使用
idea : 默认支持springboot插件
sts : spring 的一个集成eclipse的开发工具,也是可以开发springboot程序
eclipse : 需要安装一个插件(springsource-tool-suite-3.8.2.RELEASE-e4.5.2-updatesite.zip),且eclipse的版本需要>=4.5.2
进入springboot的官网,使用 https://start.spring.io/ 创建项目。