linux静默安装weblogic 12c
一、下载
官网下载:https://www.oracle.com/technetwork/middleware/weblogic/downloads/index.html
下载得到的文件fmw_12.2.1.3.0_wls_quick.jar
二、安装
不能以root用户安装,添加weblogic用户,并设置密码
useradd weblogic
passwd weblogic
su - weblogic
把fmw_12.2.1.3.0_wls_quick.jar通过ftp,或者scp等方式拷贝到/home/weblogic目录下
weblogic 12c建议安装jdk8,低版本不支持
[root@localhost ~]# java -version
java version "1.8.0_201"
Java(TM) SE Runtime Environment (build 1.8.0_201-b09)
Java HotSpot(TM) 64-Bit Server VM (build 25.201-b09, mixed mode)
创建响应文件wls.rsp及loc文件oraInst.loc
/home/weblogic/wls.rsp文件内容如下:
[ENGINE]
#DO NOT CHANGE THIS.
Response File Version=1.0.0.0.0
[GENERIC]
##The oracle home location. This can be an existing Oracle Home #or a new Oracle Home
#除了这里需要为需要安装的目录以外,别的地方不需要做修改
ORACLE_HOME=/home/weblogic/Oracle/Middleware
##Set this variable value to the Installation Type selected. e.g. WebLogic Server, Coherence, Complete with Examples.
#
INSTALL_TYPE=WebLogic Server
#
##Provide the My Oracle Support Username. If you wish to ignore Oracle Configuration Manager configuration provide empty string for user name.
#
MYORACLESUPPORT_USERNAME=
#
##Provide the My Oracle Support Password
#
#MYORACLESUPPORT_PASSWORD=
MYORACLESUPPORT_PASSWORD=
#
##Set this to true if you wish to decline the security updates. Setting this to true and providing empty string for My Oracle Support username will ignore the Oracle Configuration Manager configuration
#
DECLINE_SECURITY_UPDATES=true
#
##Set this to true if My Oracle Support Password is specified
#
SECURITY_UPDATES_VIA_MYORACLESUPPORT=false
#
##Provide the Proxy Host
#
PROXY_HOST=
#
##Provide the Proxy Port
#
PROXY_PORT=
#
##Provide the Proxy Username
#
PROXY_USER=
#
##Provide the Proxy Password
#
PROXY_PWD=
#
##Type String (URL format) Indicates the OCM Repeater URL which should be of the format [scheme[Http/Https]]://[repeater host]:[repeater port]
#
COLLECTOR_SUPPORTHUB_URL=
/home/weblogic/oraInst.loc文件内容如下:
inventory_loc=/home/weblogic/oraInventory
inst_group=weblogic
执行如下命令进行安装
[weblogic@localhost ~]$ pwd
/home/weblogic
[weblogic@localhost ~]$ ls
fmw_12.2.1.3.0_wls_quick.jar  oraInst.loc  wls.rsp
[weblogic@localhost ~]$ java -jar fmw_12.2.1.3.0_wls_quick.jar -silent -responseFile /home/weblogic/wls.rsp -invPtrLoc /home/weblogic/oraInst.loc -ignoreSysPrereqs
-silent 表明使用静默安装的方式
-responseFile 指定响应文件的路径
-invPtrLoc 指定安装清单文件路径
-ignoreSysPrereqs 忽略一些输出(可以不加此选项)
安装的时候会进行校验,如jdk版本检查,cpu速度,交换空间大小,临时空间大小等,复制会显示百分比进度条,时间较长,耐心等待。
贴下安装日志:
[weblogic@localhost ~]$ java -jar fmw_12.2.1.3.0_wls_quick.jar -silent -responseFile /home/weblogic/wls.rsp -invPtrLoc /home/weblogic/oraInst.loc -ignoreSysPrereqs
启动程序日志文件为/tmp/OraInstall2019-04-16_02-11-04PM/launcher2019-04-16_02-11-04PM.log。
正在提取安装程序... . . . . . . . . . . . . . . . . . . . . . . . . . . . . . . . . . . . . . . . . . . 完成
检查 CPU 速度是否大于 300 MHz。   实际为 3192.660 MHz    通过
检查交换空间: 必须大于 512 MB。   实际为 2047 MB    通过
检查此平台是否需要 64 位 JVM。   实际为64    通过 (不需要 64 位)
检查临时空间: 必须大于 300 MB。   实际为 22948 MB    通过
准备从/tmp/OraInstall2019-04-16_02-11-04PM启动 Oracle Universal Installer
日志:/tmp/OraInstall2019-04-16_02-11-04PM/install2019-04-16_02-11-04PM.log

*****************************************************


分发名称: Oracle Fusion Middleware 12c WebLogic 和 Coherence Developer
分发版本: 12.2.1.3.0

Oracle 清单: /home/weblogic/oraInventory

Oracle 主目录: /home/weblogic/wls12213
Java 主目录: /usr/java/jdk1.8.0_201-amd64

注: 未提供 Oracle 主目录 (默认为 /wls12213)

*****************************************************

版权所有 (c) 1996, 2017, Oracle 和/或其附属公司。保留所有权利。
正在读取响应文件...
跳过软件更新
已启用此会话的验证。
正在验证数据
复制文件
完成百分比: 10
完成百分比: 20
完成百分比: 30
完成百分比: 40
完成百分比: 50
完成百分比: 60
完成百分比: 70
完成百分比: 80
完成百分比: 90
完成百分比: 100

Oracle Fusion Middleware 12c WebLogic 和 Coherence Developer 12.2.1.3.0 的 安装 已成功完成。
日志已成功复制到/home/weblogic/wls12213/cfgtoollogs/oui。
三、创建域domain
手工创建如下目录
[weblogic@localhost ~]$ mkdir -p /home/weblogic/Oracle/Middleware/user_projects/domains/base_domain/
建立create_domain.rsp响应文件
create_domain.rsp文件内容:
read template from "/home/weblogic/wls12213/wlserver/common/templates/wls/wls.jar";

set JavaHome "/usr/java/jdk1.8.0_201-amd64";

set ServerStartMode "dev";

find Server "AdminServer" as AdminServer;

set AdminServer.ListenAddress "";

set AdminServer.ListenPort "7001";

set AdminServer.SSL.Enabled "true";

set AdminServer.SSL.ListenPort "8002";

//We can directly create a new managed server.

create Server "base" as BASE;

set BASE.ListenAddress "";

set BASE.ListenPort "8003";

//set BASE.SSL.Enabled "true";

//set BASE.SSL.ListenPort "8004″;

//Create Machine

create Machine "base" as Machinename;

//use templates default weblogic user

find User "weblogic" as u1;

set u1.password "weblogic123";

//create a new user

create User "weblogic2" as u2;

set u2.password "weblogic123";

write domain to "/home/weblogic/Oracle/Middleware/user_projects/domains/base_domain/";

//The domain name will be "demo-domain"

close template;
[root@localhost bin]# pwd
/home/weblogic/wls12213/wlserver/common/bin
[root@localhost bin]# ls
config.sh  pack.sh  unpack.sh  wlscontrol.sh  wlsifconfig.sh  wlst.sh
[root@localhost bin]# ./config.sh -mode=silent -silent_script=/home/weblogic/create_domain.rsp -logfile=/home/weblogic/create_domain.log
WARNING: This is a deprecated script. Please invoke the config.sh script under oracle_common/common/bin.
<< read template from "/home/weblogic/wls12213/wlserver/common/templates/wls/wls.jar"
>>  succeed: read template from "/home/weblogic/wls12213/wlserver/common/templates/wls/wls.jar"
<< set config option JavaHome to "/usr/lib/jvm/java-1.8.0-openjdk-1.8.0.201.b09-2.el7_6.x86_64"
>>  succeed: set config option JavaHome to "/usr/lib/jvm/java-1.8.0-openjdk-1.8.0.201.b09-2.el7_6.x86_64"
<< set config option ServerStartMode to "dev"
>>  succeed: set config option ServerStartMode to "dev"
<< find Server "AdminServer" as AdminServer
>>  succeed: find Server "AdminServer" as AdminServer
<< set AdminServer attribute ListenAddress to ""
>>  succeed: set AdminServer attribute ListenAddress to ""
<< set AdminServer attribute ListenPort to "7001"
>>  succeed: set AdminServer attribute ListenPort to "7001"
<< set AdminServer attribute SSL!Enabled to "true"
>>  succeed: set AdminServer attribute SSL!Enabled to "true"
<< set AdminServer attribute SSL!ListenPort to "8002"
>>  succeed: set AdminServer attribute SSL!ListenPort to "8002"
<< create Server "base" as BASE
>>  succeed: create Server "base" as BASE
<< set BASE attribute ListenAddress to ""
>>  succeed: set BASE attribute ListenAddress to ""
<< set BASE attribute ListenPort to "8003"
>>  succeed: set BASE attribute ListenPort to "8003"
<< create Machine "base" as Machinename
>>  succeed: create Machine "base" as Machinename
<< find User "weblogic" as u1
>>  succeed: find User "weblogic" as u1
<< set u1 attribute Password to "********"
>>  succeed: set u1 attribute Password to "********"
<< create User "weblogic2" as u2
>>  succeed: create User "weblogic2" as u2
<< set u2 attribute Password to "********"
>>  succeed: set u2 attribute Password to "********"
<< write Domain to "/home/weblogic/Oracle/Middleware/user_projects/domains/base_domain/"
..................................................
>>  succeed: write Domain to "/home/weblogic/Oracle/Middleware/user_projects/domains/base_domain/"
<< close template
>>  succeed: close template
启动weblogic
创建好域之后,生成了启动weblogic的脚本
[root@localhost base_domain]# pwd
/home/weblogic/Oracle/Middleware/user_projects/domains/base_domain
[root@localhost base_domain]# ls
autodeploy  config       fileRealm.properties  lib          security  startManagedWebLogic_readme.txt
bin         console-ext  init-info             nodemanager  servers   startWebLogic.sh
nohup ./startWebLogic.sh &
默认日志是在当前启动的目录生成nohup.out
若想自己指定日志名字,可以如下:
nohup ./startWebLogic.sh >> 你定义的文件名字 &
或者覆盖的形式:
nohup ./startWebLogic.sh >日志文件名 &
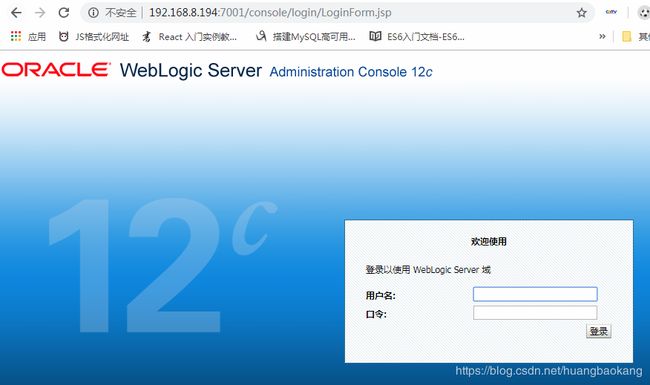
浏览器访问控制台http://ip:port/console

等待一会出现登录页

输入建立domain响应文件的账号密码进行登录
weblogic weblogic123

日志文件存储位置
[root@localhost logs]# pwd
/home/weblogic/Oracle/Middleware/user_projects/domains/base_domain/servers/AdminServer/logs
[root@localhost logs]# ls
access.log  AdminServer.log  base_domain.log  diagnostic_images
附带一个windows平台安装weblogic的链接 https://blog.csdn.net/acmman/article/details/70093877