window下使用nexus搭建maven私服,更新maven索引
Nexus是常用的私用Maven服务器,一般是公司内部使用.
(1)准备工作
下载nexus3地址:
https://www.sonatype.com/oss-thank-you-win64.zip
下载nexue2.x地址:
https://www.sonatype.com/download-oss-sonatype 
选择要下载的版本:
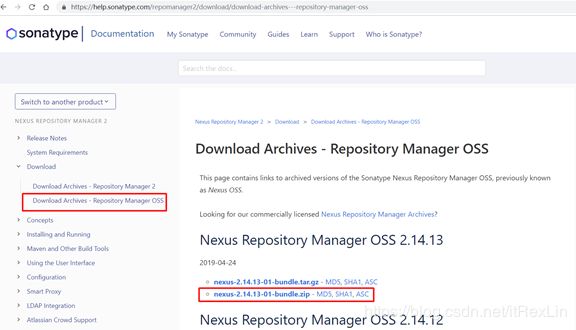
这里我选择的版本是nexus-2.14.13-01
下载好的文件: nexus-2.14.13-01-bundle.zip
(2) 解压
可以解压到任意非中文目录中

解压后:

(3)安装服务和启动服务
根据自己解压的目录选择进入: F:\OpenSources\Nexus\nexus-2.14.13-01\bin\jsw\windows-x86-64
点击install-nexus.bat安装服务(以管理员身份运行).
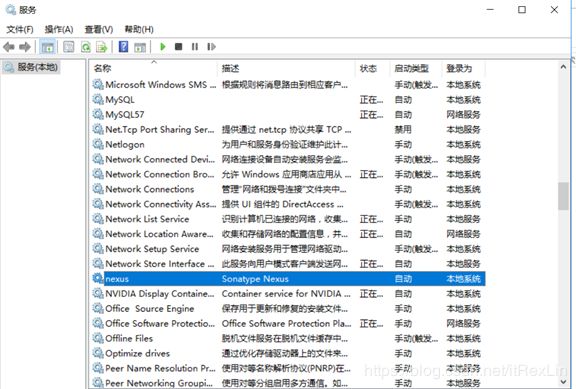
按win+R进入命令行,输入services.msc可以查看到nexus服务已安装.
以管理员身份运行F:\OpenSources\Nexus\nexus-2.14.13-01\bin\jsw\windows-x86-64目录下的start-nexus.bat启动服务.
(4)管理页面登陆和操作
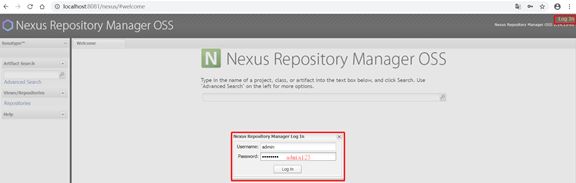
启动成功后,在浏览器输入: http://localhost:8081/nexus可以访问

登陆
(端口可以更改为其他的)
停了服务start-nexus.bat,打开F:\OpenSources\Nexus\nexus-2.14.13-01\conf目录nexus.properties

(五)常用功能
Nexus常用功能就是:指定私服的中央地址、将自己的Maven项目指定到私服地址、从私服下载中央库的项目索引、从私服仓库下载依赖组件、将第三方项目jar上传到私服供其他项目组使用。
开启Nexus服务后访问url地址http://localhost:8081/nexus/(推荐使用自己的ip地址),之后登录系统,用户名密码分别是:admin/admin123.
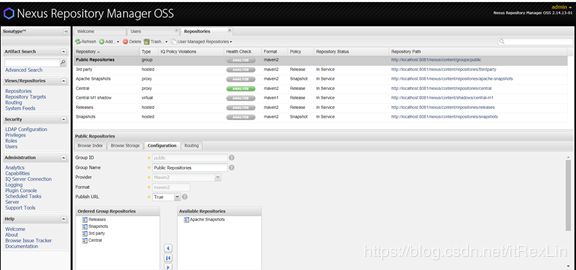
最频繁的就是点击左侧菜单栏的 Repositories 按钮

Maven项目索引更新
方法1:自动更新,这种方式很慢很慢,还不一定能成功.
下载Maven项目索引,项目索引是为了使用者能够在私服站点查找依赖使用的功能.

保存后后台会运行一个任务,点击菜单栏的Scheduled Tasks选项即可看到有个任务在RUNNING.

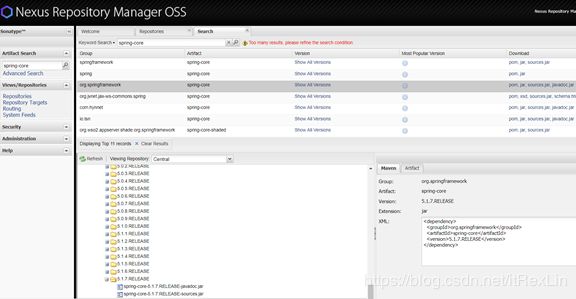
如果下载完成后,Maven索引就可以使用了,在搜索栏输入要搜索的项,就可以查到相关的信息. 例如spring-core

方法二: 手动更新,优点相对较快.
准备三个文件:
nexus-maven-repository-index.gz
nexus-maven-repository-index-packer.properties
indexer-cli-5.1.1.jar
下载地址:
http://repo1.maven.org/maven2/.index/
去到上面的网址下载(下载页面最后的包,比较全)
nexus-maven-repository-index.gz nexus-maven-repository-index-packer.properties
http://maven.outofmemory.cn/org.apache.maven.indexer/indexer-cli/5.1.1/
去到上面的网址下载索引器的包indexer-cli-5.1.1.jar
把下载包放到(同一目录),
然后到电脑–控制台(cmd)进入到你下载包的目录下运行一条命令:
java -jar indexer-cli-5.1.1.jar -u nexus-maven-repository-index.gz -d indexer
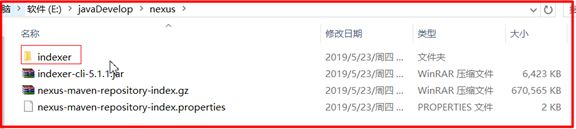
等待运行完后,在你运行那条命令的目录里面会出现:一个文件夹:indexer.
先把(这是我的目录)F:\OpenSources\Nexus\sonatype-work\nexus\indexer\central-ctx目录下的全部文件删除,
再把indexer目录下的全部文件拷贝到F:\OpenSources\Nexus\sonatype-work\nexus\indexer\central-ctx(这是我的目录)

然后重启nexus,到http://localhost:8081/nexus页面上就可以看到
我们要想使用这个私服仓库,先在项目pom中配置相关私服信息指定仓库, 这样只有本项目才在私服下载组件
        nexus
        nexus
        http://localhost:8081/nexus/content/groups/public/

            true


            true
备注:
这样这个Maven项目构建的时候会从私服下载相关依赖. 当然这个配置仅仅是在此项目中生效, 对于其他项目还是不起作用. 如果相对Maven的其他项目也生效的话. 需要修改全局的settings.xml文件
		nexusTest


			local-nexus
			http://localhost:8081/nexus/content/groups/public/

			  true


			  true


	nexusTest
在setting.xml配置镜像,maven连接私服
          nexus-releases
          *
          http://localhost:8081/nexus/content/groups/public/


          nexus-snapshots
          *
          http://localhost:8081/nexus/content/repositories/apache-snapshots/
把项目发布到私服的步骤
一.在pom.xml中配置私服路径
        release
        http://localhost:8081/nexus/content/repositories/releases/


        snapshots
        http://localhost:8081/nexus/content/repositories/snapshots/
二.在settings.xml中配置连接私服仓库的用户名和密码
	      releases
	      admin
	      admin123


		      snapshots
		      admin
		      admin123
三.右键项目run as 输入deploy.